KEY:
L = Left panels
F = Front panels
C = Center (Top & Shelf)
B = Back panels
R = Right panels
cage assembly instructions
Flight Cage
Model: # F040
cage: 31"L × 20½"W × 53"H
interior: 30¼"L × 20¼"W × 40"H
wire gauge: 12 & 16
wire spacing: ½"
getting started!
READ THESE NOTES FIRST:
• Enlist A Friend:
Cage requires two people to assemble,
as panels need to be held in place while others are installed.
• Count Hardware:
If any screws are missing, please
contact Prevue Customer Service.
• Review All Parts:
If wires are bent during shipping,
they may be straightened with needle nose pliers. For seriously
damaged pieces, please contact Prevue Customer Service.
•
Tools:
You will need needle nose pliers to remove slugs and
straighten wires. An allen wrench is included. You may use your
own hand tool with an allen wrench bit.
We
DO NOT
recommend
power drills.
Parts can be over-tightened and damaged /
stripped. Prevue is not responsible for this type of damage.
Review these instructions thoroughly before attempting to
assemble cage. If you still require assistance, please contact
Prevue Customer Service at 800.243.3624 or
customerservice
@
prevuepet.com
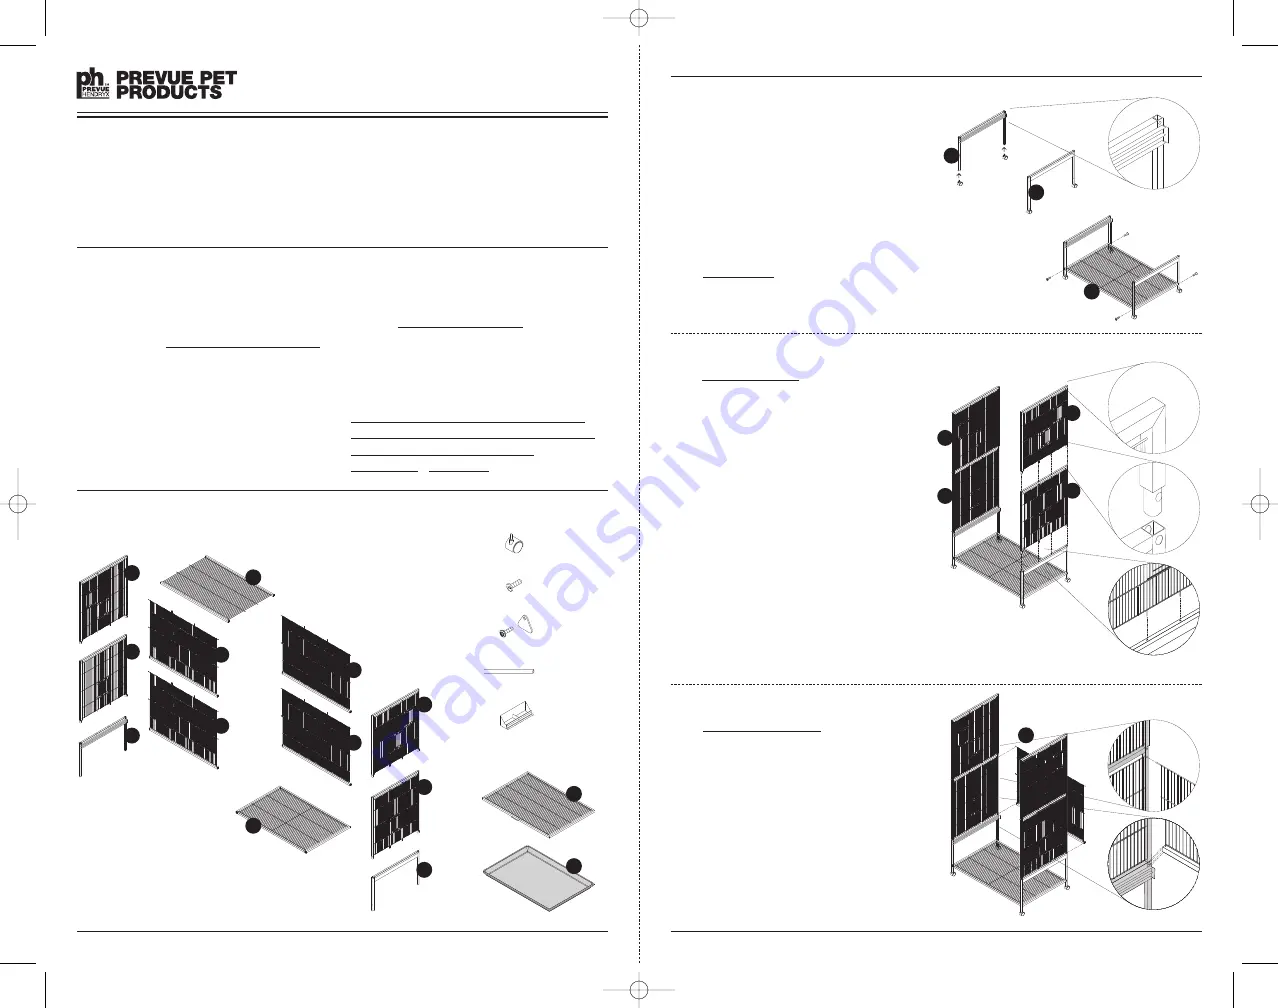
parts
1
a
Attach casters to legs of
lower left
(L1) and
lower right
(R1) side leg frames. The backstops
at the end of the frames indicates the back end.
1
b
Create the base.
Attach the
center shelf
(C1) panel to one side
leg frame (L1) and then the other (R1).
2
Stack the side panels.
The
left upper
(L3) and
right upper
(R3) side
panels have solid/finished corners and top rails
(see detail [a]). The
left lower
(L2) and
right
lower
(R2) side panels have two small holes
along the top frame and openings at the corners
of the frame to accept the posts and extended
vertical wires of the upper side panels (see
detail [b] and [c]).
→
If slugs need to be removed from the corner holes,
use needle nose pliers.
Make sure cup doors swing out. Stack (L2) and
(L3) side panels, then stack (R2) and (R3).
*
Note:
These panels remain loose for now. Have an
assistant hold panels steady for the following steps.
steps
L
E
F
T
F
R
O
N
T
B
A
C
K
R
IG
H
T
G
R
IL
L
E
T
R
A
Y
L2
L3
L1
R2
R3
R1
G
T
F2
F1
B2
B1
C1
C2
{ 4 } rolling casters
{ 16 } hex head
screws
{ 3 } wood dowel
perches
{ 4 } plastic cups
{ 1 } windbell lock
& screw
3
a
Assemble the back panels.
Back lower
(B1) and
back upper
(B2) panels are
identical and interchangeable.
Insert (B1) in position, aligning the bottom corner
screw holes (see detail [e]), and the two extended
horizontal wires (see detail [d]) along both sides.
→
If extended wires need to be straightened to align
with holes, use needle nose pliers.
R1
C1
B1
L2
L3
R2
R3
L1
(a)
(b)
(c)
(d)
(e)
instUS_CageAssembly-F040r1_fin:Layout 1 7/19/12 6:53 PM Page 1


