


PowerFleet
®
VAC4 and VAC4S Hardware User’s Guide
085-00000700 Rev K
Page 46 of 103
Replacing an Existing VAC
When a VAC needs to be replaced, a Maintenance operator can automatically configure the new VAC with the previous
VAC’s settings, using the “CloneVAC” menu option. This eliminates the need to re
-run the Install Wizard by wirelessly
transferring all settings and meters from the previous VAC to the replacement VAC, based on the last reported data for
the specified VAC ID number.
IMPORTANT: When replacing an existing VAC, DO
NOT use the VAC’s Install Wizard!
After connecting a replacement VAC to an existing VAC
cable, the VAC screen will display an error message when
it powers up. Ignore this error.
1.
Log into the vehicle.
2.
Park the vehicle safely near a WAM or at a location
with a strong Wi-Fi signal.
3.
For Wi-Fi systems, enter valid Wi-Fi credentials and
facility ID and verify the VAC connects.
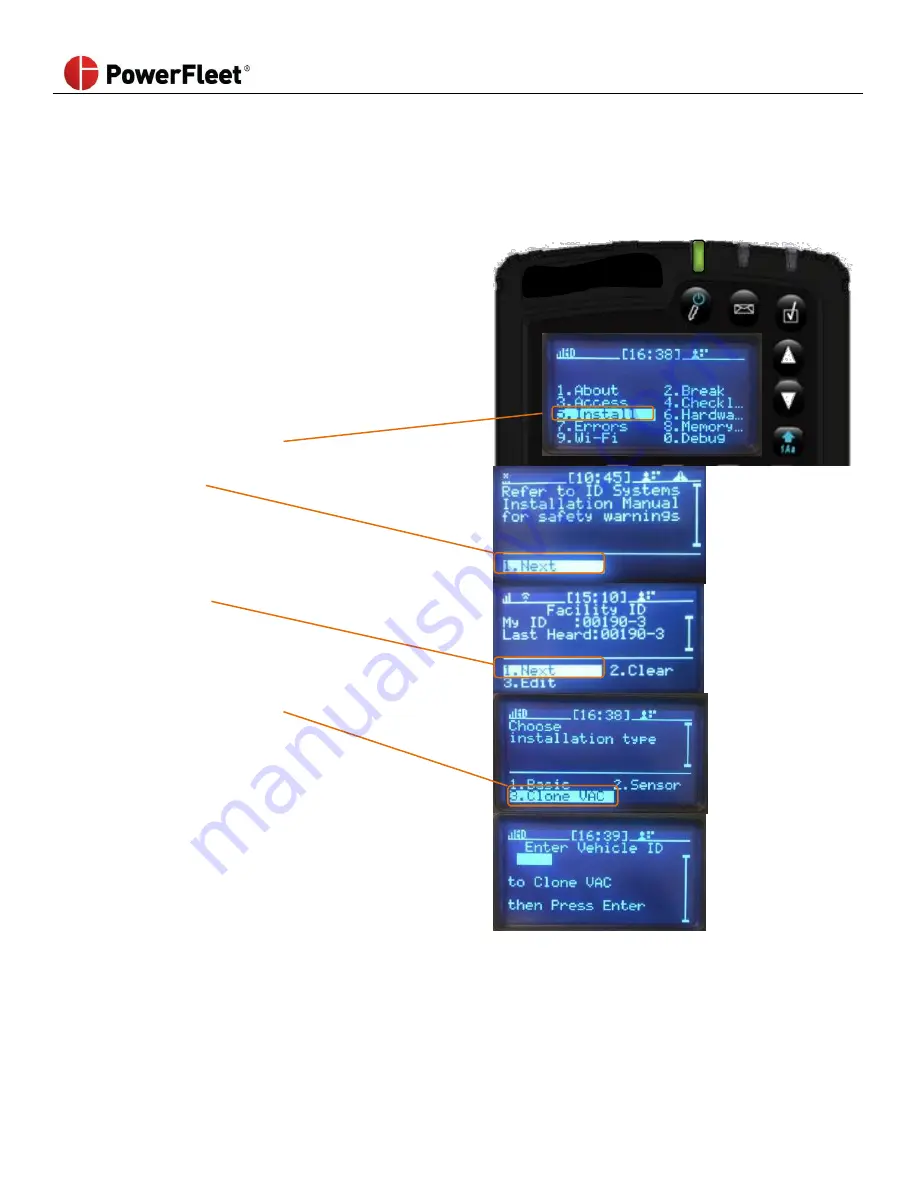
4.
Select INSTALL. Navigate to the “Choose Installation
Type” screen.
5.
Select NEXT.
6.
Select NEXT.
7.
Select CLONE VAC.
8.
Enter the vehicle ID to clone the VAC.
9.
When prompted, enter the facility ID, vehicle type and vehicle ID number. Be sure to enter all leading zeros in
the ID number.