


16
SERVICE AND ADJUSTMENTS
FIG. 26
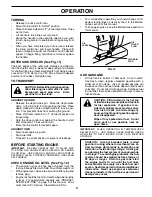
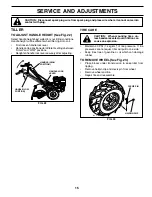
TINE REPLACEMENT
(See Figs. 24, 25 and 26)
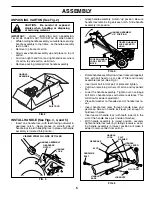
CAUTION: Tines are sharp. Wear
gloves or other protection when han-
dling tines.
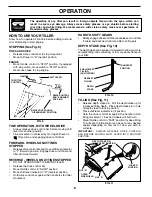
A badly worn tine causes your tiller to work harder and dig
more shallow. Most important, worn tines cannot chop and
shred organic matter as effectively nor bury it as deeply as
good tines. A tine this worn needs to be replaced.
FIG. 25
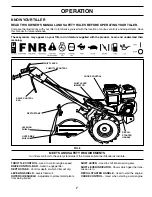
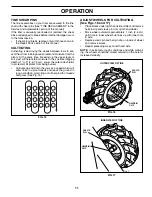
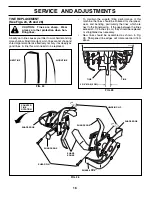
• To maintain the superb tilling performance of this
ma chine the tines should be checked for sharpness,
wear, and bending, particularly the tines which are
next to the transmission. If the gap between the tines
ex ceeds 3-1/2 inches (9 cm), they should be replaced
or straight ened as necessary.
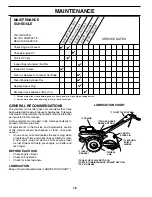
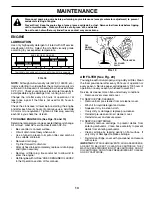
• New tines should be assembled as shown in Fig.
28. Sharp ened tine edges will rotate rearward from
above.
tine_3
3-1/2" MAX (9 CM)
tine_13
HAIRPIN CLIP
SHARP
EDGES
COUNTER
TINE
ROTATION
SHARP EDGE
SHARP EDGE
SHARP EDGE
SHEAR PIN
SHARP EDGE
FIG. 24
NEW TINE
WORN TINE
TINE
TINE
SHARP EDGE
0205
0