


46
PFM-4000
Part Number 6Z8303
Timing Procedures
Setting the Needle Bar Height
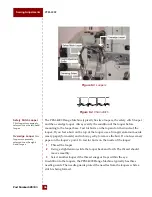
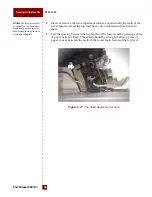
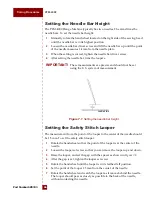
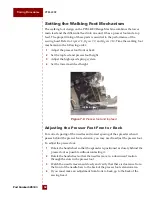
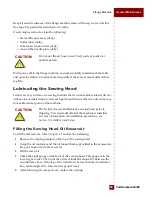
The PFM-4000 Flange Machine typically has two needles. The arm drives the
needle bars. To set the needle bar height:
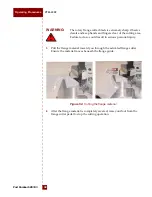
1
Manually rotate the handwheel located on the right side of the sewing head
until the needle bar is in its highest position.
2
Loosen the needle bar driver screw and lift the needle bar up until the point
of the needle measures 14 mm from the needle plate.
3
When the setting is correct, tighten the needle bar driver screw.
4
After setting the needle bar, time the loopers.
Figure 7.1
Setting the needle bar height
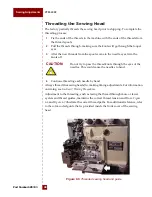
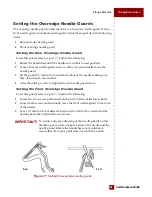
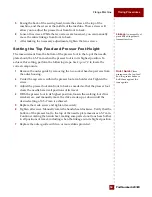
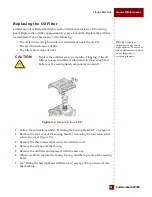
Setting the Safety Stitch Looper
The measurement from the point of the looper to the center of the needle should
be 1.5 mm. To set the safety stitch looper:
1
Rotate the handwheel so that the point of the looper is at the center of the
needle.
2
Loosen the looper set screw so that you can move the looper up and down.
3
Raise the looper, and set the gap with the spacer as shown in
4
After the gap is set, tighten the looper set screw.
5
Rotate the handwheel until the looper is in its farthest left position.
6
Set the point of the looper 1.5 mm from the center of the needle.
7
Rotate the handwheel and watch the looper as it moves behind the needle.
The looper should pass as closely as possible to the back of the needle,
without contacting the needle.
IMPORTANT!
These measurements are precise and should not be set
using the U.S. system of measurement.
needle plate


