background image


Safe Operating Procedure Guide 


THIS DOCUMENT IS UNCONTROLLED WHEN PRINTED


Page 

5

 of 

22 

3.


Safe operating procedure 

3.1.


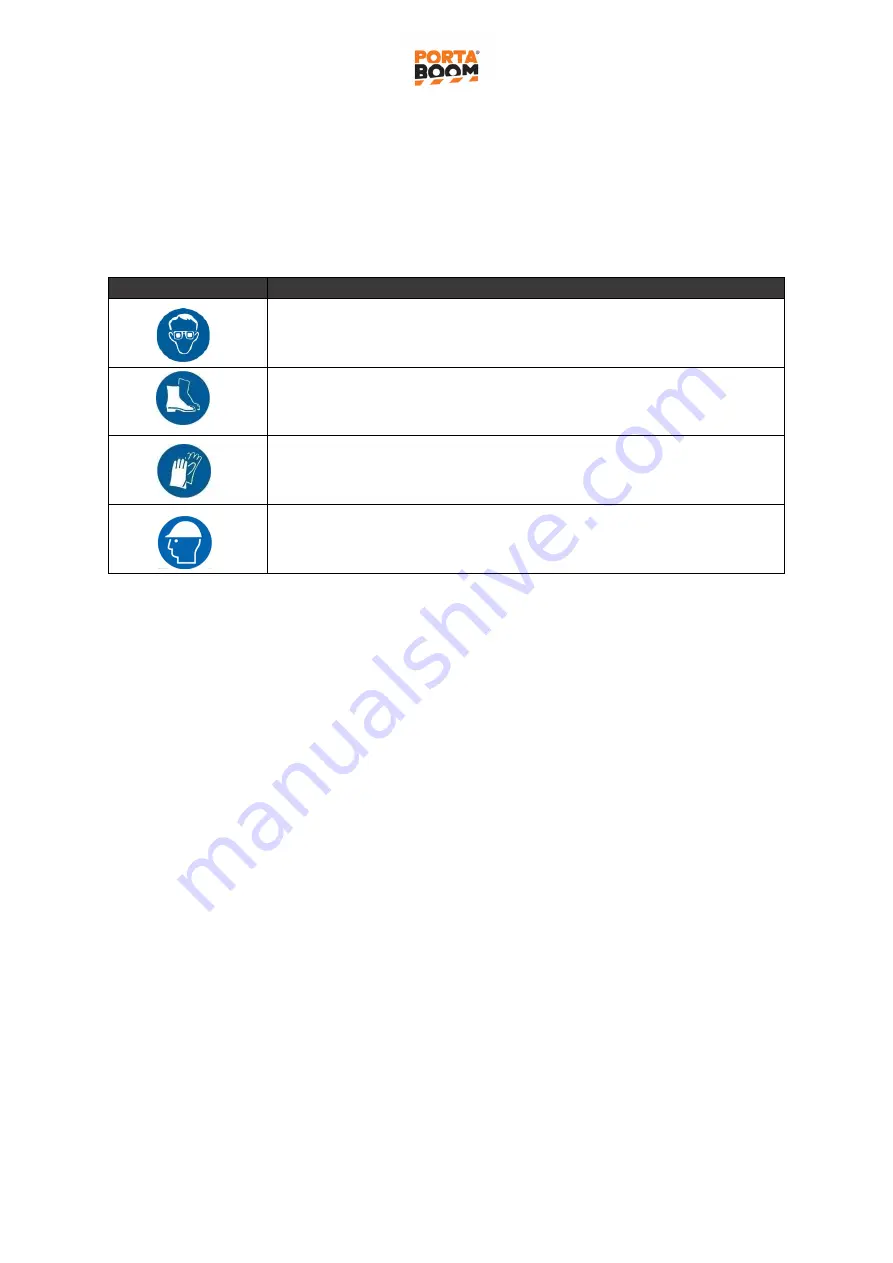
Personal protective equipment 

It is recommended that you are wearing the following personal protective equipment when using 
the product or fitting / handling accessories. 

Diagram 

Recommendation 


Safety glasses worn on work areas. 


Steel cap boots worn in work areas. 


Gloves worn when handling equipment. 


Hard hat worn while working. 


3.2.


Pre-operational checks 


Ensure that the product is inspected prior to utilisation as it must be in a safe and working 
condition prior to use. 


Faulty equipment must not be used. Immediately report suspect equipment to your 
Supervisor. 


Note


 if something is not working it is most likely one of the mode switches not registering. 

Turn the product off, turn mode switches off (down), turn required mode switch on (up) and 
turn the product on (be patient as this will take approximately 5-10 seconds). 

3.3.


Site instructions 


Deliver product and accessories at the designated setup location, ensuring that it is in a safe 
location and on a level surface. 


It is recommended manual aid be adopted if lifting the product. 


Ensure relevant approvals have been obtained, risk assessments completed and personnel 
trained on the relevant safe operating procedures. 


Ensure the product is switched off prior to fitting and connecting any accessory. 


Ensure that the product and accessories is assembled in a safe location. 


Содержание PB2000L

Страница 1: ...5901729 Model Number PB2000L Document SOP Guide PORTABOOM Setup and Operations Revision Version 2 29 October 2019 Product Owner Traffic Access Solutions Pty Ltd Contact Details Address Unit 1 610 Great Western Hwy Girraween NSW 2145 Phone 1300 329 738 Email info trafficaccess com au Web www trafficaccess com au ...

Страница 2: ... procedure 5 3 1 Personal protective equipment 5 3 2 Pre operational checks 5 3 3 Site instructions 5 3 4 Review the location and conditions 6 3 5 Setup of PB unit tower boom arm and accessory lights 7 3 6 Setup of traffic light and pedestrian light accessories 13 3 7 Positioning for live operation 15 3 8 Site operations 18 3 9 Contingency planning 20 3 10 Pack up summary 21 4 Warning 22 ...

Страница 3: ...ONTROLLED WHEN PRINTED Page 3 of 22 1 Document control Version Date Author Details 1 25 08 2016 Traffic Access Solutions SOP developed 2 29 10 2019 Traffic Access Solutions SOP updated to include traffic and pedestrian light accessories template updated ...

Страница 4: ...up and operations Complete daily inspections of the product do not use if damaged or not fit for purpose Apply manual handling controls or manual aid when moving the product Ensure the product is installed on a level surface and is stable Video resources Instruction Link Safe operating procedure training assemble operate and disassemble https www youtube com watch v onMmkHssMyc feature youtu be Be...

Страница 5: ... used Immediately report suspect equipment to your Supervisor Note if something is not working it is most likely one of the mode switches not registering Turn the product off turn mode switches off down turn required mode switch on up and turn the product on be patient as this will take approximately 5 10 seconds 3 3 Site instructions Deliver product and accessories at the designated setup locatio...

Страница 6: ...s must be conducted Look for low lying power lines tree branches street lights road signage which the boom arm may come in contact with in its setup and operation Identify other hazards that may impact the effective and safe operation of the PB unit such as uneven surfaces or obstructions It is not recommended to use the PB unit on uneven ground Where hazards have been identified the operator Traf...

Страница 7: ...dbags refer to section 3 6 If in doubt add sandbags for increased stability Important note Remain diligent and vigilant with regards to environmental changes on worksites Environmental changes could result in having to add weight to the stability legs Monitor the BOM for forecasted weather conditions every 2 hours 3 5 Setup of PB unit tower boom arm and accessory lights Step Instruction Diagram 1 ...

Страница 8: ...ble x1 Keys for access panel x2 Remove the boom arm from the carry bag 5 Using the access panel key provided align the cut out on the key with the red dot on the lock and open up the small compartment panel Note If the cut out on the key isn t lined up with the red dot on the lock you will not be able to open the panel 6 Turn the PB unit on once the self testing cycle is complete the power light w...

Страница 9: ... tower 8 Align the boom arm billet tabs with the channels on the shaft 9 Once aligned connect the boom arm to the tower by pushing firmly forward Note Do not use excessive force Do not grease or oil the shaft If you are using force to push on you are doing it incorrectly stop and start again 10 Once connected manually push the boom arm clockwise into a vertical position ...

Страница 10: ... is complete the power light will illuminate green indicating that it is ready Push the RED PUSH BUTTON in the top left hand corner of the control panel to move the boom arm into a horizontal position 13 Once the boom arm is horizontal loosen the two 2 boom arm tightening screws Note Only loosen to the point where screw feels loose further loosening will cause screws to fall out 14 Extend the Boom...

Страница 11: ...te Be careful not to place straps over the screws as this will cause damage to the strap over time 17 Ensure the stop sign is positioned in the direction of oncoming traffic Note Stop signs may vary from stage region Refer to your relevant state approvals i e NSW uses octagonal stop signs whilst all other states use a round stop sign 18 Check manual operation of the unit UP DOWN STOP ACCESSORY LIG...

Страница 12: ...TED Page 12 of 22 Step Instruction Diagram 19 Check the operation of both remote controls UP DOWN STOP ACCESSORY FUNCTIONS using the 2x single button remote controls provided Note All remotes are labelled front and back with a unit number to match the PB tower unit number ...

Страница 13: ...ns Secure this position with a minimum of two wing nuts hand tighten only 3 Use the white marks to line up the cable plug to the connector for easy alignment Line up pins and connect the accessory cable plug to the L1 port Note that the L1 Port is the primary Light and is predominantly used for 1 light operation the L2 Port is secondary Ensure the plug is pushed in and connected 4 To establish fun...

Страница 14: ...he L1 port primary and the pedestrian light cable plug to the L2 port secondary Ensure that both plugs are pushed in and fully connected 7 To establish functionality access the control panel and select the required mode switch up for on Auto Open AO will activate an automatic cycle commencing with the traffic light green pedestrian light red and boom open Auto Close AC will activate an automatic c...

Страница 15: ...age 15 of 22 3 7 Positioning for live operation Step Instruction Diagram 1 Ensure the boom arm is in the vertical position 2 Disable brakes standard or all terrain mechanism 3 Reposition PB unit into LIVE Operational Position 4 Enables brakes standard or all terrain mechanism ...

Страница 16: ...m this ensures the stability leg unhitches freely 6 Placing one hand on the wing nut bolt and the other hand at the base of the leg pull up slightly and then slide leg into fixing position ensuring the rubber stopper is firmly on the ground 7 Once in position tighten the wing nut to secure leg into position 8 Apply the same process to all 4 stability legs to complete the setup ...

Страница 17: ...the stability leg Add sandbags to all stability legs 10 Leave the boom arm in an upright operational position until you are ready to commence controlling traffic site Ensure advancing warning signs KEEP LEFT signs and lead in cones are all positioned in accordance with the selected TCP Repeat steps for setting up additional PB units 11 If using the pedestrian button accessory position the pedestri...

Страница 18: ...l Operators must ensure they use remote control caddy at all times ensuring the remote controls are labelled the same as the PB unit magnets 3 Ensure operators are positioned in a safe zone off the road away from vehicle or plant movement paths Operators should be positioned no further than 75m from the PB unit Ensure operators have clear line of site at least 120m visual on approach for any PB un...

Страница 19: ...ssist with managing pedestrians The traffic light accessory controls the vehicles which have right of way and the pedestrian light assists with controlling pedestrians 6 When a pedestrian pushes the crossing button the traffic lights will activate changing the light to amber and red Once the traffic light changes to red the boom arm will lower to stop traffic the pedestrian walk light then turns g...

Страница 20: ...ntingency planning Step Instruction Diagram 1 If a PORTABOOM Tower fails ensure you are prepared to manually operate the failed Tower and operate the other Tower by using the remote control OR perform STOP SLOW in place of the failed Tower and operate the other Tower by using the remote control ...

Страница 21: ...highest point and fasten into recess 8 Disable brakes and reposition the PB unit clockwise parallel to the curb 9 Enable brakes turn PB unit back on and lower the boom arm 10 Unbuckle the STOP sign and stow away 11 Loosen boom arm wing nuts and slide the boom arm extension into the fixed section hand tighten wing nuts 12 Turn PB unit off switch accessories off and lock the control panel 13 Place r...

Страница 22: ... from falling Ensure product is turned off prior to fitting or adjusting any accessories Some of the accessories are considered heavy or awkward it is recommended that manual aid or a two person lift be adopted Wear gloves when handling and fitting any of the accessories Ensure accessories are appropriately secured to prevent them from falling If any of the accessories are not working or damaged d...

Отзывы: