

Q
UICK
G
UIDE
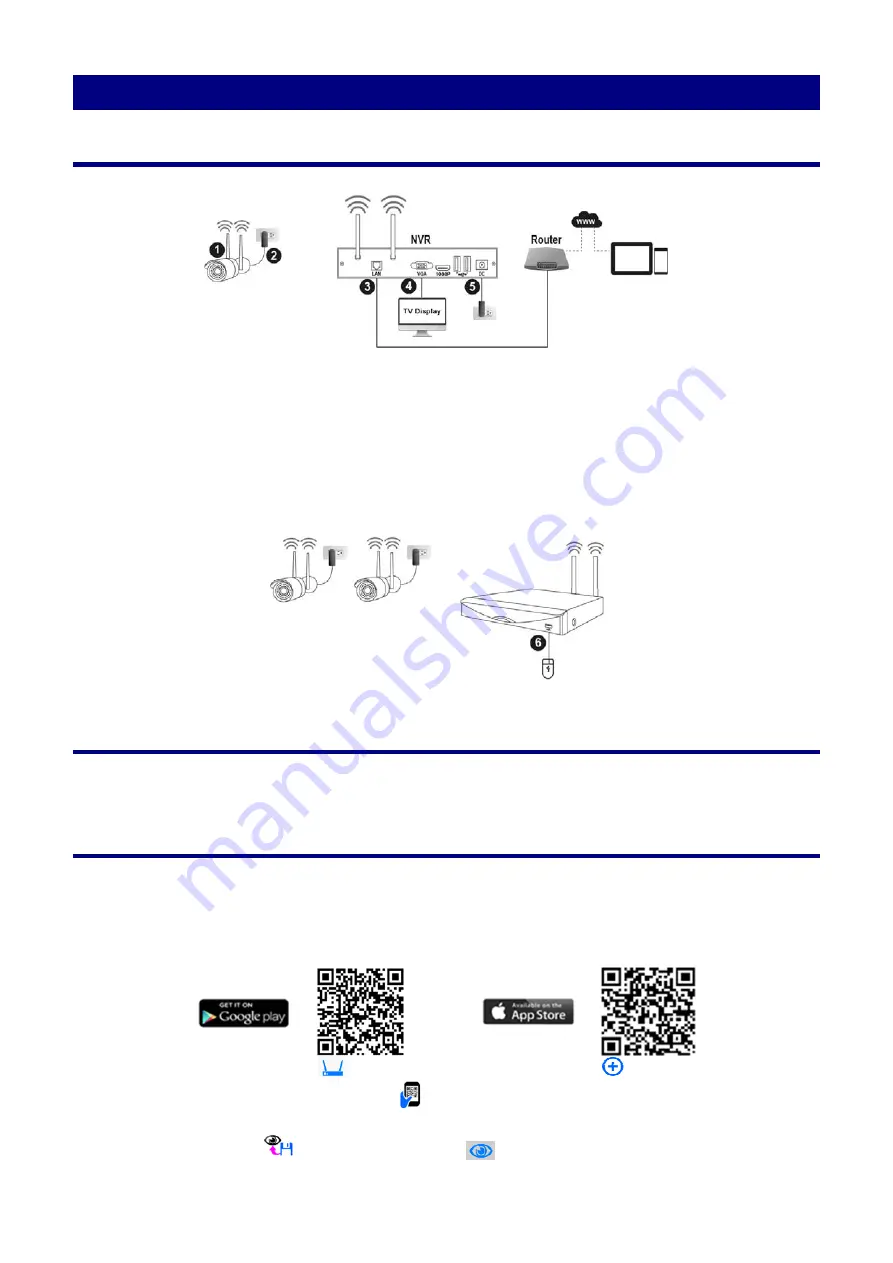
Installing & Connecting the Wireless Surveillance Kit
1. Securely connect two antennas on each network camera.
Make sure the antennas are firmly fixed
but not excessively.
2. Connect the power input on each camera and the other end to the wall socket.
3. Plug the RJ-45 connectors into the NVR’s LAN port and the other end to your router.
4. Use the VGA port on the NVR to connect to the TV Display.
5. Connect the power adapter to the NVR and the other end to the wall socket.
6. Connect the supplied USB mouse to the USB port located at the front of the NVR.
Setup the NVR Kit
Startup will take a minute and a pop-up “Quick setup” wizard will guide you through configuring your
wireless surveillance system.
Setup for Remote View
1.
Please make sure your mobile device is properly connected to the Internet before you start.
Download the free mobile Apps “Plus Viewer” for your Android or iOS device and launch the app.
Note: Please be aware that if your phone is on roaming, additional mobile data charges may apply. It is strongly
recommended that monitoring on your mobile device be done over unlimited data plans or free Wi-Fi networks, to avoid
additional charges from your mobile carrier.
2. Go to “Device Management”
and add device by tapping on “
+
”
.
3. Select “UDID”, tap on “Scan QR Code”
and scan the QR code on the product box, and then
input all require fields. The “Port” is
80
, “Username” is
user
and “Password” is
user
by default.
Finally, tap on “Save”
and go to “Live View”
to see the live video footage.


