


31
Setting up and Configuring vDisplay IP Engines
Connecting the Hardware and Power Supply for Point-To-Point Configurations
The following section provides you with detailed steps to achieve a point-to-point configuration.
To connect the hardware and power supply for point-to-point configurations
1.
Connect one end of a Cat5/Cat6 cable into the RJ-45 jack of the vDisplay IP engine. Then, connect
the other end to the RJ-45 jack of the GigE Vision compliant camera.
If the camera is not GigE Vision compliant, you must connect a GigE Vision compliant converter,
such as a Pleora iPORT IP engine, between the camera and the vDisplay IP engine.
2.
Attach one end of an HDMI-to-HDMI cable or an HDMI-to-DVI cable to the display monitor.
Then, connect the other end to the HDMI receptacle of the vDisplay IP engine.
3.
Apply power to the camera, the monitor, and then to the vDisplay IP engine.
Setting up a Unicast Video Network Configuration
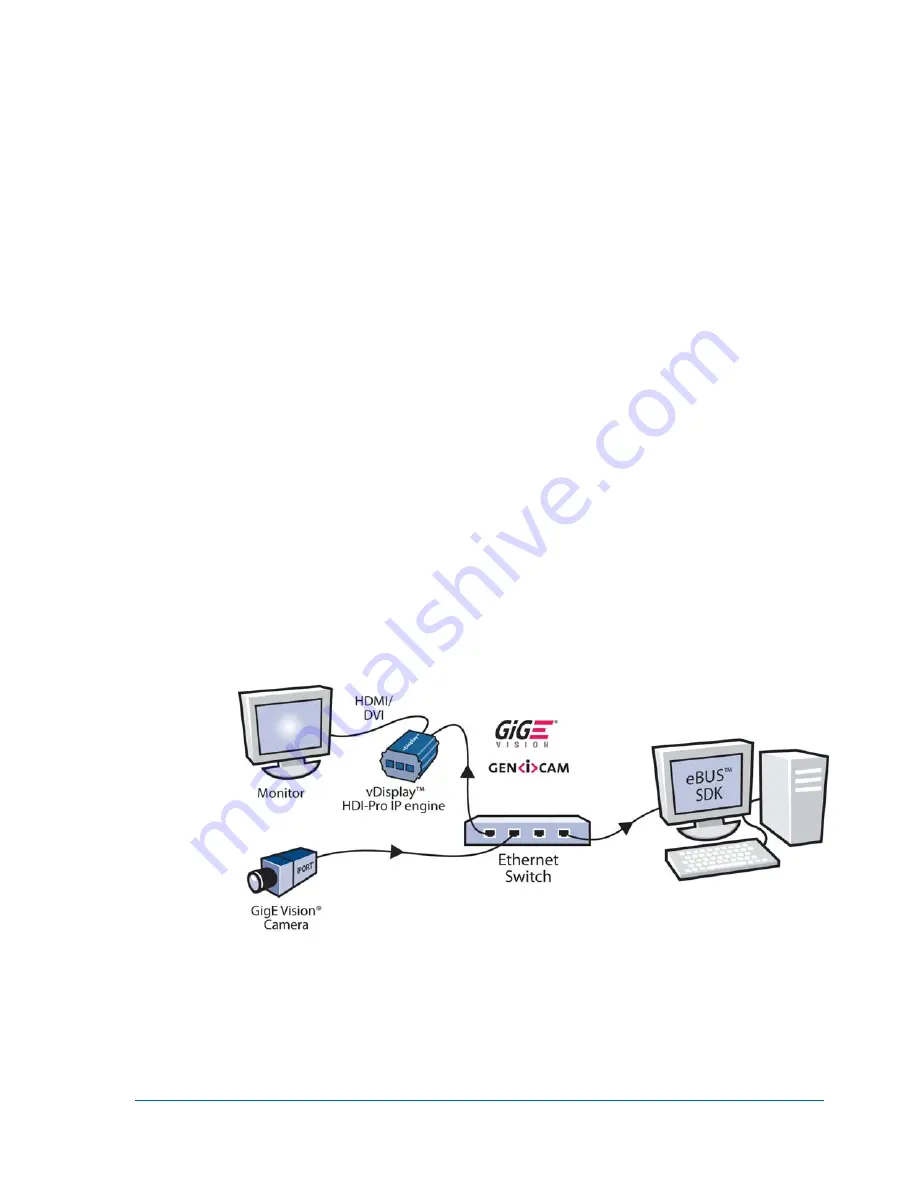
In a unicast network configuration, a GigE Vision compliant camera, connected to a network switch and
configured to send unicast packets, is the video source. A vDisplay IP engine is fed video through the
network switch and passes the video directly to a monitor. A PC with GEVPlayer installed is implemented
as a management entity. The PC configures the system and starts the GigE Vision camera acquisition,
and is responsible for sending heartbeat packets to the camera to maintain an active connection. The
following figure illustrates the vDisplay IP engine in a unicast network configuration.
Figure 4: Setting up a Unicast Video Network Configuration


