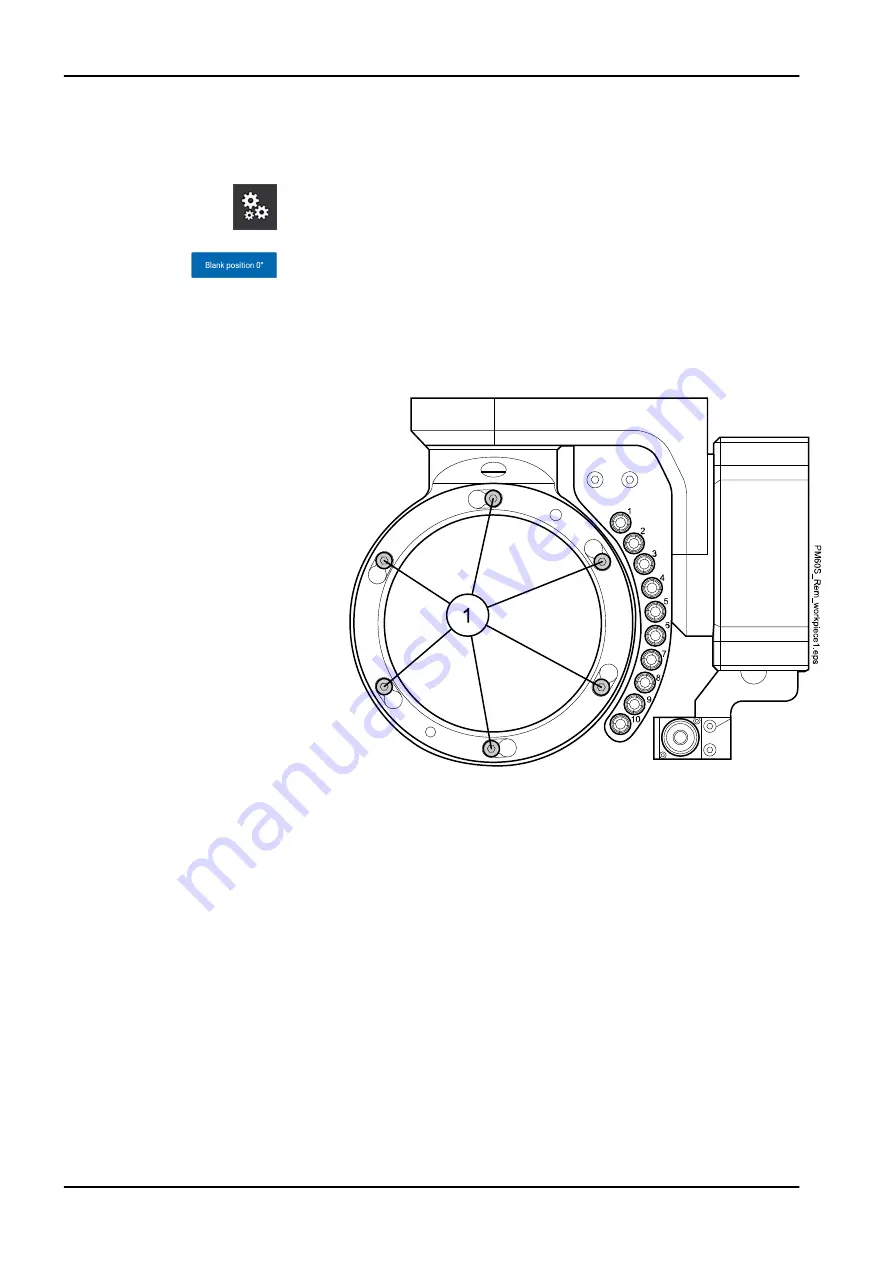
16.2 Inserting workpiece/blank
Steps
1. Press Settings in the
Options menu.
2. Press Blank position 0° to drive the milling unit to the blank change
position.
3. When the cover status display lights up, open the protective door.
4. Loosen the clamping screws of the clamping ring (1) (do not remove)
using a 3 mm Allen key.
16 Operating milling unit
68 Planmeca PlanMill 60 S
User's manual
Содержание PlanMill 60 S
Страница 1: ...Planmeca PlanMill 60 S user s manual EN 30040852...
Страница 100: ...21 2 Dimensions Front view 21 Technical information 94 Planmeca PlanMill 60 S User s manual...
Страница 101: ...Side view 21 Technical information User s manual Planmeca PlanMill 60 S 95...
Страница 112: ......
Страница 113: ......


