2.3 Hardware Installation
2.3.1 Physical Installation
1. Fix Internet camera to desired location with mount fixture
2. Connect an Ethernet cable
Connect the LAN cable on the camera to the network device (hub or switch).
NOTE:
If there has an IEEE802.3af PoE switch in your network, you can connect the
camera LAN cable to this PoE switch to obtain power. The power adapter is
unnecessary when Internet camera is connected to a PoE switch.
3. Attach the power supply
Plug in power adapter and connect to power source. After power on, the camera will start to
operate.
NOTE:
1. Only use the power adapter supplied with Internet camera Otherwise, the
product may be damaged.
2. The power adapter is unnecessary when Internet camera is connected to a
PoE switch. Otherwise, the product may be damaged when Internet camera is
connected to a PoE switch and power adapter simultaneously.
4. Attach BNC connector
Connect the video BNC connector to a monitor set if necessary check camera viewing angle
and focus.
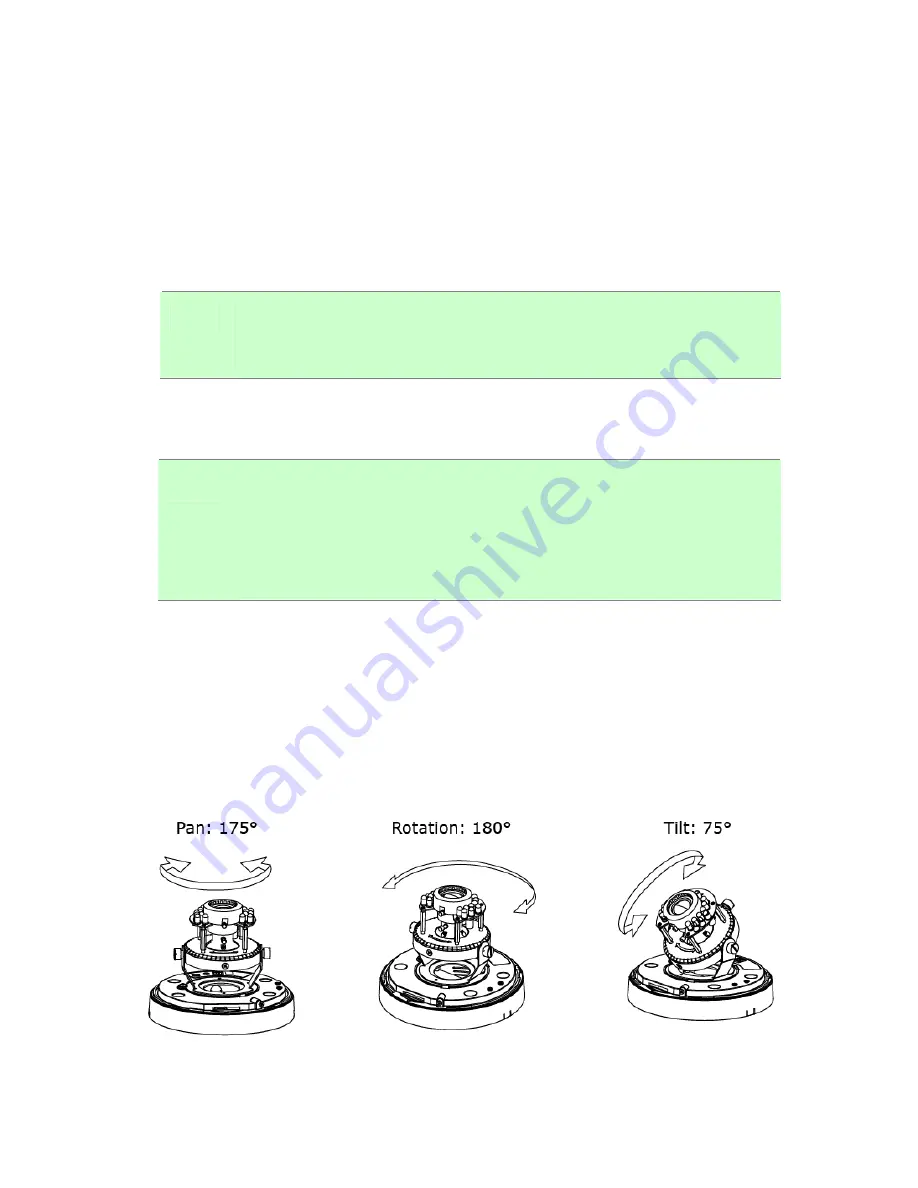
5. 3-Axis Gimbal Adjustments
Once the users open the case, the gimbal adjustment offers the convenience method to install
on the wall. The pan, tilt, and rotation are provided in this model. The users can adjust the
gimbal with Pan 175 degree, tilt 75 degree, and rotation 180 degree respectively.
12
Содержание ICA-HM132
Страница 1: ...2Mega Pixel 20M IR Vari Focal Dome IP Camera ICA HM132 User s Manual Version 1 00...
Страница 11: ...2 Relay Output Connection Or 11...
Страница 17: ...8 If the user name and password are input correctly the following web page will be displayed 17...
Страница 25: ...5 Configuration Click to get into the administration page Click to go back to the live video page 25...
Страница 41: ...5 2 5 Mail FTP To send out the video via mail of ftp please set up the configuration first 41...
Страница 46: ...NOTE The Audio will not be smooth when enable SD card recording function simultaneously 46...
Страница 47: ...5 4 Event List The ICA HM132 provides multiple event settings 5 4 1 Event Setting 47...


