TECHNOLOGIE FÜR DEN HAUSHALT
TECHNOLOGY FOR DOMESTIC USE
Bedienungsanleitung
Instruction Manual
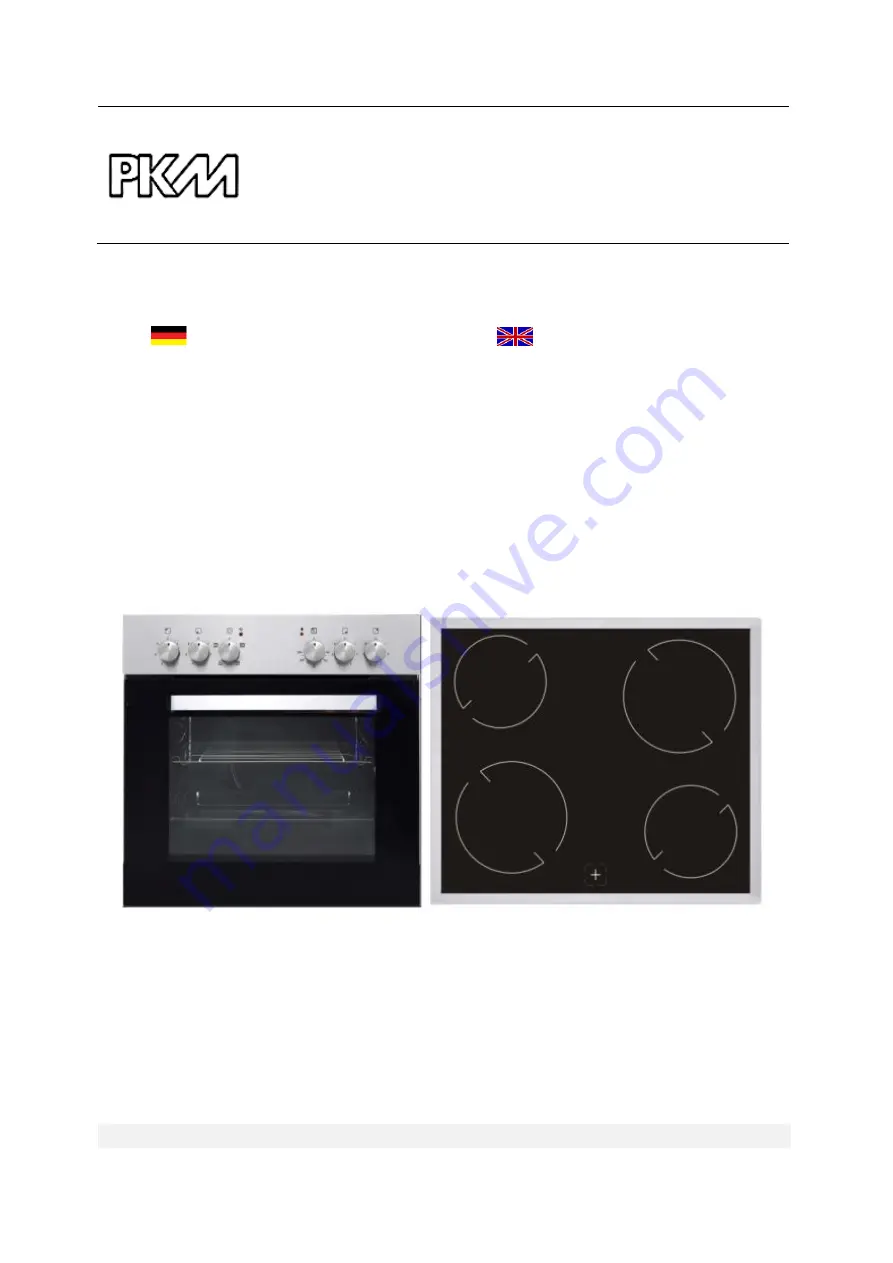
Einbau-Backofen
Built-In Oven
BIC4 GKRU-IX-2
Deutsch
Seite
2
English
Page
27
www.pkm-online.de
Страница 1: ...TECHNOLOGIE F R DEN HAUSHALT TECHNOLOGY FOR DOMESTIC USE Bedienungsanleitung Instruction Manual Einbau Backofen Built In Oven BIC4 GKRU IX 2 Deutsch Seite 2 English Page 27 www pkm online de...
Страница 2: ...falls mit bergeben Inhalt Inhalt 2 1 Sicherheitshinweise 3 1 1 Signalw rter 4 1 2 Sicherheitsanweisungen 5 2 Installation 9 2 1 Entpacken und Wahl des Standorts 9 2 2 Einbau des Kochfelds 10 2 3 Einba...
Страница 3: ...von Ihnen gekaufte Ger t wurde m glicherweise inzwischen verbessert und weist somit vielleicht Unterschiede zur Bedienungsanleitung auf Dennoch sind die Funktionen und Betriebsbedingungen identisch s...
Страница 4: ...alb geschlossener R ume bestimmt Dieses Ger t darf nicht f r gewerbliche Zwecke beim Camping und in ffentlichen Verkehrsmitteln betrieben werden Betreiben Sie das Ger t ausschlie lich im Sinne seiner...
Страница 5: ...ng mit den rtlich geltenden gesetzlichen Bestimmungen erfolgen 3 Schlie en Sie das Ger t keinesfalls an die Stromversorgung an wenn das Ger t das Netzkabel oder der Netzstecker sichtbare Besch digunge...
Страница 6: ...ren Sie das Ger t niemals selbst Reparaturen die von dazu nicht qualifizierten Personen durchgef hrt werden k nnen zu ernsthaften Verletzungen und Sch den f hren Nehmen Sie stattdessen immer Verbindun...
Страница 7: ...s Ger ts Der Dampf kann die Elektrik des Ger ts nachhaltig besch digen STROMSCHLAGGEFAHR 19 Die zug nglichen Bereiche und Teile des Ofens werden bei der Benutzung sehr hei Kinder m ssen deshalb w hren...
Страница 8: ...auf den Boden des Backofens Nutzen Sie statt dessen das Backblech oder den Rost 11 Die inneren Bestandteile des Backofens werden sehr hei Ber hren Sie keine dieser Bereiche w hrend Sie mit Ihrem Kochg...
Страница 9: ...rscharniere 9 Das Typenschild darf niemals unleserlich gemacht oder gar entfernt werden Zuwiderhandlungen f hren zum Garantieausschluss 2 Installation 2 1 Entpacken und Wahl des Standorts 1 Packen Sie...
Страница 10: ...as Kochfeld in die Einbauvorrichtung ein Das Kochfeld muss sich ordnungsgem und fest in der Einbauvorrichtung befinden Die Dichtung muss ordnungsgem anliegen 3 Befestigen Sie das Kochfeld mit den Klam...
Страница 11: ...t darf nur durch eine qualifizierte Fachkraft Elektrotechniker in an die Stromversorgung angeschlossen werden welche die landes blichen gesetzlichen Verordnungen und die Zusatzvorschriften der rtliche...
Страница 12: ...etz an 6 Setzen Sie den Ofen zum Teil in die vorbereitete ffnung ein Verbinden Sie dann den Ofen mit dem Kochfeld Die Verbindungsstecker am Ende der Kabelgruppe die aus dem Kochfeld kommt m ssen mit d...
Страница 13: ...sleiste angeschlossen werden Der elektrische Anschluss des Ger ts muss mit einem Notschalter der im Notfall das gesamte Ger t vom Netz abschaltet ausgestattet sein der Abstand zwischen den Arbeitskont...
Страница 14: ...14 Anschlussdose ffnen Zum Entriegeln Schraubenzieher ansetzen 1 und leicht nach unten bewegen 2 2 4 1 Anschlussdiagramm...
Страница 15: ...s mit Betriebsnull Br cken verbinden die Klemmen 2 3 und 4 5 Schutzleiter auf H05VV F4G2 5 3 Bei 400 230V Netz 3 Phasenanschluss mit Betriebsnull Br cke verbindet 4 5 Phasenreihenfolge nach 1 2 und 3...
Страница 16: ...Ausstattungselemente heraus Blech etc und reinigen Sie diese mit warmem Wasser und etwas Sp lmittel 4 Schalten Sie die Raumbel ftung ein oder ffnen Sie das Fenster 5 Lassen Sie den Ofen auf 2500 C f r...
Страница 17: ...Ofen Temperaturkontrolle 3 Betriebsanzeige f r das Kochfeld gr n 4 Drehschalter f r Kochfeld hinten links 5 Drehschalter f r Kochfeld vorne links 6 Drehschalter f r Kochfeld vorne rechts 7 Drehschalt...
Страница 18: ...hfeld hinten links Zum Einschalten mit oder gegen den Uhrzeigersinn drehen B Drehschalter f r Kochfeld vorne links Zum Einschalten mit oder gegen den Uhrzeigersinn drehen C Drehschalter f r Ofen Funkt...
Страница 19: ...s Kochvorgangs den Drehschalter auf die Position 0 AUS OFF Die entsprechende Kochzone heizt nun nicht mehr 3 4 Benutzung des Backofens 1 Der Ofen kann durch die Benutzung der Oberhitze und der Unterhi...
Страница 20: ...bh ngig von Zimmertemperatur sowie Menge und Art der Lebensmittel OBERHITZE MIT UMLUFT Beheizt den Ofen nur mit der Oberhitze z B zum abschlie enden Backen von oben UNTERHITZE MIT UMLUFT Beheizt den O...
Страница 21: ...was Wasser gef lltes Backblech auf die niedrigste Einschubh he in den Ofen Wenden Sie w hrend der Garzeit das Fleisch mindestens einmal bergie en Sie das Fleisch mit seinem Bratensaft oder hei em Salz...
Страница 22: ...er Glaskeramik am geeignetsten Reinigungsmittel Benutzen Sie keine Scheuermittel Benutzen Sie keine organischen Reinigungsmittel 1 Benutzen Sie keine therischen le Benutzen Sie niemals L sungsmittel O...
Страница 23: ...e Gl hbirne aus der Fassung und ersetzen Sie diese durch eine neue Hochtemperatur Gl hbirne 3000 C mit den folgenden Eigenschaften Volt 230V Leistung 25W Gewinde E14 3 Benutzen Sie keinen anderen Gl h...
Страница 24: ...eim Schlie en der T r besch digt 4 3 Entnahme der Glasscheibe 1 Schrauben Sie den Halterungsverschluss los der sich in der Ecke oben an der T r befindet und l sen Sie ihn 2 Nehmen Sie als N chstes das...
Страница 25: ...nzindex 90 50 Energieverbrauch konventionell 0 86 kW h Energieverbrauch Umluft 0 78 kW h Nettovolumen Backr hre in Litern 57 00 Gr e des Ger ts Mittel Volumen 65 l Funktionen Auftauen Oberhitze mit Um...
Страница 26: ...den und direkt mit dem Netzstecker entfernen und entsorgen Demontieren Sie immer die komplette T r damit sich keine Kinder einsperren und in Lebensgefahr geraten k nnen 4 Entsorgen Sie Papier und Kart...
Страница 27: ...Garantieanspruch erstreckt sich nicht auf 1 zerbrechliche Teile wie z B Kunststoff oder Glas bzw Gl hlampen 2 geringf gige Abweichungen der PKM Produkte von der Soll Beschaffenheit die auf den Gebrau...
Страница 28: ...nces Read the complete instruction manual before you operate the appliance for the first time Retain this instruction manual in a safe place for future reference If you transfer the appliance to a thi...
Страница 29: ...ontent Any modifications which do not influence the functions of the appliance shall remain reserved by the manufacturer Please dispose of the packing with respect to your current local and municipal...
Страница 30: ...he appliance must be performed by a qualified professional The appliance is intended for private use only The appliance is intended for cooking in a private household only The appliance is intended fo...
Страница 31: ...self Repairs carried out by unauthorized persons can cause serious damage If the appliance does not operate properly please contact the shop you purchased the appliance at Original spare parts should...
Страница 32: ...istant glue that is able to withstand a temperature of 1000 C 11 Adjacent furniture or housing and all materials used for installation must be able to resist a temperature of min 850 C above the ambie...
Страница 33: ...he glass 3 Do not put any cookware or backing trays directly on the base inside the oven Do not cover the base inside the oven with aluminium foil 4 The hob should be clean at every time Soiled cookin...
Страница 34: ...you should take note of the position of every part of the interior accessories in case you have to repack and transport it at a later point of time 5 Do not operate the appliance unless all component...
Страница 35: ...act with water or rain otherwise the insulation of the electrical system will be damaged 5 Install the appliance on a level dry and solid floor Check the correct installation with a bubble level 6 Rem...
Страница 36: ...must be vented properly Air inlet and air outlet must not be blocked Min safety distance between hob and a cupboard above 76 cm A Air inlet 2 3 Installation of the oven DANGER The appliance must be c...
Страница 37: ...ally insert the oven into the opening and connect the oven to the hob The connectors at the end of the group of wires coming out of the hob should be inserted into the appropriate sockets of the contr...
Страница 38: ...he contacts of at least 3 mm which disconnects the entire appliance from the mains in a case of emergency Read the information on the rating label and the connection diagram before connecting the appl...
Страница 39: ...PE terminal Recommended type of connection lead 1 For 230 V earthed one phase connection bridges connect 1 2 3 terminals and 4 5 terminals Protective ground to H05VV F3G4 2 For 400 230V earthed two ph...
Страница 40: ...ircuit must be equipped with an automatic circuit breaker 3 Do not attempt to repair the appliance yourself Repairs carried out by unauthorized persons can cause serious damage Always contact the near...
Страница 41: ...the oven operate 2500 C for 30 minutes Now a little bit of smoke and odour may be generated for approx 15 minutes This is normal They are generated by the substance that protects your appliance again...
Страница 42: ...tary knob cooking zone front right 7 Rotary knob cooking zone rear right 8 Oven operation indicator lamp red 9 Door handle 10 Glass ceramic 11 Residual heat indicator A 145 mm 1200 W B 180 mm 1800 W C...
Страница 43: ...3 3 Use of the hob Put a cookware directly onto a cooking zone Turn the corresponding knob clockwise or anticlockwise to switch on the hob Turn the knob to position O to stop cooking 3 4 Use of the ov...
Страница 44: ...Defrost The fan works without a heat setting You can defrost frozen food Defrosting time depends on size and weight of the food Top heat and fan switches on the top heater of the oven e g for final ba...
Страница 45: ...p tray with a small amount of water in the oven minimum rack height Turn over meat at least once Never pour cold water on the meat 3 7 Saving of energy Do not open the oven door unnecessarily often Sw...
Страница 46: ...after cleaning Clean the outside of the oven with warm soapy water Use a sponge or a soft cloth Never use abrasive or aggressive detergents If you use a special oven detergent check that the detergent...
Страница 47: ...door and push the safety catch upwards 2 Close the door slightly 3 Lift the door and pull it towards your direction 4 To reassemble proceed in reverse order 5 Check that the groove of the hinge brack...
Страница 48: ...our aftersales service Check the schedule below before you contact your aftersales service MALFUNCTION POSSIBLE CAUSES MEASURES Appliance does not work at all The appliance is not supplied with energy...
Страница 49: ...imensions hob H W D in cm 5 00 58 00 51 00 Dimensions oven H W D in cm 59 80 59 50 55 00 Weight net hob in kg 8 00 Weight net oven in kg 27 00 6 Waste management 1 While unpacking the packaging materi...
Страница 50: ...our residential area dispose of these materials at a suitable municipal collection point for waste recycling 7 Receive more detailed information from your retailer or your municipal facilities Materia...
Страница 51: ...ile components as plastic glass or bulbs 2 minor modifications of the PKM products concerning their authorized condition if they do not influence the utility value of the product 3 damage caused by ha...
Страница 52: ...used in Germany Austria Belgium Luxembourg and the Netherlands August 2014 TECHNOLOGIE F R DEN HAUSHALT SERVICE INFORMATION TECHNOLOGY FOR DOMESTIC USE Sie finden alle Informationen zum Kundendienst a...
Страница 53: ...53 nderungen vorbehalten Subject to alterations Stand Updated 15 05 2017 05 18 2017 PKM GmbH Co KG Neuer Wall 2 47441 Moers...