En
59
10
Controlling the rest of your system
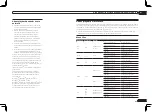
5 Repeat steps 3 to 4 to program a
sequence of up to five commands.
If you press
RCU SETUP
before programming is
completed, commands programmed up to that
point will be stored.
6 Press RCU SETUP to exit the
programming mode.
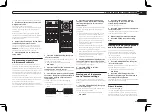
Using multi operations
1 Press MULTI OPERATION.
Release the button after the LED flashes once.
The LED continues to flash.
2 Within five seconds, press an input
function button that has been set up with
a multi operation.
The receiver switches on (if it was in standby)
and the programmed multi operation is per-
formed automatically.
Using System off
1 Press MULTI OPERATION.
Release the button after the LED flashes once.
The LED continues to flash.
2 Within five seconds, press
u
SOURCE.
The command sequence you programmed will
run, then all Pioneer components will switch
off, followed by this receiver (switch of all the
zones becomes off).
!
In order to avoid accidently switching off a
DVD recorder that is currently recording, no
DVD recorder power off codes are sent.
Erasing the settings for the
multi-operation
This erases all the settings programmed in the
remote control for the multi-operation.
1 Press and hold RCU SETUP, then press
‘8’ for three seconds.
Release the button after the LED flashes once.
The LED continues to flash.
!
To cancel the preset setup mode press
RCU SETUP
.
2 Press the input function button
containing the program you want to
cancel or the
u
SOURCE button for three
seconds.
If the LED lights for one second, the erasing has
been successfully completed.
Resetting the remote control
settings
Use this procedure to reset all the remote con-
trol’s settings to the factory default.
!
When preset codes are set, all the signals
learned in the input function buttons are
cleared. This function is convenient when you
want to reset some but not all of input function
buttons.
1 Press and hold RCU SETUP, then press
‘0’ for three seconds.
Release the button after the LED flashes once.
The LED continues to flash.
2 Press and hold the ENTER button for
three seconds.
If the LED lights for one second, the erasing has
been successfully completed.
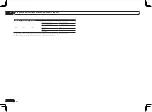
Default preset codes
Input function button
Preset code
DVD
2158
BD
2160
DVR/BDR
2150
HDMI
2159
TV/SAT
0116
CD
5066
TV CTRL
0116
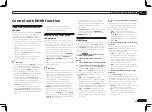
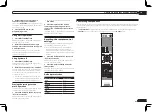
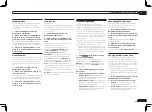
Controlling components
This remote control can control components after entering the proper codes (see
Setting the remote
to control other components
on page 56 for more on this). Use the input function buttons to select
the component.
!
The
TV CONTROL
buttons on the remote control are dedicated to control the TV assigned to the
TV CTRL
button. If you have two TVs, assign the main TV to the
TV CTRL
button.
ZONE 2
ZONE 3
LIGHT
RECEIVER
D.ACCESS
CH LEVEL A.ATT DIMMER
SIGNAL SEL MCACC SLEEP
TV / DTV
MPX
PQLS
PHASE CTRL
THX
STATUS
PGM
STEREO
iPod CTRL
HOME
MENU
TUNE
TUNE
TOOLS
LIST
CH
TV CONTROL
INPUT
INPUT SELECT
iPod
USB
OPTION
TUNER
SIRIUS
ADPT
HMG
SAT
CD
TV
RCU SETUP
SOURCE
RECEIVER MULTI
OPERATION
BDR
BD
DVD
DVR
HDMI
RECEIVER
TV CTRL
MUTE
MASTER
VOLUME
VOL
PRESET
TOP MENU
BAND
GUIDE
T.EDIT
VIDEO
PARAMETER
AUDIO
PARAMETER
ENTER
PRESET
RETURN
CATEGORY
MEMORY
STANDARD
MENU
ADV SURR
AUTO / ALC /
DIRECT
AUDIO
HDMI OUT
INFO
CLASS
ENTER
DISP
HDD
DVD
5
4
6
8
0
7
9
1
3
/ CLR
CH
222
Содержание VSX-1126-K
Страница 100: ...100 13 Additional information En ...
Страница 101: ...101 13 Additional information En ...
Страница 102: ...102 13 Additional information En ...

