background image

8

Operation

02

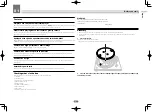
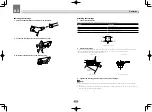
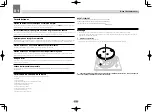
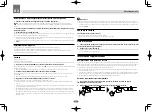
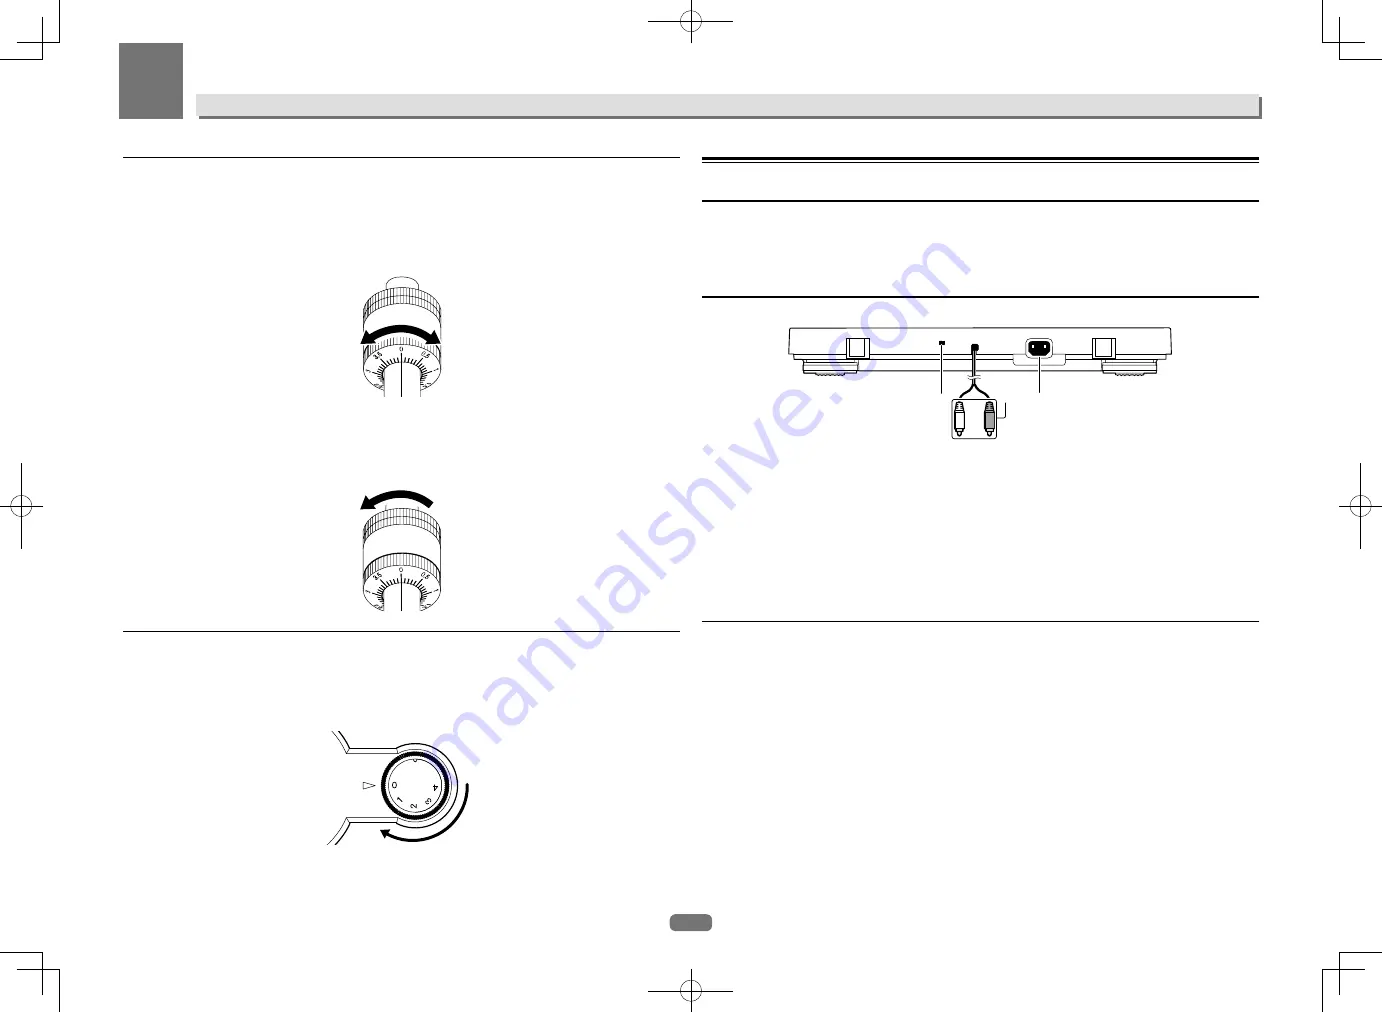
Adjusting the stylus pressure

1  Return the tone arm to the arm rest.
2  Match the “0” on the stylus pressure adjustment ring to the center line of the arm rear 
shaft.

While using your finger to hold the balance weight to keep it from moving, turn only the stylus pressure adjust-
ment ring so that the number “0” comes to the black center line of the tone arm rear shaft.

3  Adjust the stylus pressure.

Turn the balance weight to adjust to the appropriate stylus pressure value for your cartridge.

!

  When turning the balance weight, the stylus pressure adjustment ring turns together. While observing the 

adjustment ring, adjust the stylus pressure to the appropriate value.

!

  The appropriate stylus pressure for the included cartridge is 3.5 g. Set to “3.5”.

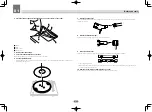
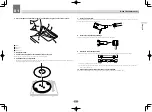
Adjusting anti-skating

This adjustment is made to prevent stylus jumping.

1  Match to the same scale position as the stylus pressure value.
2  Turn the [ANTI-SKATING] dial to match the reference mark to the same value as the 
cartridge stylus pressure value.

AN

TI-S

KATIN

G

Connecting your equipment

Connecting your equipment

!

  Be sure to turn off the power and unplug the power cord from the power outlet whenever making or changing 

connections.

!

  Refer to the operating instructions for the component to be connected.

!

  Connect the power cord after all the connections between devices have been completed.

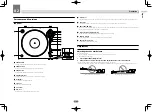
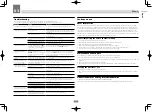
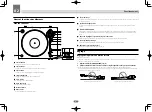
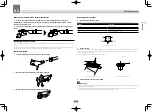
Descriptions of terminals

PHONO LINE

AC IN

3

1

2

Equalizer switch

Move this switch to appropriate position according to the audio input terminal of the pre-main amplifier or 
other component.

RCA output terminals

Connects to the audio input terminal of the pre-main amplifier or other component.

AC IN terminal

Connects to a power outlet using the included power cord. Wait until all connections between the equipment 
are completed before connecting the power cord.

!

  Be sure to use the included power cord.

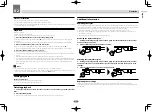
Connecting to a pre-main amplifier and component

1  Set the equalizer switch to appropriate position.

PHONO

: When connecting to the PHONO input terminal (the built-in equalizer of record player is not used.)

LINE

: When connecting a terminal other than the PHONO input terminal (the built-in equalizer of record player is 

used.)

2  Connect the RCA output terminal to the input terminal of the pre-main amplifier or other 
component.
3  Connect the power cord.

Connects to a power outlet using the included power cord. Wait until all connections between the equipment are 
completed before connecting the power cord.

!

  Before connecting to the outlet (AC outlet) mounted on the connected equipment, check the wattage dis-

played on the outlet. (This unit consumes 2 W of power.)

!

  If the player starts operating when the power cord is plugged in, press the [

STOP

] button.

Содержание PL-30-K

Страница 1: ...STEREO TURNTABLE PLATINE STEREOPHONIQUE GIRADISCOS ESTEREOFÓNICO Operating Instructions Mode d emploi Manual de instrucciones English Français Español ...

Страница 2: ...xposed to rain or moisture does not operate normally or has been dropped D3 7 13 69_En 11 12 13 14 WARNING This equipment is not waterproof To prevent a fire or shock hazard do not place any container filled with liquid near this equipment such as a vase or flower pot or expose it to dripping splashing rain or moisture D3 4 2 1 3_A1_En WARNING To prevent a fire hazard do not place any naked flame ...

Страница 3: ...ets the sound come through clearly without annoying blaring or distortion and most importantly without affecting your sensitive hearing Sound can be deceiving Over time your hearing comfort level adapts to higher volumes of sound so what sounds normal can actually be loud and harmful to your hearing Guard against this by setting your equipment at a safe level BEFORE your hearing adapts ESTABLISH A...

Страница 4: ...fore you start Features 5 Checking what s in the box 5 Assembly 5 02 Operation Part names and functions 7 Adjustment 7 Connecting your equipment 8 Playback 9 Pausing playback 9 Finishing playback 9 Additional information 9 03 Others Troubleshooting 11 Cautions on use 11 Maintenance of each part 11 About trademarks and registered trademarks 11 Specifications 12 ...

Страница 5: ...the grip between the record and the turntable for stable record playing Unobtrusive design Its appearance and finish engender a composed ambience so it harmonizes with your components as well as your interior Detachable power cord Cables are not obstacles when the player is moved thus preventing disconnection problems Checking what s in the box Please check that you ve received the following suppl...

Страница 6: ... the headshell Insert the headshell with attached cartridge into the tone arm Next while keeping the headshell horizontal tighten the lock nut 8 Attach the balance weight Attach the balance weight to the rear shaft of the tone arm 9 Mount the dust cover Insert the hinges of the dust cover securely into their holders on the back of the turntable PHONO LINE AC IN Insert both hinges fully When removi...

Страница 7: ... ANTI SKATING dial When a record is played there is power to pull the stylus tip toward the inner perimeter By matching this dial to the stylus pressure value that power is eliminated c Stylus pressure adjustment ring Used to match to the appropriate stylus pressure of the cartridge d Balance weight Used to balance the tone arm and adjust the stylus pressure e Adapter for EP record Used to play st...

Страница 8: ...to be connected Connect the power cord after all the connections between devices have been completed Descriptions of terminals PHONO LINE AC IN 3 1 2 1 Equalizer switch Move this switch to appropriate position according to the audio input terminal of the pre main amplifier or other component 2 RCA output terminals Connects to the audio input terminal of the pre main amplifier or other component 3 ...

Страница 9: ... system cannot be used for 25 cm records In this case operate manually If the tone arm does not return to its original position after playback stops press the STOP button Pausing playback Pull up the lifter lever The stylus of the cartridge lifts away from the record To resume playback push down the lifter lever Finishing playback 1 Pull up the lifter lever to return the tone arm to the arm rest a...

Страница 10: ...tridge 2 Attach the cartridge To achieve the required overhang mount in such a way that the stylus tip is positioned about 45 mm from the edge of the headshell s mount surface the rubber washer as shown on the diagram below The overhang for this player should be 19 mm Back side 45 mm 1 3 4 in Mount parallel Front side Mount perpendicular 3 Tighten the cartridge mount screws to mount the cartridge ...

Страница 11: ...g brush to carefully remove dust etc from the stylus tip Is anti skating adjusted correctly Adjust anti skating correctly Is the arm height adjusted correctly Adjust the arm height correctly The arm stops along the way and does not go ahead Does the record have scratches Check the condition of the record Is the arm coming into contact with something Check around the arm If there is an obstacle rem...

Страница 12: ...eed 33 1 3 rpm 45 rpm Wow and flutter 0 1 or less WRMS JIS WTD S N ratio 60 dB DIN B Turntable Aluminum die casting Tone arm part Arm type Static balance straight type tone arm Effective length 221 5 mm Overhang 19 mm Stylus pressure variable range 0 g to 4 0 g 1 scale 0 1 g Proper cartridge weight 4 5 g to 9 5 g single cartridge Cartridge type MM type Headshell weight 10 0 g including screws and ...

Страница 13: ...T LIMITED TO THE IMPLIED WARRANTIES OF MERCHANTABILITY AND FITNESS FOR A PARTICULAR PURPOSE TO A PERIOD NOT TO EXCEED THE WARRANTY PERIOD NO WARRANTIES SHALL APPLY AFTER THE WARRANTY PERIOD SOME STATES DO NOT ALLOW LIMITATIONS ON HOW LONG AN IMPLIED WARRANTY LASTS AND SOME STATES DO NOT ALLOW THE EXCLUSIONS OR LIMITATIONS OF INCIDENTAL OR CONSEQUENTIAL DAMAGES SO THE ABOVE LIMITATIONS OR EXCLUSION...

Страница 14: ...débranché au niveau de la prise secteur si vous prévoyez une période prolongée de non utilisation par exemple avant un départ en vacances D3 4 2 2 2a _A1_Fr La protection de votre ouïe est entre vos mains Pour assurer le rendement optimal de votre matériel et plus important encore la protection de votre ouïe réglez le volume à un niveau raisonnable Pour ne pas altérer votre sens de la perception l...

Страница 15: ...éristiques 4 Vérification du contenu de la boîte 4 Montage 4 02 Fonctionnement Noms et fonctions des éléments 6 Réglage 6 Raccordement de votre équipement 7 Lecture 8 Pause de la lecture 8 Fin de la lecture 8 Informations supplémentaires 8 03 Divers Guide de dépannage 10 Précautions d emploi 10 Entretien de chaque élément 11 À propos des marques commerciales et des marques déposées 11 Spécificatio...

Страница 16: ... discret L apparence et la finition de cette platine créent une ambiance sereine qui s harmonisera avec vos appareils ainsi qu avec votre intérieur Cordon d alimentation amovible Les câbles ne sont pas des obstacles lorsque l on déplace la platine empêchant ainsi des problèmes de déconnexion Vérification du contenu de la boîte Veuillez vérifier que vous avez reçu tous les accessoires suivants Plat...

Страница 17: ...ellule avec la cellule installée dans le bras de lecture Ensuite serrez l écrou de blocage tout en maintenant le porte cellule à l horizontale 8 Fixez le contrepoids d équilibrage Fixez le contrepoids d équilibrage sur l arbre arrière du bras de lecture 9 Montez le capot anti poussière Insérez fermement les charnières du capot anti poussière dans leurs supports à l arrière de la platine PHONO LINE...

Страница 18: ...e vers l intérieur du disque En faisant correspondre cette molette à la valeur de la pression de la pointe de lecture on supprime cette force c Bague de réglage de la pression de la pointe de lecture Permet de faire correspondre la pression de la pointe de lecture appropriée de la cellule d Contrepoids d équilibrage Permet d équilibrer le bras de lecture et de régler la pression de la pointe de le...

Страница 19: ...églage permet d empêcher la pointe de lecture de sauter 1 Faites correspondre à la même position de la graduation que la valeur de la pression de la pointe de lecture 2 Tournez la molette ANTI SKATING pour faire coïncider le repère avec la même valeur que la pression de la pointe de lecture de la cellule A NTI SKATIN G Raccordement de votre équipement Raccordement de votre équipement Veillez à tou...

Страница 20: ...s mettez en place le couvercle de la pointe de lecture pour proté ger l extrémité de la pointe de lecture Cet appareil possède une fonction de retour automatique qui renvoie automatiquement le bras de lecture dans sa position d origine dès qu un point spécifique est atteint à la fin de la lecture d un disque Ceci ne pose pas de problèmes avec les disques de format habituel Toutefois avec certains ...

Страница 21: ...é de la cellule Mise en place de la cellule 1 Raccordez les fils conducteurs Ces fils comportent un code couleur comme indiqué ci dessous Veillez à les raccorder correctement Couleur Fonction Rouge Canal droit R Blanc Canal gauche L Vert Masse du canal droit RG Bleu Masse du canal gauche LG Haut R L RG LG Arrière de la cellule 2 Fixez la cellule Pour obtenir le surplomb voulu fixez la cellule de t...

Страница 22: ...ent Tournez le contrepoids d équilibrage jusqu à ce que le bras de lecture devienne horizontal Problème Vérification Solution La pointe de lecture saute La pression de la pointe de lecture est elle correctement réglée Faites correspondre le contrepoids d équilibrage avec la valeur de la pression de la pointe de lecture appropriée pour votre cellule Le disque est il déformé ou a t il des rayures Vé...

Страница 23: ...ON Les noms de sociétés et de produits mentionnés ici sont des marques commerciales de leurs détenteurs respectifs Spécifications Alimentation CA 120 V 60 Hz Consommation 2 W Poids de l appareil principal 5 6 kg Dimensions maximales 435 mm L 110 mm H 372 6 mm P Température de fonctionnement tolérée 5 C à 35 C Humidité de fonctionnement tolérée 5 à 85 sans condensation Plateau Méthode d entraînemen...

Страница 24: ...E GARANTIE IMPLICITE QUE CE SOIT Y COMPRIS ENTRE AUTRES LES GARANTIES IMPLICITES DE QUALITÉ MARCHANDE OU D ADAPTATION À UN USAGE PARTICULIER À UNE PÉRIODE N EXCÉDANT PAS LA PÉRIODE DE GARANTIE AUCUNE GARANTIE NE S APPLIQUE APRÈS LA PÉRIODE DE GARANTIE CERTAINS ÉTATS NE PERMETTENT PAS LA LIMITATION DE LA DURÉE D UNE GARANTIE IMPLICITE ET CERTAINS NE PERMETTENT PAS L EXCLUSION S U O V À R E U Q I L ...

Страница 25: ......
Страница 26: ...ente póngase de inmediato en contacto con un médico D41 6 4_A1_Es NOTA EL AVISO DEL COMPARTIMIENTO DE LAS PIEZAS QUE EL USUARIO NO DEBE REPARAR ESTÁ SITUADO EN LA PARTE INFERIOR DEL APARATO D3 7 13 68_A1_Es PRECAUCIÓN Puesto que el cable de alimentación hace las funciones de dispositivo de desconexión de la corriente para el aparato para desconectar toda la alimentación del aparato deberá desenchu...

Страница 27: ...ón del contenido de la caja 4 Montaje 4 02 Operación Nombres y funciones de los controles 6 Ajuste 6 Conexión del equipo 7 Reproducción 8 Pausa de la reproducción 8 Final de la reproducción 8 Información adicional 8 03 Otros Solución de problemas 10 Cuidados para el uso 10 Mantenimiento de cada parte 10 Acerca de las marcas comerciales y marcas comerciales registradas 11 Especificaciones 11 Españo...

Страница 28: ...na a la vez que mejora el agarre entre el disco y el giradiscos para proporcionar una reproducción más estable Diseño discreto Su aspecto y acabado se adaptan al ambiente combinando perfectamente con el resto de dispositivos y decora ción interior Cable de alimentación desenchufable Los cables no representan un obstáculo cuando se desplaza el reproductor por lo que se evitan así problemas de desco...

Страница 29: ...nserte el portacápsula con el cartucho montado en el brazo fonocaptor A continuación apriete la contratuerca mientras mantiene el portacápsula horizontal 8 Monte el contrapeso Fije el contrapeso al eje trasero del brazo fonocaptor 9 Monte la cubierta guardapolvo Introduzca firmemente las bisagras de la funda guardapolvo en sus suportes de la parte trasera del giradiscos PHONO LINE AC IN Introduzca...

Страница 30: ...TING Cuando se reproduce un disco hay una fuerza que tira de la punta de la aguja hacia el perímetro interior Al hacer coincidir este dial con el valor de presión de la aguja se elimina esta fuerza c Anillo de ajuste de presión de la aguja Se utiliza para hacer coincidir con la presión adecuada de aguja del cartucho d Contrapeso Se utiliza para equilibrar el brazo fonocaptor y ajustar la presión d...

Страница 31: ...tación después de terminar las conexiones entre los aparatos Descripciones de los terminales PHONO LINE AC IN 3 1 2 1 Interruptor del ecualizador Mueva este interruptor a la posición correcta según el terminal de entrada de audio del pre amplificador u otro componente análogo 2 Terminales con salida RCA Conecta el terminal de entrada de audio al pre amplificador u otro componente análogo 3 Termina...

Страница 32: ...Notas No toque el brazo fonocaptor o el giradiscos ni desactive la corriente mientras se está reproduciendo un disco El sistema de reproducción automática no se puede utilizar con discos de 25 cm En este caso deberá reali zar la operación manualmente Si el brazo fonocaptor no vuelve a su posición original después de detener la reproducción pulse el botón STOP Pausa de la reproducción Tire de la pa...

Страница 33: ...erde Toma de tierra del canal derecho RG Azul Toma de tierra del canal izquierdo LG Parte superior R L RG LG Parte posterior del cartucho 2 Monte el cartucho Para conseguir el saliente necesario realice el montaje de tal forma que la punta de la aguja quede colocada a unos 45 mm del borde de la superficie de fijación del portacápsula la arandela de goma como se muestra en el diagrama siguiente El ...

Страница 34: ... en la punta de la aguja una gran cantidad de polvo Retire el portacápsula con el cartucho y utilice un pincel de punta suave o un pincel de escritura para eliminar con cuidado el polvo etc de la punta de la aguja Está ajustado correctamente el anti skating Ajuste el anti skating correctamente Está ajustada correctamente la altura del brazo Ajuste correctamente la altura del brazo Problema Verific...

Страница 35: ...ma de accionamiento por correa Motor Servo motor de CC Velocidad de rotación 33 1 3 rpm 45 rpm Lloro y fluctuación 0 1 o inferior a WRMS JIS WTD Relación señal ruido 60 dB DIN B Giradiscos Caja de fundición a presión de aluminio Parte del brazo fonocaptor Tipo de brazo Brazo fonocaptor de tipo recto con equilibrado estático Longitud efectiva 221 5 mm Saliente 19 mm Rango variable de presión de la ...

Страница 36: ...nics com In Canada Aux Canada http www pioneerelectronics ca S018_B1_EnFr PIONEER HOME ELECTRONICS CORPORATION 1 1 Shin ogura Saiwai ku Kawasaki shi Kanagawa 212 0031 Japan PIONEER ELECTRONICS USA INC P O BOX 1540 Long Beach California 90801 1540 U S A TEL 800 421 1404 PIONEER ELECTRONICS OF CANADA INC 340 Ferrier Street Unit 2 Markham Ontario L3R 2Z5 Canada TEL 1 877 283 5901 905 479 4411 PIONEER...

Отзывы: