Controls and displays
03
7
En
English
Deutsch
Français
Nederlands
Italiano
Español
Р
ус
ский
Chapter 3:
Controls and displays
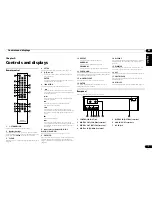
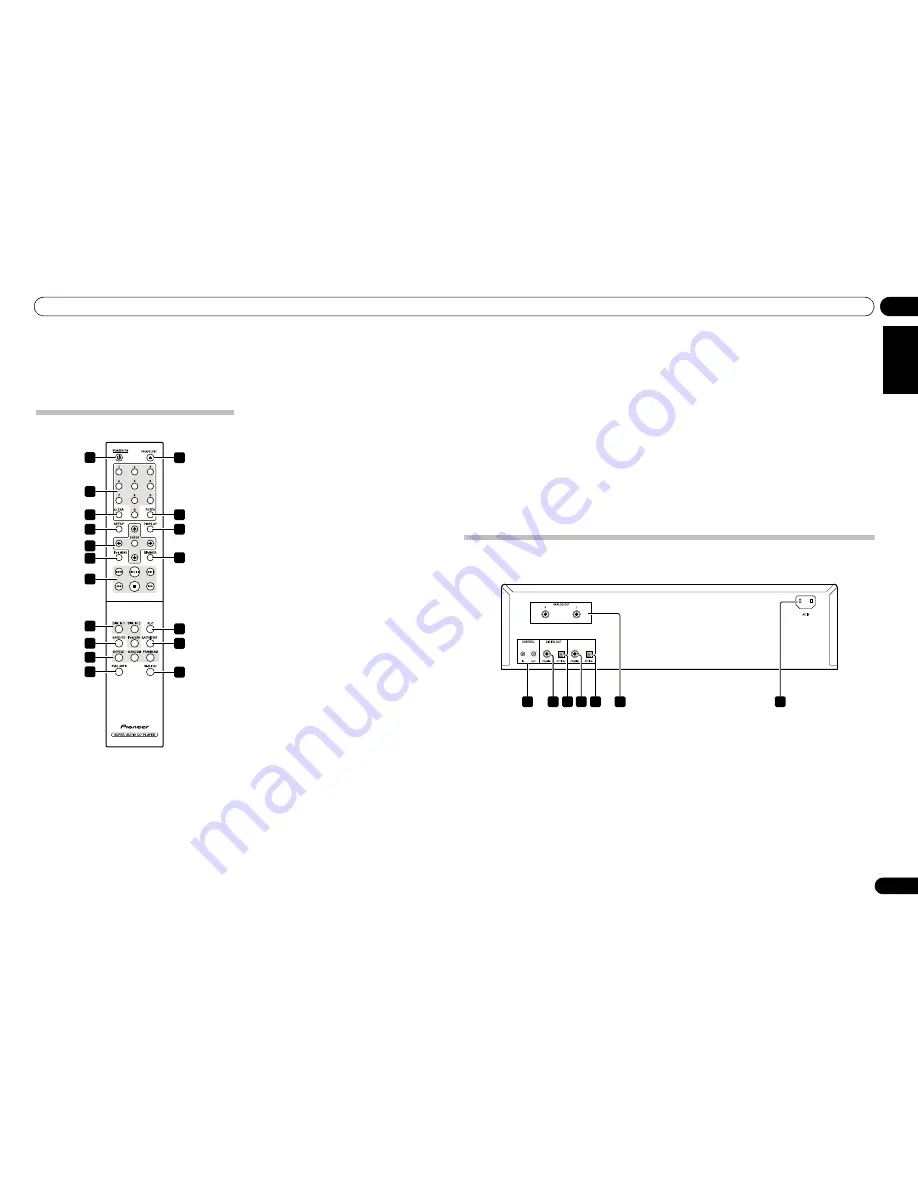
Remote control
1
STANDBY/ON
Switches the unit between standby and on.
2
Number buttons
Use these buttons when you wish to specify a certain
track for playback. Use the number buttons to select the
track, then press
ENTER
to confirm the selection.
3
CLEAR
Press to clear the contents set for programmed playback
(page 9).
4
SETUP
Use to set the auto power down function (page 12).
5
///
Use these to select items, change settings and
move the cursor.
ENTER
Use this to implement the selected item or enter a
setting that you have changed.
6
iPod MENU
Use when operating the iPod/iPhone/iPad menu.
7
Press to return to the beginning of the currently
playing track. Press twice to return to the beginning
of the previous track.
Press to start playback. During playback, pause/
unpause playback.
Press during playback to skip ahead to the
beginning of the next track.
Press to perform fast reverse on the currently
playing track. If the button is pressed again during
fast reverse, the reversing speed changes in four
steps.
Press to stop playback.
Press to perform fast forward on the currently
playing track. If the button is pressed again during
fast forward, the fast forward speed will change in
four steps.
8
Input selector buttons (DIG IN 1,
DIG IN 2, iPod/USB )
Press to select an input source.(page 10, 11, 12).
9
SACD/CD
Press to switch the unit’s input to SACD/CD. In the case
of hybrid SACD discs, if this button is pressed when
playback is stopped, the disc's playback area changes
(page 12).
1
12
13
14
15
16
17
18
2
3
4
6
8
10
11
9
7
5
10 REPEAT
Press to initiate repeat play (page 9).
RANDOM
Press to initiate random play (page 9).
PROGRAM
Press to initiate programmed playback (page 9).
11 PURE AUDIO
Press this button to activate the Pure Audio mode. In this
mode, audio playback is performed with greatest fidelity
to the original sounds (page 12).
12
OPEN/CLOSE
Press to open and close the disc tray (page 9).
13 ENTER
Use this to implement the selected item or enter a
setting that you have changed.
14 DISPLAY
Press to display various data about the disc, including
elapsed playing time and remaining playing time
(page 10).
15 DIMMER
Press to change the illumination levels for the main
unit’s front panel display and indicators (page 12).
16 ALC
Press to alternate Auto Level Control ON/OFF(page 12).
17 S.RETRIEVER
Press to alternate between sound retriever function
settings(page 12).
18 Hi-Bit 32
Press to alternate Hi-Bit 32 function ON/OFF (page 12).
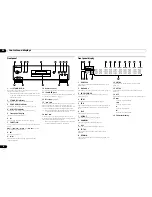
Rear panel
See page 5 for details regarding connections.
1
CONTROL IN/OUT jack
2
DIGITAL OUT (COAXIAL) terminal
3
DIGITAL OUT (OPTICAL) terminal
4
DIGITAL IN (COAXIAL) terminal
5
DIGITAL IN (OPTICAL) terminal
6
ANALOG OUT terminals
7
AC IN jack
DIGITAL IN
1
2 3 4 5
7
6
PD-50_PWSYXZT8.book 7 ページ
年
月
日 金曜日 午前
時
分

