Setting up
08
26
En
Chapter 8
Setting up
Setting up TV channels automatically
This section describes how to automatically search for and set up TV channels.
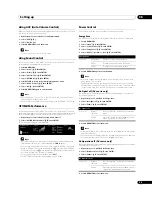
Using Auto Installation
When the flat screen TV is switched on for the first time after purchase, Auto
Installation menu appears on screen. For language, channel and time zone
selections, follow the steps below.
1
Select “Language” (
/
).
2
Select a language (
/
).
You can select from among four languages; English, Italian, Spanish and
Portuguese.
3
Select “Terrestrial Tuner” (
/
).
Use
/
to select “Digital”, “Analogue” or “Both” (default).
4
Select “Time Zone” (
/
).
Use
/
to select “NSW/ACT” (default), “VIC”, “QLD”, “SA”, “WA”, “TAS” or “NT”
(see page 37).
5
Select “Start” (
/
then ENTER).
Auto Installation automatically starts. To quit Auto Installation before it finishes,
press
RETURN
.
Note
• You can start Auto Installation from the HOME MENU after moving to another
city, for example. Follow the steps below before starting Auto Installation:
1
Press HOME MENU (
/
then ENTER).
2
Select “Setup” (
/
then ENTER).
3
Select “System Setup” (
/
then ENTER).
4
Select “Auto Installation” (
/
then ENTER).
The password entry screen appears. Enter your four-digit password using buttons
0
to
9
. See
Using a password
on page 44.
If no channel is found, check the antenna connections, and then retry Auto
Installation.
Note
• Channels obtained may vary depending on the installation environment and
weather conditions.
Setting up analogue TV channels manually
Use the Manual Adjust function to set up analogue TV channels manually.
1
Press HOME MENU.
2
Select “Setup” (
/
then ENTER).
3
Select “System Setup” (
/
then ENTER).
4
Select “Analogue TV Setup” (
/
then ENTER).
The password entry screen appears. Enter your four-digit password using buttons
0
to
9
. For the password, see
5
Select “Manual Adjust” (
/
then ENTER).
6
Select “Programme Entry” (
/
).
7
Select a programme number (
/
).
You can select 1 through 99.
8
Select “Search” (
/
).
9
Enter a frequency using buttons 0 to 9, then ENTER.
You can also press
/
to enter a frequency.
10 Select “Store” (
/
).
11 Select “Yes” or “No” (
/
).
12 Press HOME MENU again to exit the menu.
Alternatively, to set up for another channel, repeat steps 7 to 11.
Note
• Manual Adjust also allows you to make selections for “Tuner NR” and
“Channel Lock”. See
Reducing video noise
and
Setting Channel Lock
.
Reducing video noise
For the individual channels, you can specify whether the flat screen TV should
reduce video noise depending on the levels of broadcasting signals.
1
Repeat steps 1 to 5 provided for
Setting up analogue TV channels manually.
2
Select “Tuner NR” (
/
).
3
Select “On” (
/
).
4
Press HOME MENU to exit the menu.
Note
• This function may not achieve a satisfactory result, depending on the
conditions of broadcasting signals.
• The factory default is “On”.
Setting Channel Lock
Channel Lock inhibits selected TV channels from being tuned and watched.
1
Repeat steps 1 to 7 provided for
Setting up analogue TV channels manually.
After selecting a channel (using Programme Entry), perform the following steps:
2
Select “Channel Lock” (
/
).
3
Select “Block” (
/
).
The selection is switched between “View” (default) and “Block”.
4
Press HOME MENU to exit the menu.
Start
Language :
English
Terrestrial Tuner
:
Both
Time Zone
:
NSW/ACT
Item
Description
Yes
You can select the channel using
P+
/
P–
No
You cannot select the channel using
P+
/
P–
Manual Adjust
Label
Sort
Содержание Kuro PDP-C509A
Страница 1: ... 08G00001 ARB1580 A Printed in Japan ...
Страница 88: ... 08G00001 ARB1580 A Printed in Japan ...


