background image

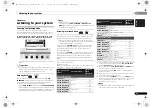
ARC (Audio Return Channel) function

27

En

06

06

English

Français

Español

Chapter 6:

ARC (Audio Return 
Channel) function

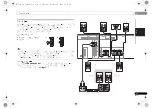
If your TV supports an audio return channel function, con-

nect your TV and this unit with an HDMI cable and the TV

audio will be inputted into this unit via the HDMI terminal

without the need for an audio cable to be connected. Turn

ON the “ARC” in the HDMI SETUP when using this function.

Important

• Use a High Speed HDMI

®

 Cable when using the ARC 

function. The ARC function may not operate properly with 

other HDMI cables.

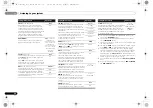
ARC Setup

1

Press 

 RECEIVER to switch the receiver on.

2

Press 

, then press SETUP.

The System Setup menu appears on the front panel display. 

Use 

///

 and 

ENTER

 on the remote control to 

navigate through the screens and select menu items. Press 

RETURN

 to confirm and exit the current menu.

• Press 

SETUP

 at any time to exit the System Setup menu.

3

Use 

/

 to select ‘HDMI SET’ from the System Setup 

menu, then press ENTER.

4

Use 

/

 to choose the ‘ARC’ setting you want.

When a TV supporting the HDMI Audio Return Channel 

function is connected to the receiver, the sound of the TV can 

be input via the HDMI terminal.

ON

 – The TV’s sound is input via the HDMI terminal.

OFF

 – The TV’s sound is input from the audio input 

terminals other than HDMI inputs.

5

When you’re finished, press RETURN.

You return to the System Setup menu.

Before starting ARC operation

When starting ARC operation, put the TV and this unit in

STANDBY mode after connecting this unit with the TV. Next,

turn ON the power of this unit and then the TV, in this order.

In order to start ARC operation, after connecting this unit to

a TV with an HDMI cable, you will need to switch the input

on the TV to the input mode required to connect to this unit.

Then, you can select a TV program.

Important

• The ARC function may not operate even if the above 

conditions are met. If this is the case, listen to the TV 

audio after connecting this unit and the TV with an audio 

cable.

• The CEC (Consumer Electronic Control) function may 

activate when the ARC function is turned ON, causing 

power to turn ON and OFF and the input to switch from 

one to another. Since this unit does not guarantee 

synchronized operation based on the CEC function, we 

recommend that you turn OFF the HDMI CONTROL 

setting on the connected player. This unit may not 

operate properly if the HDMI CONTROL on the player is 

ON. Refer to the relevant device’s instruction manual for 

details. If this does not work, turn OFF the ARC function.

If this is the case, listen to the TV audio after connecting 

this unit and the TV with an audio cable.

In addition, this unit does not guarantee synchronized 

operation that allows the TV remote control to operate the 

volume (including mute). Use this unit to operate the 

volume (including mute).

• Turn OFF the power and remove the power cord from the 

wall socket when connecting other devices or making 

connection changes to this unit. After all connections are 

completed, insert the power cord into the wall socket.

• If the power cord is connected when the ARC function is 

ON, the HDMI will take 2 to 10 seconds to initialize. This 

unit cannot be operated during the initialization. During 

initialization, the HDMI indicator on the display will blink. 

Turn ON the unit after blinking stops.

RECEIVER

06_HDMI control.fm  27 ページ  2011年7月22日 金曜日 午後6時7分

Содержание HTP-071

Страница 1: ...1 Zhtw English ϜН Español Operating Instructions HOME CINEMA PACKAGE ঢ় ቒଲ ၇ HTP 071 AUDIO VIDEO MULTI CHANNEL RECEIVER VSX 321 K P VSX 321 K P_DLPWXE book Page 1 Thursday September 8 2011 10 17 AM ...

Страница 2: ...ment on thick carpet or a bed D3 4 2 1 7b _A1_En Operating Environment Operating environment temperature and humidity 5 C to 35 C 41 F to 95 F less than 85 RH cooling vents not blocked Do not install this unit in a poorly ventilated area or in locations exposed to high humidity or direct sunlight or strong artificial light D3 4 2 1 7c _A1_En This product is for general household purposes Any failu...

Страница 3: ...ample when on vacation D3 4 2 2 1a_A1_En CAUTION The STANDBY ON switch on this unit will not completely shut off all power from the AC outlet Since the power cord serves as the main disconnect device for the unit you will need to unplug it from the AC outlet to shut down all power Therefore make sure the unit has been installed so that the power cord can be easily unplugged from the AC outlet in c...

Страница 4: ...ng antennas 15 Using external antennas 16 Plugging in the receiver 16 03 Basic playback Canceling the demo display 17 Playing a source 17 Selecting the audio input signal 17 Listening to the radio 18 Improving FM sound 18 Saving station presets 19 Listening to station presets 19 Naming preset stations 19 Changing the radio frequency step 19 Making an audio recording 20 04 Listening to your system ...

Страница 5: ...eakers Where you place the speakers will have a big effect on the sound Placing the speakers page 10 Connecting the speakers page 11 2 Connecting the components For surround sound you ll want to hook up using a digital connection from the Blu ray Disc DVD player to the receiver About video outputs connection page 13 Connecting a TV and playback components page 14 Connecting antennas page 15 Pluggi...

Страница 6: ...dicator Blinks when connecting an HDMI equipped component lights when the component is connected page 14 7 MASTER VOLUME dial 8 STANDBY ON 9 PHONES jack Use to connect headphones When the headphones are connected there is no sound output from the speakers The listening mode when the sound is heard from the headphone can be selected only from PHONES SURR STEREO or STEREO ALC mode 10 Listening mode ...

Страница 7: ...EXPRESS or DTS HD encoded audio signals is detected ES Lights to indicate DTS ES decoding 96 24 Lights when a source with DTS 96 24 encoded audio signals is detected NEO 6 When one of the NEO 6 modes of the receiver is on this lights to indicate NEO 6 processing page 21 20 Dolby Digital indicators 2D Lights when a Dolby Digital encoded signal is detected 2D Lights when a source with Dolby Digital ...

Страница 8: ...can be accessed after you have selected the corresponding input function button BD DVD etc Press first to access AUDIO PARAMETER Use to access the Audio options page 23 SETUP Press to access the System Setup menu page 25 RETURN Confirm and exit the current menu screen Press BD DVD or DVR BDR first to access TOP MENU Displays the disc top menu of a Blu ray Disc DVD HOME MENU Displays the HOME MENU ...

Страница 9: ... set the listening volume 15 MUTE Mutes unmutes the sound 16 DISP Switches the display of this unit The listening mode sound volume or input name can be checked by selecting an input source 17 SHIFT Press to access the boxed commands above the buttons on the remote These buttons are marked with an asterisk in this section Loading the batteries The batteries included with the unit are to check init...

Страница 10: ...ngle Place the center speaker above or below the TV so that the sound of the center channel is localized at the TV screen Also make sure the center speaker does not cross the line formed by the leading edge of the front left and right speakers It is best to angle the speakers towards the listening position The angle depends on the size of the room Use less of an angle for bigger rooms Surround and...

Страница 11: ...r wire is inserted fully into the speaker terminal If any of the bare speaker wire touches the back panel it may cause the power to cut off as a safety measure Connect the surround back speakers Connect the SURR BACK PRE OUT outputs of the unit and additional amplifier to add a surround back speaker You can use the additional amplifier on the surround back channel pre outs for a single speaker as ...

Страница 12: ... Plus Dolby TrueHD DTS HD Master Audio see below for limitations Video CD Super VCD and CD This receiver incorporates High Definition Multimedia Interface HDMI technology This receiver supports the functions described below through HDMI connections Digital transfer of uncompressed video contents protected by HDCP 1080p 24 1080p 60 etc 3D signal transfer Deep Color signal transfer x v Color signal ...

Страница 13: ...deo cable for coaxial digital connections Video cables Standard RCA video cables These cables are the most common type of video connection and are used to connect to the composite video terminals The yellow plugs distinguish them from cables for audio About video outputs connection This receiver is not loaded with a video converter When you use HDMI cables for connecting to the input device the sa...

Страница 14: ...ch to the DVD input then press SIGNAL SEL to choose the audio signal C1 COAXIAL1 see Selecting the audio input signal on page 17 HDMI VIDEO L R R L COAXIAL AUDIO SPEAKERS ANTENNA OPTICAL ASSIGNABLE OUT A CD R TAPE OUT SURRBACK PREOUT L R Single CD R TAPE IN CD SAT MONITOR OUT CD SAT DVD IN TV IN IN DVD DVR BDR IN DVD IN BD IN CD SAT TV IN 1 IN 1 FM UNBAL 75 AMLOOP FRONT CENTER SURRO R R L HDMIIN H...

Страница 15: ...loop antenna and the FM wire antenna as shown below To improve reception and sound quality connect external antennas see Using external antennas below 1 Push open the tabs then insert one wire fully into each terminal then release the tabs to secure the AM antenna wires 2 Fix the AM loop antenna to the attached stand To fix the stand to the antenna bend in the direction indicated by the arrow fig ...

Страница 16: ...you an electric shock Check the power cord once in a while If you find it damaged ask your nearest Pioneer authorized independent service company for a replacement Do not use any power cord other than the one supplied with this unit Do not use the supplied power cord for any purpose other than that described below The receiver should be disconnected by removing the mains plug from the wall socket ...

Страница 17: ...al and listening mode check the connections and settings Note You may need to check the digital audio output settings on your DVD player or digital satellite receiver It should be set to output Dolby Digital DTS and 88 2 kHz 96 kHz PCM 2 channel audio and if there is an MPEG audio option set this to convert the MPEG audio to PCM Depending on your DVD player or source discs you may only get digital...

Страница 18: ...no and AM 3 Tune to a station There are three ways to do this Automatic tuning To search for stations in the currently selected band press and hold TUNE for about a second The receiver will start searching for the next station stopping when it has found one Repeat to search for other stations Manual tuning To change the frequency one step at a time press TUNE High speed tuning Press and hold TUNE ...

Страница 19: ...r preset stations 1 Choose the station preset you want to name See Listening to station presets above for how to do this 2 Press TUNER EDIT twice The cursor at the first character position is blinking on the display 3 Input the name you want Choose a name up to eight characters long Use PRESET to select character position Use TUNE to select characters The name is stored when ENTER is pressed Tip T...

Страница 20: ...buttons on the remote control or by using the front panel INPUT SELECTOR dial 2 Select the audio input signal if necessary Press SIGNAL SEL and select the analog inputs A for the source component of which you want to record see page 17 for more on this 3 Prepare the source you want to record Tune to the radio station load the CD etc 4 Prepare the recorder Insert a blank tape MD etc into the record...

Страница 21: ...oofer depending on your speaker settings Dolby Digital and DTS multichannel sources are downmixed to stereo The following modes provide basic surround sound for stereo and multichannel sources Explanatory notes No No connected Yes Connected Two Two speakers are connected Whether connected or no a If surround back channel processing page 23 is switched off or the surround back speakers are set to N...

Страница 22: ...be out of phase and an unreliable sound image will be produced If the speaker distance is not properly set you may not have a maximized Phase Control effect The Phase Control mode cannot be set to ON in the following cases When the PURE DIRECT mode is switched on When the headphones are connected ACTION Designed for action movies with dynamic soundtracks DRAMA Designed for movies with lots of dial...

Страница 23: ...e set the setting to OFF 1 Switch the receiver into standby 2 While holding down PRESET on the front panel and hold the STANDBY ON for about two seconds UP MIX OFF appears and the Up Mix function turns off If you want to turn this function on perform steps 1 and 2 again When set to ON the Up Mix indicator on the front panel lights Note Set to ON regardless of this setting when playing DTS HD signa...

Страница 24: ... TrueHD DTS HD and DTS HD Master Audio you may need to use this feature when listening to surround sound at low volumes AUTOd MAX MID OFF Setting What it does Option s LFE ATT LFE Attenuate Some Dolby Digital and DTS audio sources include ultra low bass tones Set the LFE attenuator as necessary to prevent the ultra low bass tones from distorting the sound from the speakers The LFE is not limited w...

Страница 25: ...X2 or none If you didn t connect surround back speakers choose NO If you select one surround back speaker only make sure that additional amplifier is hooked up to the PRE OUT L Single terminal SW Subwoofer LFE signals and bass frequencies of channels set to SMALL are output from the subwoofer when YES is selected see notes below Choose the PLUS setting if you want the subwoofer to output bass soun...

Страница 26: ...tput at low volumes You may need to adjust the level after testing with an actual soundtrack 6 When you re finished press RETURN You return to the Speaker Setup menu Tip You can change the channel levels at any time by press then press CH SELECT and LEV on the remote control You can also press CH SELECT and use to select the channel and then use to adjust the channel levels Speaker Distance For go...

Страница 27: ...o start ARC operation after connecting this unit to a TV with an HDMI cable you will need to switch the input on the TV to the input mode required to connect to this unit Then you can select a TV program Important The ARC function may not operate even if the above conditions are met If this is the case listen to the TV audio after connecting this unit and the TV with an audio cable The CEC Consume...

Страница 28: ...component is connected correctly refer to Connecting your equipment on page 10 Use the same type of video cables for the source component and TV to connect to this receiver see About video outputs connection on page 13 The video input selected on the TV monitor is incorrect Refer to the instruction manual supplied with the TV No sound from subwoofer The Dolby Digital or DTS source you are listenin...

Страница 29: ...n the HDMI equipped component you are connecting check with the manufacturer for HDMI compatibility information If you aren t receiving HDMI signals properly through this receiver from your component please try the following configuration when connecting up Configuration Connect your HDMI equipped component directly to the display using an HDMI cable Then use the most convenient connection digital...

Страница 30: ...220 V to 240 V 50 Hz 60 Hz Power Consumption 175 W In standby 0 45 W ARC function OFF Dimensions 435 mm W x 168 mm H x 362 5 mm D Weight without package 7 6 kg Furnished Parts Remote control 1 Dry cell batteries AAA size IEC R03 2 AM loop antenna 1 FM wire antenna 1 Power cord These operating instructions Note The specifications are applicable when the power supply is 230 V Specifications and the ...

Страница 31: ...Additional information 31 En 07 07 English ϜН Español 07_additional_info fm 31 ページ 2011年9月1日 木曜日 午後8時23分 ...

Страница 32: ... ڐ у ߩঢ় ңഋĩԄ ୧ཿңഋՅߞ ٻ ңܼᓢᢉϜȂ ܗ ٻ ңܼ آ ٚ ܗ ϜĪՅᏳयึҢࢉሬ ٯ ሰ ঔ౪ȂӶ ߴң ܜ ᐋঔ౪ຳңȄ ॴ ݨ ཏ ٲ ԋ၇ҐᐡਣȂ ጃۢӶҐᐡѳ ڻ Ⴒ ޫޠ пւ ॴȞദഌijıġŤŮȃन८IJıġŤŮȃІ ڎ IJıġŤŮпαȟȄ ឍ ᐡ෧α ڏ ԥϟᖂራІ πңܼ ॴȂпጃߴҐ ࠣϟҔ ளᐈձ ٯ ЦႇዦȄ ᗘռЭ د Ȃ Ͻஈ π ܗ ң ޑ ࠣȞԄൣિȃ ҁȃᛩᄎȟ ڐ ᇑȂη ϽӶࠕ෨ ܗ ט αᐈձҐᐡȄ D3 4 2 1 7b _A1_Zhtw Anki VSX 321 K P_DLPWXE book Page 2 Thursday September 8 2011 10 17 AM ...

Страница 33: ...3 Zhtw English ϜН Español D3 4 2 2 1a_A1_Zhtw STANDBY ON D3 4 2 2 2a _A1_Zhtw K058c_A1_Zhtw Pb VSX 321 K P_DLPWXE book Page 3 Thursday September 8 2011 10 17 AM ...

Страница 34: ...15 連接天線 15 使用外部天線 16 插上接收器電源 16 03 基本播放功能 取消示範顯示 17 播放來源 17 選擇音訊輸入訊號 17 收聽收音機 18 改善 FM 音質 18 儲存預設電台 19 收聽預設電台 19 命名預設電台 19 切換無線電頻率間隔 19 錄音 20 04 聆聽您的系統 選擇聆聽模式 21 自動播放 21 使用環繞音效聆聽 21 使用先進環繞聲 22 使用直流 22 使用聲音修正器功能 22 使用相位控制獲得更佳音效 22 使用後環繞聲道處理模式 23 設定 Up Mix 功能 23 設定音訊選項 23 05 系統設定選單 使用系統設定選單 25 揚聲器設定選單 25 揚聲器設定 25 分頻器 25 聲道位準 26 揚聲器距離 26 自動電源關閉選單 26 FL 示範模式選單 26 06 使用 ARC 音訊返回通道 功能 ARC 設定 27 啟動 ARC 操...

Страница 35: ...器的位置對音效產生極大的影響 揚聲器之擺設 第 10 頁 連接揚聲器 第 11 頁 2 連接設備 要產生環繞音效 需將 Blu ray Disc 播放機 DVD 播放器利用數位接線連接至接收器上 關於連接視訊輸出 第 13 頁 連接電視機及播放設備 第 14 頁 連接天線 第 15 頁 插上接收器電源 第 16 頁 3 開啟電源 確定已設定好電視機的視訊輸入 若不知如何設 定 請參閱電視機隨附手冊 4 請根據您居住的地區及環境進行初始設定 切換無線電頻率間隔 第 19 頁 5 FL 示範模式選單 第 26 頁 不想要在前面板顯示幕上展示示範顯示時 使用音訊返回通道功能 第 27 頁 連接的電視支援 HDMI 音訊返回通道功能 時 6 播放來源 第 17 頁 選擇音訊輸入訊號 第 17 頁 選擇聆聽模式 第 21 頁 7 調整所需要的聲音 使用聲音修正器功能 第 22 頁 使用相位控制獲得更...

Страница 36: ...接上時 不會有聲音從揚聲器輸 出 在從耳機聽到聲音時 只能使用 PHONES SURR STEREO 或 STEREO ALC 模式選擇聆聽模式 10 聆聽模式按鍵 AUTO SURROUND STREAM DIRECT 在自動環 繞聲模式 第 21 頁 與直流播放 第 22 頁 之間切換 ALC STANDARD SURR 按下可進行標準解碼 並能在 2 Pro Logic II 2 Pro Logic IIx 和 NEO 6 模式 以及自動音量控制立體聲模式 第 21 頁 間切換 ADVANCED SURROUND 可於各種環繞模式中 進行切換 第 22 頁 STEREO 按下可選擇立體聲播放 第 21 頁 AUDIO VIDEO MULTI CHANNEL RECEIVER MASTER VOLUME STANDBY ON INPUT SELECTOR STEREO SOUND RE...

Страница 37: ...D 解碼音 訊訊號時會亮起 ES 亮起表示 DTS ES 解碼中 96 24 偵測到含 DTS 96 24 解碼音訊訊號時會亮 起 NEO 6 當接收器其中一種 NEO 6 模式啟用 亮 起表示正在進行 NEO 6 處理 第 21 頁 20 Dolby Digital 指示燈 2D 偵測到 Dolby Digital 編碼訊號時會亮起 2D 偵測到含 Dolby Digital Plus 解碼音訊訊 號時會亮起 2HD 偵測到含 Dolby TrueHD 解碼音訊訊號時 會亮起 EX 亮起表示 Dolby Digital EX 解碼中 2PLII x 在指示 2 Pro Logic II 2 Pro Logic IIx 解碼中時亮起 如需有關本功能的詳細資訊 請參閱第 21 頁的使用環繞音效聆聽 乙節 21 ADV S 已選取其中一種先進環繞聲模式時會亮起 詳情請參 閱第 22 頁的使用先...

Страница 38: ...BDR 以選取 TOP MENU 可顯示 Blu ray Disc DVD 的 頂層 選單 HOME MENU 顯示 HOME MENU 畫面 RETURN 確認並退出目前的選單畫面 MENU 可顯示 Blu ray Disc 播放機的 TOOLS 選 單 首先按下 TUNER 以選取 TUNER EDIT 記憶喚回的電台 第 18 頁 也 可用於變更名稱 第 19 頁 BAND 切換 AM FM ST 立體聲 和 FM MONO 廣播頻段 第 18 頁 9 TUNE PRESET ENTER 可使用箭頭按鍵進行環繞音效系統的設定 第 25 頁 亦用於控制 Blu ray Disc DVD 選單 選項 使用 TUNE 可用於搜尋無線電頻率 而 PRESET 可用於選擇預設無線電電台 第 19 頁 10 設備控制按鍵 這些主要按鍵 等 用以控制使用輸入功能按 鍵選取後的設備 這些按鍵上方的控...

Страница 39: ...閉先鋒 DVD DVR 裝置電源 13 TV CONTROL 按鍵 這些按鍵僅可使用先鋒電視控制 可用以開啟 關閉電視機電源 INPUT 可用以選擇電視機輸入訊號 CH 可用以選擇聲道 VOL 可用以調整電視機音量 DTV TV 在先鋒電視的數位電視與類比電視輸 入模式之間切換 14 MASTER VOLUME 用以設定聆聽的音量大小 15 MUTE 可進行靜音 取消靜音 16 DISP 切換本機的顯示幕 選擇輸入來源可檢查聆聽模式 音量或輸入名稱 17 SHIFT 按下可使用遙控器上的 方形 指令 位於按鍵上 方 這些按鍵在本節中皆有星號標示 裝入電池 本機內附的電池可用於檢查初始操作 電池電量可能 不夠長時間使用 建議使用壽命較長的鹼性電池 注意 電池使用不當會導致滲漏及爆炸等危險 請遵守 下列安全注意事項 新舊電池切勿混合使用 裝入電池時 請正確對照電池匣內的正負極標 示 電池形狀雖...

Страница 40: ...距離的位置 若有使用中置揚聲器 請將前置揚聲器擺在較寬的角度上 若沒使用 則擺在 較窄的角度上 請將中置揚聲器擺在電視機上方或下方 以使中置聲道如同座落在電視機螢幕 上一樣 另外 請確定中置揚聲器並未超過左 右前置揚聲器前緣的連線上 揚聲器面對聆聽位置為最佳角度 此角度取決於房間的大小 房間越大 所使 用的角度越小 環繞及後環繞揚聲器應擺在高出您耳朵 60 cm 至 90 cm 的位置 並向下微傾 揚聲器請不要面向彼此擺放 對於 DVD Audio 揚聲器要比家庭劇院播放時 更直接放在聆聽者身後 如果環繞聲揚聲器無法直接設定為 7 1 聲道系統的聆聽位置 關閉 Up Mix 功 能可以增強環繞聲效果 請參閱第 23 頁的設定 Up Mix 功能 乙節 請不要將環繞揚聲器擺在比前置及中置揚聲器距離聆聽位置更遠的地方 以免 減弱環繞聲的效果 注意 請確定所有揚聲器均已牢牢安裝 這不僅有助於改善...

Страница 41: ...的 SURR BACK PRE OUT 輸出和另外的擴大機以增加後環繞揚聲器 您也可以在後環繞聲道前置輸出上連接另外的擴大機供單體揚聲器使用 此 時 僅將擴大機入左聲道 L Single 端子 1 推開端子 插入裸露的導線 2 鬆開端子 1 2 HDMI VIDEO L R R L COAXIAL AUDIO SPEAKERS ANTENNA OPTICAL ASSIGNABLE OUT A CD R TAPE OUT SURRBACK PREOUT L R Single CD R TAPE IN CD SAT MONITOR OUT CD SAT DVD IN TV IN IN DVD DVR BDR IN DVD IN BD IN CD SAT TV IN 1 IN 1 FM UNBAL 75 AMLOOP FRONT CENTER SURROUND SUBWOOFER R L R L...

Страница 42: ...D 及 CD 本接收器整合高傳真多媒體介面 HDMI 技術 本接收器支援以下描述的透過 HDMI 連接的功能 數位傳送未壓縮的視訊 內容受到 HDCP 的保護 1080p 24 1080p 60 等 3D 訊號傳送 Deep Color 訊號傳送 x v Color 訊號傳送 音訊返回通道 請參閱第 27 頁的使用 ARC 音 訊返回通道 功能 乙節 輸入最多 8 個頻道的多頻道線性 PCM 數位音訊訊 號 192 kHz 或以下 輸入下列數位音訊格式 Dolby Digital Dolby Digital Plus DTS 高位 元率音訊 Dolby TrueHD DTS HD Master Audio DVD Audio CD VCD 超級 VCD 附註 使用 High Speed HDMI Cable 若使用除 High Speed HDMI Cable 以外的 HDMI 連接線 則...

Страница 43: ...若將連 接線折彎繞過尖角 可能會造成損壞 標準 RCA 視訊線也可用於同軸數位連接 視訊線 標準 RCA 視訊線 此種連接線為最常用類型的視訊接線 主要是用來連 接複合視訊端子 黃色插頭則是用來區別視訊線與音 訊線 關於連接視訊輸出 本接收器未搭載視訊轉換器 當您使用 HDMI 連接線 來連接至輸入裝置時 應使用相同的連接線連接至電 視機 來自本機類比 複合 視訊輸入的訊號將不會從 HDMI OUT L R AUDIO 白色 左 紅色 右 COAXIAL IN OPTICAL IN 同軸數位 音訊線 光纖線 VIDEO 黃色 VIDEO VIDEO IN IN HDMI MONITOR OUT HDMI OUT 用於連接來源裝置的端子 用於連接電視機監視器的端子 播放設備 電視機 可輸出視訊訊號 VSX 321 K P_DLPWXE book Page 13 Thursday Septem...

Страница 44: ... IN CD SAT MONITOR OUT CD SAT DVD IN TV IN IN DVD DVR BDR IN DVD IN BD IN CD SAT TV IN 1 IN 1 FM UNBAL 75 AMLOOP FRONT CENTER SURRO R R L HDMIIN HDMIOUT R L DIGITALAUDIOOUT ANALOGAUDIOOUT OPTICAL 選擇一台 HDMI DVI 相容 電視機 HDMI DVI 相容 Blu ray Disc 播放機 若電視不支援 HDMI 音訊返 回通道功能 則需要此連接 來聆聽接收器上的電視音效 HDMI VIDEO L R R L COAXIAL AUDIO SPEAKERS ANTENNA OPTICAL ASSIGNABLE OUT A CD R TAPE OUT SURRBACK PREOUT L R Sin...

Страница 45: ...效果的方向 4 將 FM 線型天線連接至 FM 天線插座 為了能獲得最佳的接收效果 請將 FM 天線完全展開 並固定到牆上或門框上 切勿將線鬆弛地垂掛或捲 起 VIDEO L R R L COAXIAL AUDIO SPEAKERS ANTENNA OPTICAL ASSIGNABLE OUT A CD R TAPE OUT SURRBACK PREOUT L R Single CD R TAPE IN CD SAT MONITOR OUT CD SAT DVD IN TV IN IN DVD DVR BDR IN DVD IN BD IN CD SAT TV IN 1 IN 1 FM UNBAL 75 AMLOOP FRONT CENTER SURROUN R R L R L DIGITALAUDIOOUT ANALOGAUDIOOUT OPTICAL COAXIAL VIDEOOUT ...

Страница 46: ...佈置上不可會有腳踩到的情 形 破損的電源線會引起火災或讓您遭受電擊 請每隔一段時間檢查一次電源線 若您發現到有 破損 請洽最近的先鋒授權服務公司尋求更換 請勿使用不是本機隨附的其他電源線 請勿將電源線用於非下列所述之範圍 不常使用時 例如 休假時 本機應把主電源插 頭從牆上插座拔掉將電源切斷 附註 連接此接收器至 AC 電源插座後 開始 2 秒至 10 秒的 HDMI 初始化程序 在此程序期間無法執 行任何操作 在此程序期間 前面板顯示幕的 HDMI 指示燈閃爍 您可以在它一停止閃爍時即開 啟此接收器的電源 將 HDMI 設定 ARC 設定為 OFF 時 您可略過此程序 詳情請參閱第 27 頁的 使用 ARC 音訊返回通道 功能 乙節 1 將隨附的電源線插入接收器背面的 AC IN 插座內 2 將另一端插入電源輸出插座內 ANTENNA FM UNBAL 75 75 Ω 同軸連接線 J 型...

Страница 47: ...PEG 音訊轉換成 PCM 因 DVD 播放器或碟片的不同 您可能只能取得數 位雙聲道立體聲和類比音效 此時若您想要聆聽 多聲道環繞音效 接收器必須設為多聲道聆聽模 式 5 使用 MASTER VOLUME 可調整音量 轉低您電視機的音量 如此才能讓所有音效能直接來 自連接本接收器的揚聲器 選擇音訊輸入訊號 可選擇各輸入來源使用的音訊輸入訊號 完成設定 後 每當您使用輸入功能按鍵選擇輸入來源時 就會 套用已選擇的音訊輸入 按下SIGNAL SEL按鍵選取相對於來源設備的音訊 輸入訊號 每次按下時可選取以下選項 H 選擇 HDMI 訊號 H 可選擇用於 BD DVD DVR BDR 及 CD SAT 輸入 至於其他輸入 則無 法選用 H 當第 23 頁的設定音訊選項 中的 HDMI 選項設 定為 THRU 時 將會透過電視機而非本接收器 聽到聲音 C1 O1 選取數位輸入 選擇同軸 1 輸入...

Страница 48: ...索到電台為止 要搜索 其他電台 請重複上述步驟 手動調諧 要逐步變更頻率 請按下 TUNE 按鍵 高速調諧 持續按住 TUNE 按鍵可進行高速調諧 搜索 到所需頻率時請放開按鍵 改善 FM 音質 若在調選到一 FM 電台時因訊號微弱而導致 TUNE 或 ST 指示燈未亮 請將接收器切換至單聲道接收模式 按下 BAND 以選取 FM MONO 如此應可有效改善音質 進而享受廣播的樂趣 CH VOL DVR BDR CD CD R ADAPTER TUNER PORTABLE PHASE SIGNAL SEL S RETRIEVER ENTER MUTE RETURN AUDIO PARAMETER TUNER EDIT TOOLS MASTER VOLUME BAND MENU TOP MENU TUNE TUNE P R E S E T P R E S E T HOME MENU SETU...

Страница 49: ...標在顯示幕上閃爍 3 輸入想要的名稱 選擇最多八個字元長度的名稱 可用 PRESET 以選擇字元位置 可用 TUNE 以選擇字元 按下 ENTER 時會儲存名稱 提示 若要刪除電台名稱 請依照步驟 1 與 2 然後在 顯示幕空白時按下 ENTER 在顯示幕空白時按下 TUNER EDIT 以保留之前的名稱 將預設電台命名後 請按 DISP 以顯示名稱 要返 回頻率顯示時 按數次 DISP 以顯示頻率 切換無線電頻率間隔 若發現無法成功調選到電台 則表示該頻率間隔不適 用於所在的國家 地區 以下為切換設定值的方式 1 將接收器切換成待機 2 在按住 TUNE 按鍵時 同時按住 STANDBY ON 按鍵約兩秒鐘 每次操作時 可輪流切換 10K STEP 與 9K STEP 的 聲道調諧間隔 INPUT SELECT SOURCE SLEEP TV CONTROL INPUT RECEIVER...

Страница 50: ...OR 旋鈕來選擇輸入來 源 2 選擇音訊輸入訊號 如有必要 若要錄製來源設備 請按下 SIGNAL SEL 鍵並選擇類 比輸入 A 有關詳細資料請參閱第 17 頁 3 準備好要錄製的來源 請調選電台 置入 CD 等 4 準備好錄製設備 將空白的錄音帶 MD 等置入錄製設備並設定錄製音 量 若不確定如何進行 請參閱錄製設備隨附操作手冊 5 開始錄製 然後開始播放來源設備 附註 接收器的音量 平衡 音調 低音 高音 響 度 及環繞音效不會對錄製訊號造成影響 INPUT SELECT SOURCE SLEEP TV CONTROL INPUT RECEIVER CH VOL RECEIVER BD DVD TV DVR BDR CD CD R ADAPTER TUNER PORTABLE PHASE SIGNAL SEL S RETRIEVER DTV TV VSX 321 K P_DLPWXE...

Страница 51: ...道音效 b 您也可調整 C WIDTH DIMEN 及 PNRM 音效 請參閱第 23 頁的設定音訊選項 乙節 c 您也可調整 C IMG 音效 請參閱第 23 頁的設定 音訊選項 乙節 d 本模式只能在關閉後環繞揚聲器聲道處理 第 23 頁 後選擇 e 您可使用 STEREO 按鍵來選擇 STEREO 模式 聲音可配合環繞音效設定聆聽 同時還可使用 午夜 響度 相位控制 聲音修正器及音調等功 能 附註 在各項能提供 6 1 聲道音效的模式中 相同的訊 號會從兩個後環繞揚聲器聽到 ADV SURR AUTO DIRECT AUDIO PARAMETER TUNER EDIT TOOLS MASTER VOLUME BD MENU ALC STANDARD STEREO SOUND RETRIEVER STEREO ADVANCED SURROUND DISPLAY BAND TUNER E...

Страница 52: ...定為 ON 開啟 PURE DIRECT 模式時 連接耳機時 ACTION 專為帶有動態音效音軌的動作片使 用 DRAMA 專為帶有大量對話內容的影片使 用 ENT SHOW 適用於歌舞劇來源 ADVANCED GAME 適用於電玩遊戲 SPORTS 適用於體育節目 CLASSICAL 可提供大型音樂廳類型的音效 ROCK POP 針對搖滾及 或流行音樂建立現場 演唱會音效 UNPLUGGED 適用於音場音樂來源 EXT STEREO 能利用所有揚聲器為立體聲來源提 供多聲道音效 F S S ADVANCE 前場前環繞聲 可讓您僅使用前置揚聲器及重低音 來建立自然環繞音效 用於提供豐富的環繞音效 該音效 指向左 右前置揚聲器音效投射區 域匯集的中央部分 PHONES SURR 在透過耳機聆聽時 仍然可以享受 到整體環繞的效果 BD MENU ADV SURR ADVANCED SURROU...

Страница 53: ...動設定為 OFF 視輸入 訊號和聆聽模式而定 設定音訊選項 在此有許多額外的聲音設定值 讓您可以利用 AUDIO PARAMETER 選單來完成 如未說明 預設值均以粗 黑體字 重要 注意 若是有一設定值沒有在 AUDIO PARAMETER 選單中出現 則表示其不適用於目 前的來源 設定值以及接收器的狀態 1 按下 然後按下 AUDIO PARAMETER 按 鍵 2 使用 以選取您要調整的設定值 視接收器目前的狀態 模式而定 某些選項可能會無 法選取 請參照下表與此相關的備註 3 使用 依所需設定 請參照下表各項設定值可供使用的選項 4 按下 RETURN 確認並退出選單 INPUT SELECT SOURCE SLEEP TV CONTROL INPUT RECEIVER RECEIVER 1 4 7 MIDNIGHT 2 5 8 SPEAKERS LEV SB CH DISP TE...

Страница 54: ...Dolby Digital DTS Dolby Digital Plus Dolby TrueHD DTS HD 和 DTS HD Master Audio 最佳化之電影原聲配樂的動態範圍位 準 小聲聆聽環繞音效時 可能需 要用到此功能 AUTOd MAX MID OFF 設定 功能 選項 LFE ATT LFE 衰減 有些 Dolby Digital 及 DTS 音源中含 有超低頻低音音調 請依需要設定 LFE 衰減器 以免超低頻低音音調造 成揚聲器的聲音失真 當設定至 0 dB 時不限制 LFE 此為 建議值 當設定至 15 dB 時 LFE 則有其各別限制的程度 選擇 OFF 時 不會從 LFE 聲道輸出音效 0 0 dB 5 5 dB 10 10 dB 15 15 dB 20 20 dB OFF HDMI HDMI 音訊 可指定 HDMI 音訊訊號自本接收器傳 出 AMP 或通過至...

Страница 55: ...量 一部 X1 二部 X2 或無 若是您沒有 連接後環繞揚聲器 請選擇 NO 若只選取一個後環繞揚聲器 則請確定該額外揚 聲器已接至 PRE OUT L Single 端子上 SW 重低音 設定為 SMALL 的聲道的 LFE 訊 號及低音頻率 在選取 YES 時會經由重低音輸出 請參閱以下的附註說明 若希望重低音能持續 輸出低音音效或想要更深沉的低音 可選擇 PLUS 設定值 一般經由前置及中置揚聲器輸出的低音 頻率也會傳送至重低音上 若未連接重低音 請 選擇 NO 低音頻率會經由其他揚聲器輸出 4 操作完成 按下 RETURN 此時會回到 Speaker Setup 選單 附註 若前置揚聲器的設定選取 SMALL 重低音揚聲器 便會固定設定為 YES 另外 若是前置揚聲器設 定為 SMALL 中置 環繞及後環繞揚聲器便不能 設定為 LARGE L 此時 所有的低音頻率會 全部傳送至重低...

Страница 56: ...請從主要聆聽位置擷 取讀數 並將每只揚聲器的位準調至 75 dB SPL C 加權 慢速讀取 重低音測試音以低音音量輸出 使用實際音軌測試 後 可能需要再調整音量等級 6 操作完成 按下 RETURN 此時會回到 Speaker Setup 選單 提示 您可以隨時按下 然後按遙控器上的 CH SELECT 和 LEV 來變更聲道位準 您也可以 按 CH SELECT 及使用 選擇聲道 然後使用 調整聲道位準 揚聲器距離 為使系統的聲音能有正確的深度及分離度 因此必須 在指定揚聲器與聆聽位置間的距離 本接收器隨後便 可加入正確的延遲以產生強而有力的環繞音效 1 使用 按鍵從 System Setup 選單中選取 SP SETUP 設定 然後按 ENTER 2 使用 按鍵從 SP SETUP 選單中選取 SP DISTN 設定 然後按 ENTER 3 使用 選擇要設定距離的揚聲器 使用 至調整...

Страница 57: ...效從 HDMI輸入以外的音訊輸入端子 輸入 5 操作完成 按下 RETURN 此時會回到 System Setup 選單 啟動 ARC 操作前 開始 ARC 操作前 連接本機與電視後 讓電視與本 機進入待機模式 接著 依此順序開啟本機電源然後 再開啟電視電源 為啟動 ARC 操作 在以 HDMI 纜 線連接本機與電視後 您將需要切換電視輸入為連接 本機所需的輸入模式 然後您即可選擇電視節目 重要 即使符合以上條件 也有可能無法操作 ARC 功 能 若真是如此 請在連接本機與音訊纜線後聆 聽電視音訊 當 ARC 功能為開啟時 CEC 消費電子控制 功 能即會啟動 並造成電源開啟與關閉且輸入切換 因本機不保證採 CEC 功能架構的同步操作 所以 建議您關閉連接播放器上的 HDMI CONTROL 設 定 若播放器上的 HDMI CONTROL 為開啟 則 本機可能無法正確操作 有關詳細資訊 請...

Страница 58: ...節 請使用適用於來源設備與電視的相同類型視訊連 接線 以連接此接收器 請參閱第 13 頁的關於 連接視訊輸出 乙節 電視機選取的視訊輸入錯誤 請參閱電視機隨附 的操作手冊 重低音沒有聲音 所聆聽的Dolby Digital或DTS來源可能不含LFE聲 道 在第 25 頁的揚聲器設定 中將重低音設定切換為 YES 或 PLUS 在第 24 頁上將 LFE ATT LFE 衰減 切換為 LFEATT 0 或 LFEATT 5 環繞或中置揚聲器沒有聲音 正確連接揚聲器 請參閱第 11 頁 請參閱第 25 頁的揚聲器設定 乙節 檢查揚聲器設 定 請參閱第 26 頁的聲道位準 乙節 檢查揚聲器音 壓 相位控制功能似乎沒有提供音效 確定已正確設定所有揚聲器的揚聲器距離 請參 閱第 26 頁的揚聲器距離 乙節 廣播節目中有明顯雜音 接上天線 第 15 頁 並調整至最佳接收的方位 將鬆散的連接線排放在遠離...

Страница 59: ... 線 都可能造成雜訊或音訊中斷 關於 HDMI 連接線的重要資訊 以下為您可能無法透過本接收器傳送HDMI訊號的範 例 此取決於您連接的 HDMI 設備 關於 HDMI 相 容資訊 請洽詢設備製造商 若無法透過本接收器從您的設備正確接收 HDMI 訊 號 請在連接時嘗試使用以下配置方式 配置 使用 HDMI 連接線直接將 HDMI 設備接上顯示器 然 後最便利的連接方式 建議使用數位連接 來傳送音 訊至接收器 關於音訊連接的更多資訊 請參閱操作 說明 使用此配置時 請將顯示裝置的音量設定為最 小 附註 視設備而定 音訊輸出可能會受到連接顯示裝置 可用聲道數的限制 例如 如使用有立體聲音訊 限制的監視器 音訊輸出將減至雙聲道 若要切換輸入來源 您必須切換接收器與顯示裝 置上的功能 使用 HDMI 連接線時 由於顯示裝置的聲音會關 閉 因此您必須在每次切換輸入來源時調整顯示 器的音量 重新設定...

Страница 60: ...型 A 19 針 HDMI 輸出類型 5 V 100 mA 其他資訊 電源需求 AC 220 V 至 240 V 50 Hz 60 Hz 消耗功率 175 W 待機時 0 45 W ARC 功能 OFF 尺寸 435 mm 寬 x 168 mm 高 x 362 5 mm 深 重量 不含包裝 7 6 kg 隨附配件 遙控器 1 乾電池 AAA IEC R03 2 AM 環型天線 1 FM 線型天線 1 電源線 本操作手冊 附註 規格僅在電源為 230 V 時才適用 如因改良以致規格及設計有所變更 恕不另行通 知 ҦEpmcz Mbcpsbupsjft ᇨആȄȶ Щȷȃ ȶEpmczȷȃȶQsp MphjdȷȃȶTvsspvoe FYȷ ᇅᚗEዀᇭ Epmcz Mbcpsbupsjft ޠ ୧ዀȄ Ґᐡ ᐄज ւጢဵ6 67 785 6 85 491 7 337 727 7 598 646 8...

Страница 61: ...07 07 其他資訊 31 Zhtw English ϜН Español VSX 321 K P_DLPWXE book Page 31 Thursday September 8 2011 10 17 AM ...

Страница 62: ...32 Zhtw 07_additional_info fm 32 ページ 2011年9月9日 金曜日 午後2時13分 ...

Страница 63: ...33 Zhtw English ϜН Español 07_additional_info fm 33 ページ 2011年9月9日 金曜日 午後2時13分 ...

Страница 64: ...2Z5 Canada TEL 1 877 283 5901 905 479 4411 PIONEER EUROPE NV Haven 1087 Keetberglaan 1 B 9120 Melsele Belgium TEL 03 570 05 11 PIONEER ELECTRONICS ASIACENTRE PTE LTD 253 Alexandra Road 04 01 Singapore 159936 TEL 65 6472 7555 PIONEER ELECTRONICS AUSTRALIA PTY LTD 5 Arco Lane Heatherton Victoria 3202 Australia TEL 03 9586 6300 PIONEER ELECTRONICS DE MEXICO S A DE C V Blvd Manuel Avila Camacho 138 10...

Отзывы: