The System Setup menu
25
En
05
05
English
ϜН
Español
Chapter 5:
The System Setup menu
Using the System Setup menu
The following section shows you how to make detailed
settings to specify how you’re using the receiver, and also
explains how to fine-tune individual speaker system settings
to your liking.
Important
• If headphones are connected to the receiver, disconnect
them.
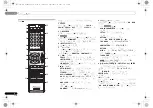
1
Press
RECEIVER to switch the receiver on.
2
Press
, then press SETUP.
The System Setup menu appears on the front panel display.
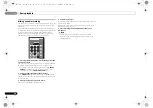
Use
///
and
ENTER
on the remote control to
navigate through the screens and select menu items. Press
RETURN
to confirm and exit the current menu.
• Press
SETUP
at any time to exit the System Setup menu.
3
Select the setting you want to adjust.
•
SP SETUP
-
SP SET
– Specify the size and number of speakers you’ve
connected (see below).
-
X.OVER
– Specify which frequencies will be sent to the
subwoofer (see below).
-
CH LEVEL
– Adjust the overall balance of your speaker
system (page 26).
-
SP DISTN
– Specify the distance of your speakers from
the listening position (page 26).
•
HDMI SET
– Set when using the ARC function.
(see
ARC
Setup
on page 27).
•
APD
– Sets to automatically turn off the power when the
receiver has not operated for several hours (see
The Auto
Power Down menu
on page 26).
•
FL DEMO
– Sets the demo display on the front panel
display (see
The FL Demo Mode menu
on page 26).
The Speaker Setup menu
This receiver allows you to make detailed settings to optimize
the surround sound performance. You only need to make
these settings once (unless you change the placement of
your current speaker system or add new speakers).
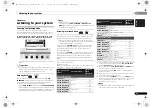
Speaker Setting
Use this setting to specify your speaker configuration (size,
number of speakers).
1
Use
/
to select ‘SP SETUP’ from the System Setup
menu, then press ENTER.
2
Use
/
to select ‘SP SET’ from the SP SETUP menu,
then press ENTER.
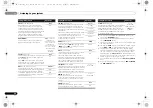
3
Use
/
to select the set of speakers that you want to
set then select a speaker size.
Use
/
to select the size (and number) of each of the
following speakers:
•
F
(Front) –Do not change from
SMALL
.
•
C
(Center) – Select
SMALL
if you connect a center. If you
didn’t connect a center speaker, choose
NO
(the center
channel is sent to the other speakers).
•
S
(Surround) – Select
SMALL
if you connect a surround
speakers. If you didn’t connect surround speakers choose
NO
(the sound of the surround channels is sent to the
other speakers).
•
SB
(Surround Back) – Select the number of surround
back speakers you have (one (
X1
), two (
X2
) or none). If
you didn’t connect surround back speakers choose
NO
.
-
If you select one surround back speaker only, make sure
that additional amplifier is hooked up to the
PRE OUT L
(Single)
terminal.
•
SW
(Subwoofer) – LFE signals and bass frequencies of
channels set to
SMALL
are output from the subwoofer
when
YES
is selected (see notes below). Choose the
PLUS
setting if you want the subwoofer to output bass sound
continuously or you want deeper bass (the bass
frequencies that would normally come out the front and
center speakers are also routed to the subwoofer). If you
did not connect a subwoofer choose
NO
(the bass
frequencies are output from other speakers).
4
When you’re finished, press RETURN.
You return to the Speaker Setup menu.
Note
• If you select
SMALL
for the front speakers, the subwoofer
will automatically be fixed to
YES
. Also, the center,
surround and surround back speakers can’t be set to
LARGE
(
L
) if the front speakers are set to
SMALL
. In this
case, all bass frequencies are sent to the subwoofer.
• If the surround speakers are set to
NO
, the surround back
speakers will automatically be set to
NO
.
• If you have a subwoofer and like lots of bass, it may seem
logical to select
LARGE
for your front speakers and
PLUS
for the subwoofer. This may not, however, yield the best
bass results. Depending on the speaker placement of
your room you may actually experience a decrease in the
amount of bass due to low frequency cancellations. In
this case, try changing the position or direction of
speakers. If you can’t get good results, listen to the bass
response with it set to
PLUS
and
YES
or the front speakers
set to
LARGE
and
SMALL
alternatively and let your ears
judge which sounds best. If you’re having problems, the
easiest option is to route all the bass sounds to the
subwoofer by selecting
SMALL
for the front speakers.
•
LARGE
setting is not use with this system. If each speaker
is connected, select the
SMALL
setting.
• Do not change the crossover frequency from 200 Hz.
Crossover Network
• Default setting:
200Hz
This setting decides the cutoff between bass sounds playing
back from the speakers selected as
LARGE
, or the subwoofer,
and bass sounds playing back from those selected as
SMALL
. It also decides where the cutoff will be for bass
sounds in the LFE channel.
• For more on selecting the speaker sizes, see
Speaker
Setting
on page 25.
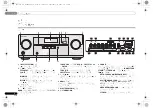
INPUT SELECT
SOURCE
SLEEP
TV
CONTROL
INPUT
RECEIVER
CH
RECEIVER
BD
DVD
TV
DVR/BDR
CD
CD R
DTV/TV
ENTER
MUTE
RETURN
PARAMETER
TOOLS
VOLUME
BAND
MENU
TOP
MENU
TUNE
TUNE
P
R
E
S
E
T
P
R
E
S
E
T
HOME
MENU
SETUP
PTY SEARCH
RECEIVER
05_system_setup.fm 25 ページ 2011年9月1日 木曜日 午後8時16分
Содержание HTP-071
Страница 31: ...Additional information 31 En 07 07 English ϜН Español 07_additional_info fm 31 ページ 2011年9月1日 木曜日 午後8時23分 ...
Страница 61: ...07 07 其他資訊 31 Zhtw English ϜН Español VSX 321 K P_DLPWXE book Page 31 Thursday September 8 2011 10 17 AM ...
Страница 62: ...32 Zhtw 07_additional_info fm 32 ページ 2011年9月9日 金曜日 午後2時13分 ...
Страница 63: ...33 Zhtw English ϜН Español 07_additional_info fm 33 ページ 2011年9月9日 金曜日 午後2時13分 ...


