98
AVIC-W8400NEX/XNUC
1
2
3
4
A
B
C
D
E
F
1
2
3
4
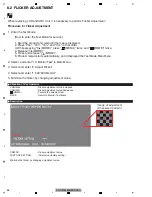
8.2 FLICKER ADJUSTMENT
When replacing LCD and SOC Unit, it is necessary to perform Flicker Adjustment.
Procedure for Flicker Adjustment
1. Enter the Test Mode.
[How to enter the Test Mode for service]
1. Start the product and wait until the map is displayed.
2. Press "Vol+", "Vol-", "Vol+" and "Vol-" in that order.
3. While pressing " (MODE)", press " (MENU)" twice and " (HOME)" twice.
4. Release " (MODE)".
5. Press and release " (MODE)".
6. Product restart starts automatically, and it displayed the Test Mode Main Menu.
2. Select and enter "13. Monitor Test" in Main Menu.
3. Select and enter "2. Adjust Flicker".
4. Select and enter "1. 840*480 Monitor".
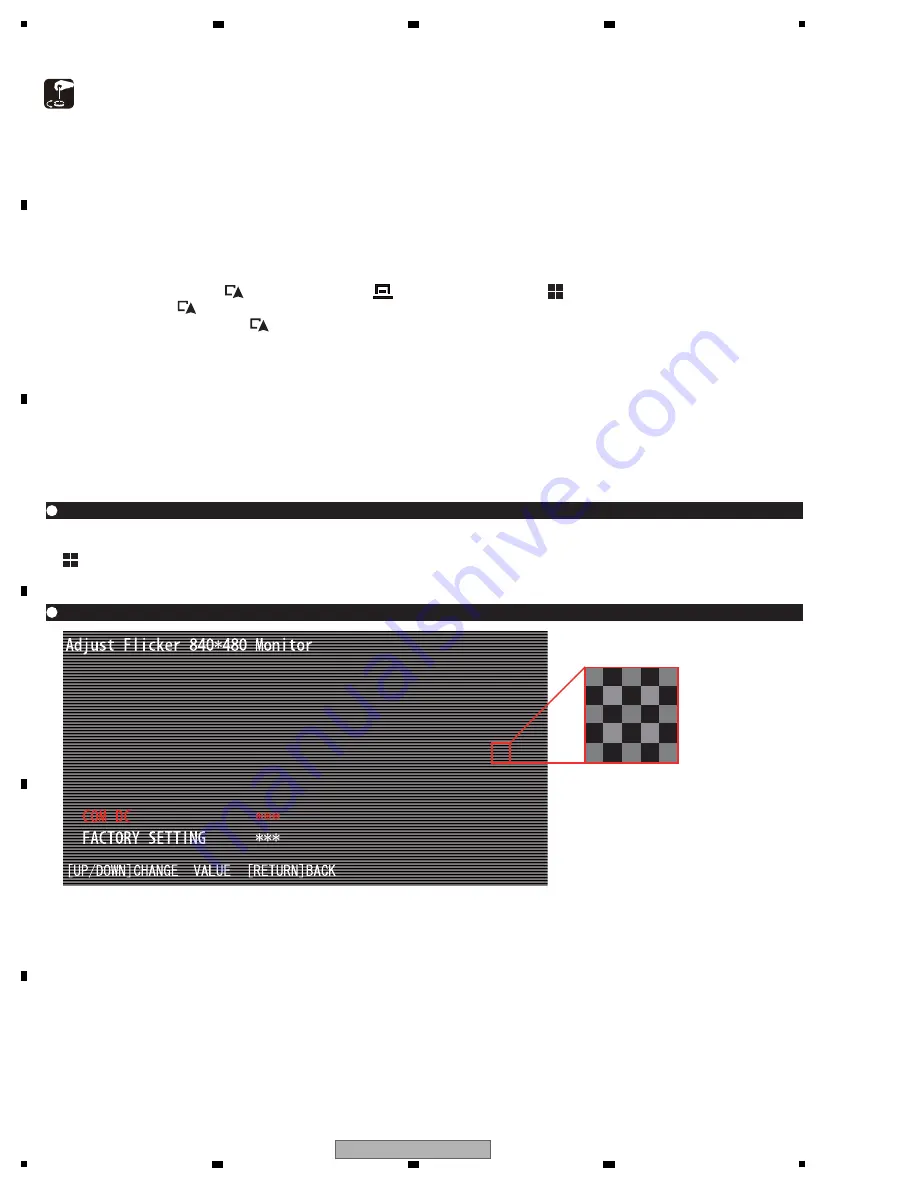
5. Minimize the flicker by changing adjustment value.
Allocation of Key Operation
r
: Flicker adjustment value increases
VOLUME-
: Flicker adjustment value decreases
(HOME)
: Execute the selected item
BACK
: Return to Monitor Test Menu
Description
COM DC
: Flicker adjustment value
FACTORY SETTING
: Initial value (factory setting)
Minimize the flicker by changing adjustment value.
Image of adjustment
(Checkered pattern)


