PIKA WARP Pager
Configuration and Installation Manual
Systems Requirements
•
Power Source: 110V-240V AC (50-60 Hz).
•
Non VLAN tagged LAN Port at the customer
premise; on same network as the IP Phones.
•
Standard Polycom SIP User Agent (UA) Account.
•
IP Phone Info: MAC Address & DN for each IP
Phone.
•
FTP or TFTP Server with option 66; or a static
(T)FTP Server
•
Optional: common USB Stick
Configuration Overview
•
Configuration and physical connection of
WARP
Pager
should require no more then 15 minutes.
•
Simply create two small configuration files and post
them on an FTP server, a TFTP server
or
a USB
stick (USB config requires an autorun script
provided by PIKA).
•
Power up at customer premise.
Configuration File Basics
•
Use a text editor to create two comma delimited files
<macaddress>.cfg and <macaddress>.phones. Eg.
001e840005ab.cfg and 001e840005ab.phones.
•
Be sure to use lower case and remove the colons.
•
The MAC address used for the filenames are that of
the Warp (located on the underside of the Warp).
Creating Configuration File #1
•
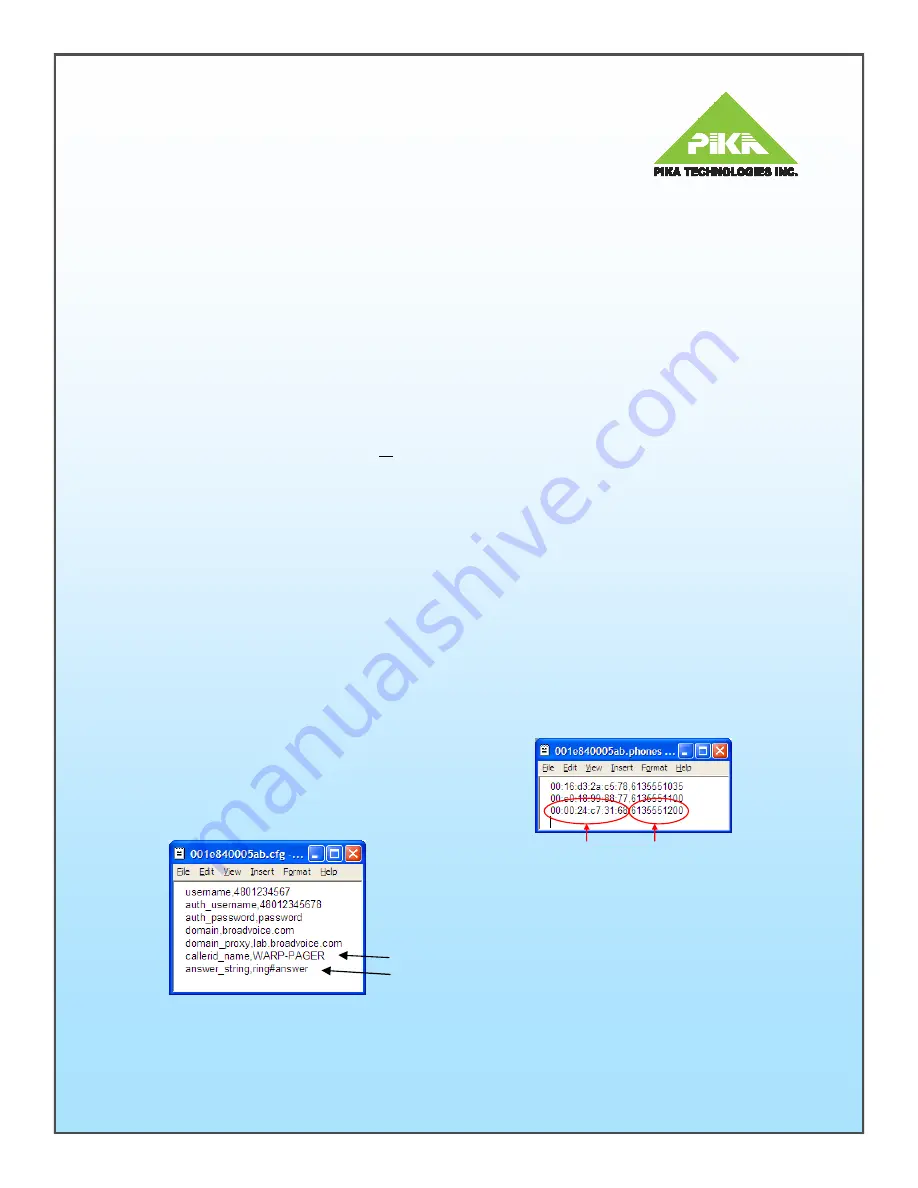
<macaddress>.cfg contains the SIP (UA) User
Agent Account information assigned to the WARP
Pager.
•
Sample content for this file is as in Figure 1.
•
Line 6 is an optional string that assigns a ‘caller id’
value to the pager . In the example, “WARP-
PAGER” will be displayed on the display of a each
phone receiving a page. If left empty, the callerid will
default to ‘Paging’. (see Figure 1: Note 1)
Note 1
Note 2
Figure 1
Creating Configuration File #1 (cont.)
• Line 7 contains the string which identifies the ‘Auto
Answer’ calling feature within Polycom phone
configuration files (see Figure 1: Note 2). If unspecified
the default value of ‘answer_string’ is ‘Auto Answer’ but it
is recommended that the administrator specifically check
the Polycom configuration files to determine the strings
proper setting.
Note
: any white space (blanks) must be
substituted with the # delimiter if you choose to change
the default setting (answer_string,auto#answer).
• It is recommended that the administrator provision the
‘Ring Answer’ calling feature. Whereby the paged party
will receive a page notification tone prior to auto answer.
See ‘Application Note for Polycom Phones’ for
provisioning details.
Note 3
: for Static TFTP server add:
•
ftp_server,192.168.1.1
Note 4:
for Static FTP server with password add:
•
ftp_server,192.168.1.1
•
ftp_user,user
•
ftp_password,password
Creating Configuration File #2
•
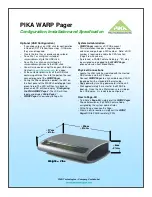
<macaddress>.phones
contains details of the IP Phones
in the Paging Group. MAC addresses and DN numbers
are required.
• Sample content for this file is as in Figure 2.
• The number of lines in this file must equal the number of
Phones in the Paging Group.
• The maximum is 30 IP Phones.
Do not include the
Warp Pager
in this list.
WARP Pager Configuration - (T)FTP Server
• Enable DHCP option-66 or configure your static (T)FTP
server (see Notes 3 & 4).
• Save Files #1 and #2 in the root directory of the (T)FTP
server prior to powering up the Warp. Note: Default
Polycom user name and password is being used.
• WARP Pager supports (T)FTP provisioning similar to
that of common IP Phones. After obtaining DHCP info,
WARP Pager will first attempt an FTP connection to
retrieve the two configuration files. If FTP is not
available, a TFTP connection will be attempted.
MAC Address DN Number
Figure 2


