


SAFECONF configuration software
103503_en_03
PHOENIX CONTACT
4-19
4.
Once a check has been completed without errors, the project can be transmitted to the
safety module. For information about downloading a configuration project and the
associated startup of the safety module, please refer to "Downloading the configuration
4.5.5
Documenting the signal assignment and the project
Documenting signal
assignment
The system offers the option of maintaining a signal list or, more accurately, a signal
assignment list.
1.
Click on the following icon in the toolbar:
The "Assignment Map" dialog box opens.
2.
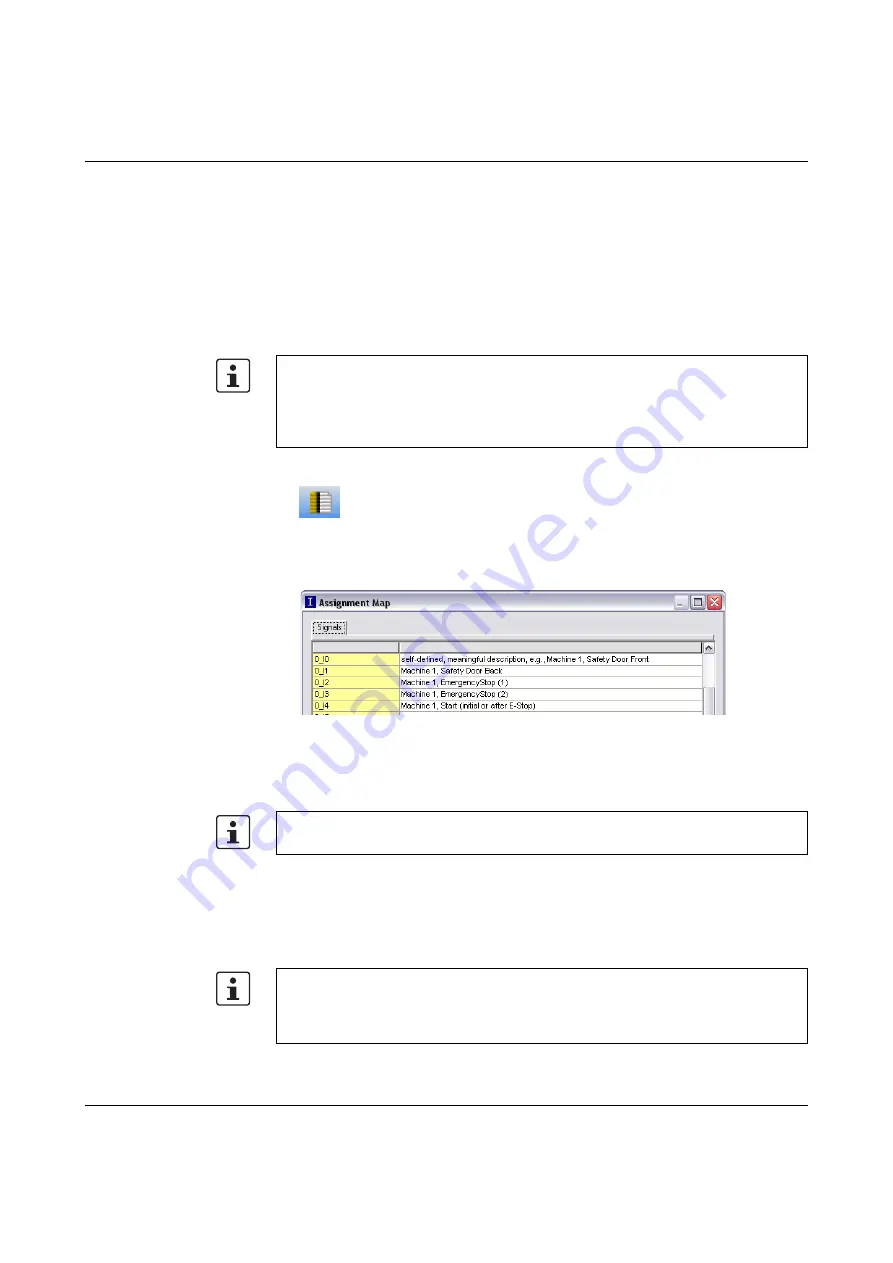
For each input, enter a meaningful short description in the right-hand field of the list by
double-clicking in the field and typing in the text.
Figure 4-15
Documenting signal assignment in the "Assignment Map" dialog box
3.
Once all the required texts have been entered, confirm the dialog box with "OK" to save
the signal list.
Entering project
documentation
Open the "Project Info" dialog box by selecting "Project Information..." in the "Project" menu.
This dialog box can be used to enter the most important information about the current
project, from project-specific data (description of the application, designation, name of the
creator/editor, etc.) to manufacturer data, the operator, and installation location, through to
data relating to safety inspections, and a revision history for the project.
We strongly recommend that this "wiring documentation" is maintained on an ongoing
basis, as it makes both the safety logic that has been created and the project as a whole
easier to understand, and helps to prevent incorrect connections being established in the
connection editor. In practice, it is better to enter signal names before editing the safety
logic because any text entered in the connection editor is visible as tool tips.
For additional information about signal information, please refer to the online help, which
is opened by pressing <F1> when the "Assignment Map" dialog box is active.
To ensure compliance with standards, the fields with yellow row headers must be
completed each time a new project version is developed. The fields with a gray
background are less important. However, it is highly recommended that you enter data in
all fields.
Содержание 2986229
Страница 2: ......
Страница 32: ...PSR TRISAFE S 2 16 PHOENIX CONTACT 103503_en_03...
Страница 50: ...PSR TRISAFE S 3 18 PHOENIX CONTACT 103503_en_03...
Страница 74: ...PSR TRISAFE S 4 24 PHOENIX CONTACT 103503_en_03...
Страница 88: ...PSR TRISAFE S 5 14 PHOENIX CONTACT 103503_en_03...
Страница 90: ...PSR TRISAFE S 6 2 PHOENIX CONTACT 103503_en_03...
Страница 96: ...PSR TRISAFE S 7 6 PHOENIX CONTACT 103503_en_03...