background image

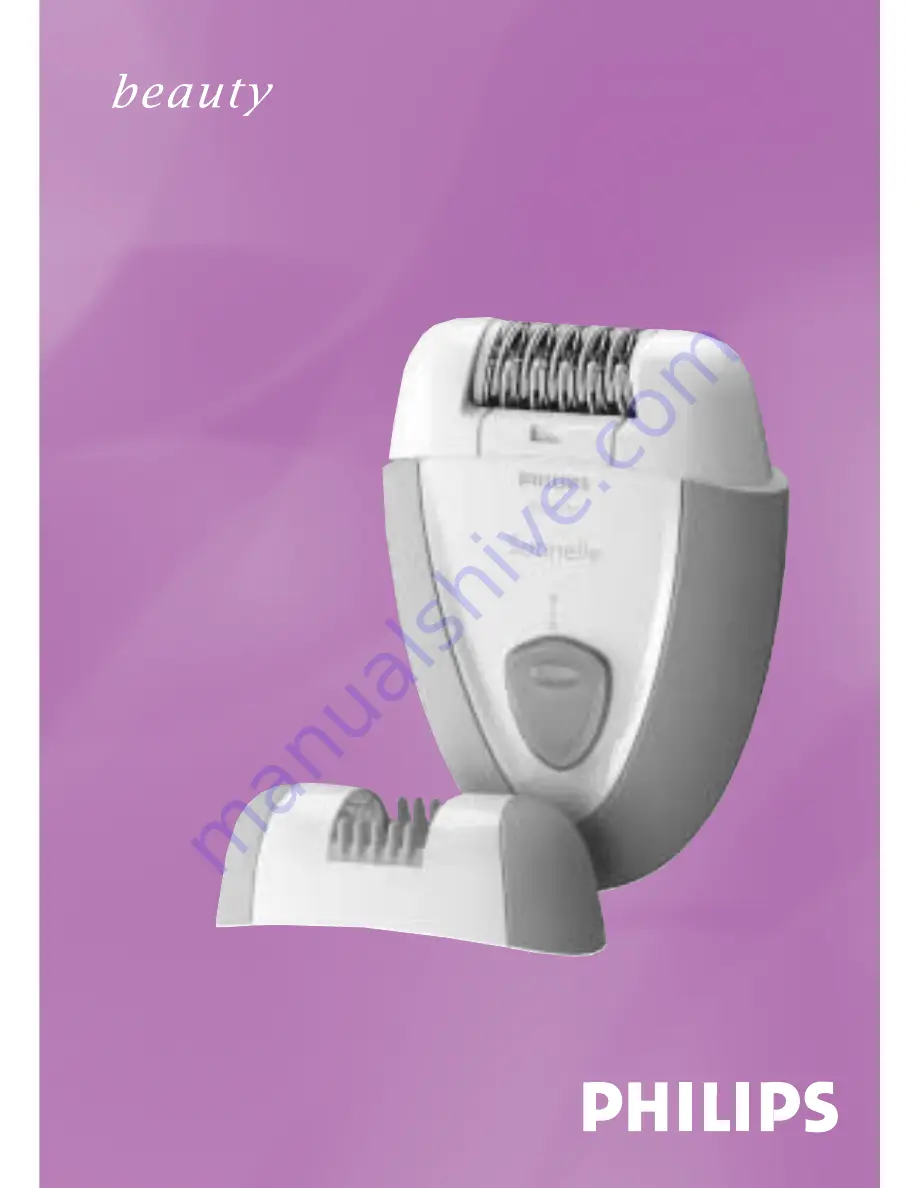
Satinelle

HP6408

Содержание HP4608/00

Страница 1: ...Satinelle HP6408 ...

Страница 2: ...2 ...

Страница 3: ...3 2 3 4 5 6 7 8 9 10 11 12 13 14 15 16 17 ...

Страница 4: ...4 1 ...

Страница 5: ...ENGLISH 6 DEUTSCH 11 FRANÇAIS 16 NEDERLANDS 21 ESPAÑOL 26 ITALIANO 31 PORTUGUÊS 36 41 TÜRKÇE 47 PORTUGUÊS BR 52 HP6408 ...

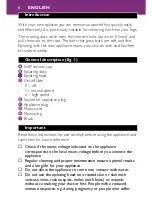
Страница 6: ... Socket for appliance plug F Appliance plug G Mains cord H Mains plug I Brush Important Read these instructions for use carefully before using the appliance and save them for future reference Check if the mains voltage indicated on the appliance corresponds to the local mains voltage before you connect the appliance Regular cleaning and proper maintenance ensure optimal results and a long life for...

Страница 7: ...d by one of the original type in order to avoid a hazard Preparing for use Make sure your skin is clean entirely dry and free from grease Do not use any cream before you start epilating Epilation is easier just after taking a bath or shower Make sure your skin is completely dry when you start epilating When you use the appliance for the first time we advise you to try it out on an area with only l...

Страница 8: ...ee hand to make the hairs stand upright fig 6 B Stretching the skin properly is particularly important if you have sensitive or delicate skin 3 Place the epilator perpendicularly onto the skin with the on off slide pointing in the direction in which you are going to move the appliance fig 7 4 Move the appliance slowly over the skin against the direction of hair growth fig 8 Do not apply pressure 5...

Страница 9: ... are going to move the appliance fig 7 5 Move the appliance slowly over the skin against the direction of the hair growth fig 8 Epilate your bikini line as shown in the figure fig 12 Epilate your underarms as shown in the figure fig 13 For a cool sensation you can dab the area you have just epilated with a cloth soaked in cold water Cleaning For a good and smooth epilating result it is essential t...

Страница 10: ...to the appliance and pushing it against the direction of the arrow indicated on the back of the epilating head until it snaps home fig 17 Guarantee service If you need information or if you have a problem please visit the Philips Web site at www philips com or contact the Philips Customer Care Centre in your country you will find its phone number in the worldwide guarantee leaflet If there is no C...

Страница 11: ...pinzetten C Epilierkopf D Ein Aus Schalter 0 Aus I normale Geschwindigkeit II hohe Geschwindigkeit E Buchse für Gerätestecker F Gerätestecker G Netzkabel H Netzteil I Bürste Wichtig Lesen Sie diese Bedienungsanleitung vor dem ersten Gebrauch des Geräts sorgfältig durch und bewahren Sie sie zur späteren Einsichtnahme auf Prüfen Sie bevor Sie das Gerät anschließen ob die Spannungsangabe auf dem Gerä...

Страница 12: ... und Wimpern Kleidung Fäden Kabeln und Bürsten umVerletzungen und Beschädigungen zu vermeiden Halten Sie das Gerät außer Reichweite von Kindern Verwenden Sie das Gerät nur mit dem mitgelieferten Netzkabel Wenn das Netzkabel defekt oder beschädigt ist darf es nur von einem Philips Service Center oder einer von Philips autorisierten Werkstatt durch ein Original Ersatzkabel ausgetauscht werden um ein...

Страница 13: ...ät ein indem Sie die gewünschte Geschwindigkeit wählen Wählen Sie Geschwindigkeitsstufe I für Hautpartien mit geringer Behaarung für schwer erreichbare Zonen und für Hautpartien direkt über Knochen z B Knie und Knöchel Abb 4 Wählen Sie Geschwindigkeitsstufe II für größere Hautpartien mit stärkerer Behaarung Abb 5 2 Straffen Sie die Haut mit der freien Hand damit sich die Härchen aufrichten Abb 6 B...

Страница 14: ...are nicht zu lang sind max 0 5 mm 1 Setzen Sie die Präzisionskappe auf den Epilierkopf Abb 10 B Die Präzisionskappe lässt sich nur in einer Richtung auf das Gerät setzen 2 Schalten Sie das Gerät ein Abb 11 Wir empfehlen Geschwindigkeitsstufe II 3 Straffen Sie die Haut mit der freien Hand Abb 6 4 Setzen Sie das Gerät senkrecht auf die Haut wobei der Ein Aus Schalter in die Richtung zeigt in der Sie...

Страница 15: ...il aus der Steckdose Abb 14 3 Zum Entfernen des Epilierkopfes drücken Sie mit dem Daumen in Pfeilrichtung auf die geriffelte Fläche und ziehen den Epilierkopf vom Gerät ab Abb 15 4 Reinigen Sie die Epilierpinzetten und alle anderen erreichbaren Teile mit der beiliegenden Bürste Abb 16 Setzen Sie den Epilierkopf wieder auf das Gerät indem Sie ihn gegen die Pfeilrichtung drücken bis er hörbar einras...

Страница 16: ...d alimentation H Fiche secteur I Brosse Important Lisez les instructions du mode d emploi avant d utiliser l appareil et conservez les pour un usage ultérieur Avant de brancher l appareil vérifiez que la tension indiquée sur l appareil correspond à la tension de votre secteur Le nettoyage et l entretien régulier garantissent les meilleurs résultats et une durée de vie prolongée Ne laissez pas l ap...

Страница 17: ...é et pour éviter tout accident il ne doit être remplacé que par un cordon d origine Préparation à l emploi Assurez vous que votre peau est propre sans graisse ni crèmes N appliquez aucune crème avant l épilation Les poils sont plus faciles à épiler après un bain ou une douche Mais votre peau doit être complètement sèche durant l épilation Quand vous utilisez l appareil pour la première fois nous v...

Страница 18: ...s fig 6 B Il est très important d étirer correctement la peau surtout si vous avez une peau sensible ou délicate 3 Placez l épilateur perpendiculairement sur la peau avec le bouton marche arrêt orienté dans la direction où vous voulez déplacer l appareil fig 7 4 Déplacez l appareil lentement dans le sens inverse de la pousse des poils fig 8 N exercez pas de pression sur l appareil 5 Placez le bout...

Страница 19: ...la peau dans le sens inverse de la pousse des poils fig 8 Epilez la zone du maillot comme indiqué dans l image fig 12 Epilez les aisselles comme indiqué dans l image fig 13 Pour plus de fraîcheur vous pouvez tamponner la zone épilée avec un chiffon humide Nettoyage Pour obtenir les meilleurs résultats il est très important de nettoyer la tête d épilation après chaque emploi N immergez jamais l app...

Страница 20: ...u elle soit fixée fig 17 Garantie et service Pour plus d informations visitez notre Philips Web site www philips com ou veuillez contacter le Service Consommateurs Philips de votre pays vous trouverez le numéro de téléphone dans le dépliant sur la garantie internationale S il n y a aucun Service Consommateurs Philips dans votre pays contactez votre distributeur ou le Service Department of Philips ...

Страница 21: ...e beschrijving A SoftPrecision kap B Epileerschijfjes C Epileerhoofd D Aan uitknop 0 uit I normale snelheid II hoge snelheid E Opening voor apparaatstekkertje F Apparaatstekkertje G Netsnoer H Stekker I Borsteltje Belangrijk Lees deze gebruiksaanwijzing zorgvuldig door voordat je het apparaat gaat gebruiken Bewaar de gebruiksaanwijzing om hem indien nodig te kunnen raadplegen Controleer of het vol...

Страница 22: ...ng of beschadiging houd het apparaat uit de buurt van hoofdhaar wimpers wenkbrauwen kleding draden borstels snoeren en dergelijke Houd het apparaat buiten het bereik van kinderen Gebruik het apparaat uitsluitend in combinatie met het bijgeleverde snoer Indien het netsnoer beschadigd is laat het dan altijd vervangen door een van het oorspronkelijke type om gevaar te voorkomen Klaarmaken voor gebrui...

Страница 23: ...s snelheid I voor gebieden met dunne beharing voor moeilijk te bereiken gebieden en voor gebieden waar het bot zicht direct onder de huid bevindt zoals de knieën en enkels fig 4 Kies snelheid II voor grotere en of sterker behaarde gebieden fig 5 2 Trek de huid met je vrije hand strak zodat de haartjes goed rechtop staan fig 6 B Vooral als u een gevoelige of tere huid heeft is het erg belangrijk da...

Страница 24: ...SoftPrecision kap kan slechts op één manier op het apparaat bevestigd worden 2 Schakel het apparaat in fig 11 We raden u aan snelheid II te gebruiken 3 Trek de huid met uw vrije hand strak fig 6 4 Plaats het apparaat loodrecht op de huid met de aan uitknop wijzend in de richting waarin u het apparaat gaat bewegen fig 7 5 Beweeg het apparaat langzaam over de huid tegen de haargroeirichting in fig 8...

Страница 25: ... fig 15 4 Reinig de epileerschijfjes van het epileerhoofd en alle andere delen die toegankelijk zijn met het bijgeleverde borsteltje fig 16 Bevestig het epileerhoofd door het op het apparaat te plaatsen en dan met uw duim in tegengestelde richting van de pijl aangegeven op de achterkant van het epileerhoofd op het apparaat te duwen totdat het epileerhoofd vastklikt fig 17 Garantie service Als u in...

Страница 26: ...dad alta EToma para la clavija del aparato F Clavija del aparato G Cable de red H Clavija I Cepillo Importante Lea atentamente estas instrucciones de uso antes de utilizar el aparato y consérvelas por si necesitara consultarlas en el futuro Antes de enchufar el aparato compruebe que el voltaje indicado en el aparato se corresponde con el voltaje de red local Una limpieza regular y un mantenimiento...

Страница 27: ...l para evitar situaciones de peligro Cómo preparar el aparato Asegúrese de que su piel esté limpia completamente seca y libre de grasa No use ninguna crema antes de empezar a depilarse La depilación resulta más fácil si se hace justo después de bañarse o ducharse Asegúrese de que tiene la piel completamente seca antes de comenzar a depilarse Cuando use el aparato por primera vez le aconsejamos que...

Страница 28: ...a piel con la otra mano fig 6 B Estirar bien la piel es especialmente importante si tiene la piel sensible o delicada 3 Coloque la depiladora de forma perpendicular sobre la piel con el botón de marcha parada apuntando en la dirección en la que va a mover el aparato fig 7 4 Mueva despacio el aparato sobre la piel en sentido contrario al crecimiento del vello fig 8 No ejerza presión 5 Desconecte el...

Страница 29: ...la dirección en la que va a mover el aparato fig 7 5 Mueva despacio el aparato sobre la piel en sentido contrario al crecimiento del vello fig 8 Depílese la línea del bikini tal y como muestra el dibujo fig 12 Depílese las axilas tal y como muestra el dibujo fig 13 Para obtener una sensación de frescor puede frotar la zona recién depilada con un paño mojado en agua fría Limpieza Para conseguir un ...

Страница 30: ...en el aparato y empujándolo en sentido contrario al que indica la flecha de la parte trasera del cabezal depilador hasta que encaje en su sitio fig 17 Garantía y servicio Si necesita información o si tiene algún problema visite la página web de Philips en www philips com o póngase en contacto con el Servicio Philips de Atención al Cliente de su país hallará el número de teléfono en el folleto de l...

Страница 31: ...locità normale II velocità massima E Presa per spinotto F Spinotto G Cavo di alimentazione H Spina I Spazzolina Importante Prima di usare l apparecchio leggete queste istruzioni e conservatele per eventuali riferimenti futuri Prima di collegare l apparecchio alla presa di corrente verificate che la tensione indicata sull apparecchio corrisponda a quella della rete locale Una pulizia regolare e una...

Страница 32: ...dotazione Nel caso il cavo di alimentazione fosse danneggiato dovrà essere sostituito esclusivamente con un cavo originale per evitare situazioni a rischio Come preparare l apparecchio Controllate che la pelle sia pulita e priva di creme e sostanze grasse Non applicate nessuna crema prima dell epilazione L epilazione risulta più facile se effettuata subito dopo la doccia o il bagno Fate in modo ch...

Страница 33: ...er quelle difficili da raggiungere e dove le ossa si trovano subito sotto la pelle come ginocchia e caviglie fig 4 Selezionate la velocità II per le zone più estese e con peli più grossi fig 5 2 Tendete la pelle con la mano libera in modo che i peli si sollevino fig 6 B Tendere la pelle è particolarmente importante se avete la pelle delicata o sensibile 3 Appoggiate l epilatore perpendicolarmente ...

Страница 34: ...sull apparecchio in un solo modo 2 Accendete l apparecchio fig 11 Vi consigliamo di selezionare la velocità II 3 Tendete la pelle con la mano libera fig 6 4 Appoggiate l apparecchio perpendicolarmente alla pelle con il cursore on off che punta nella direzione nella quale muovete l apparecchio fig 7 5 Passate l apparecchio lentamente sulla pelle nel senso opposto alla crescita dei peli fig 8 Epilat...

Страница 35: ...a testina e tutte le parti accessibili utilizzando la spazzolina fornita fig 16 Inserite la testina epilatoria nell apparecchio premendola in direzione opposta rispetto alla freccia posta sul retro della testina fino a quando scatta nella posizione corretta fig 17 Garanzia e Assistenza Per ulteriori informazioni o in caso di problemi vi preghiamo di visitare il sito Philips su www philips com oppu...

Страница 36: ...ar 0 desligado I velocidade normal II velocidade alta E Ligação da ficha F Ficha da máquina G Fio H Ficha de alimentação I Escova Importante Antes de usar o aparelho leia estas instruções com atenção e guarde as para uma eventual consulta futura Verifique se a voltagem indicada na máquina corresponde à voltagem local antes de ligar à corrente Uma limpeza regular e uma manutenção adequada garantirã...

Страница 37: ...bo de alimentação que a acompanha Se o cabo de alimentação se estragar deverá sempre ser substituído por um fio do tipo original para evitar situações gravosas para o utilizador Preparação A pele deve estar limpa completamente seca e sem qualquer gordura Não use cremes antes de começar a depilação A depilação é mais fácil se for feita após o banho ou duche A pele deve estar completamente seca quan...

Страница 38: ...a velocidade II para zonas mais extensas e com pêlos mais fortes fig 5 2 Estique a pele com a mão livre para levantar os pêlos fig 6 B Esticar bem a pele é particularmente importante se tiver a pele sensível ou delicada 3 Posicione a depiladora perpendicularmente sobre a pele com o interruptor virado na direcção para a qual irá movimentar a máquina fig 7 4 Movimente a máquina lentamente sobre a pe...

Страница 39: ...elha se a velocidade II 3 Estique a pele com a mão livre fig 6 4 Posicione a máquina perpendicularmente sobre a pele com o interruptor virado na direcção para a qual irá movimentar a máquina fig 7 5 Movimente a máquina lentamente sobre a pele na direcção contrária ao crescimento dos pêlos fig 8 Faça a depilação da linha do biquini conforme se ilustra fig 12 Faça a depilação das axilas conforme se ...

Страница 40: ...eças que tenham ficado visíveis fig 16 Volte a colocar a cabeça de depilação na máquina e empurre a na direcção da seta assinalada na parte de trás da cabeça até encaixar no seu lugar fig 17 Garantia e assistência Se precisar de assistência ou de informações ou se tiver qualquer problema por favor visite o site da Philips em www philips pt ou contacte o Centro de Informação ao Consumidor Philips d...

Страница 41: ... 0 5mm 1 A SoftPrecision cap B C D on off 0 off I E A F B G H B I B C 41 ...

Страница 42: ... D D E F G H B B 42 ...

Страница 43: ... I E J 1 B 2 2 B 3 1 E M 4 5 2 D 6 43 ...

Страница 44: ...B 3 D on off 7 4 8 5 R on off 0 9 SoftPrecision D SoftPrecision E B 0 5mm 1 D SoftPrecision 10 B SoftPrecision 0 2 U 11 R 3 D 6 44 ...

Страница 45: ...4 D on off 7 5 8 E 12 E 13 G M G 1 R 9 2 B 14 3 E 15 4 16 45 ...

Страница 46: ... 17 0 1 Philips www philips com Philips Philips 46 ...

Страница 47: ...o girişi F Cihaz fişi G Elektrik kordonu H Elektrik fişi I Fırça Önemli Cihazı kullanmadan önce kullanma kılavuzunu okuyarak şekilleri inceleyin Kullanma kılavuzunu saklayın Cihazı prize takmadan önce adaptörün üzerinde bulunan voltajın evinizdeki şebeke voltajıyla uygunluğunu kontrol edin Cihaza uyguladığınız düzenli temizlik ve bakım cihazınızın kullanım süresini uzatacaktır Cihazın su ile tems ...

Страница 48: ...elektrik kordonu hasarlıysa daha fazla hasara yol açmamak için mutlaka orjinal modeli ile değiştirilmelidir Cihazın kullanıma hazırlanması Cildinizin temiz kremsiz ve kuru olduğundan emin olunuz Epilasyondan önce krem sürmeyiniz Epilasyonun banyodan veya duştan sonra yapılması daha kolay ve rahat olacaktır Ancak cildinizin tamamen kuru olmasına dikkat ediniz Size tavsiyemiz ilk defa epilaslasyon y...

Страница 49: ...linizle gerin şek 6 B Epilasyon sırasında tüylerin yukarı doğru kalkması için cildinizi diğer elinizle gerin 3 Epilasyon cihazını dikey açma kapama düğmesi hareket ettireceğiniz yöne doğru bakacak şekilde cildinizin üzerine yerleştirin şek 7 4 Cihazı cildiniz üzerinde tüylerin çıkış yönünün tersine doğru yavaşça gezdirin şek 8 Cihazı cildinize bastırmayın 5 Açma kapama düğmesini 0 pozisyonuna kayd...

Страница 50: ...a kapama düğmesi cihazı hareket ettireceğiniz yöne bakacak şekilde cihazı çalıştırın şek 7 5 Cihazı cildiniz üzerinde tüylerin çıkış yönünün tersine doğru yavaşça gezdirin şek 8 Şekilde görüldüğü gibi bikini bölgesini epilasyon yapın şek 12 Şekilde görüldüğü gibi koltukaltı bölgesini epilasyon yapın şek 13 Rahatlamak amacı ile epilasyon yaptığınız bölgeye soğuk su ile kompress yapabilirsiniz Temiz...

Страница 51: ...mizleyin şek 16 Epilasyon başlığını cihaz üzerinde bulunan ok yönünün tersinde kaydırarak yerine yerleştiriniz şek 17 Garanti Servis Eğer bir probleminiz olursa servise veya bilgiye ihtiyacınız olursa Philips internet sayfasına www philips com tr veya ülkenizde bulunan Philips Tüketici Danışma Merkezini arayabilirsiniz Telefon numarasını garanti belgeleri içerisinden bulabilirsiniz 0800 261 33 02 ...

Страница 52: ...seletor de velocidade 0 desligar I velocidade normal II velocidade máxima E Encaixe para o conector F Conector G Fio H Adaptador com seletor de voltagem I Escova para limpeza Importante Para sua maior segurança leia estas instruções antes de testar o aparelho guarde este manual para eventuais consultas Selecione aVoltagem no adaptador do aparelho antes de colocá lo na tomada 110v 220v Mantenha seu...

Страница 53: ...tinuar por três dias aconselhamos consultar um médico Para previnir danos e ferimentos mantenha o aparelho quando ligado longe de seus cabelos sobrancelha cílios roupas linhas fios escovas etc Mantenha o aparelho longe do alcance das crianças Apenas utilize o aparelho em combinação com seu adaptador com seletor de voltagem Se o adaptador e ou fio estiver danificado só deverá ser substituído por um...

Страница 54: ... o adaptador com a voltagem selecionada na tomada fig 3 Depilando as pernas 1 Ligue o aparelho e selecione qual velocidade irá utilizar Selecione a velocidade I para zonas com menos pêlos zonas mais difíceis de se alcançar e zonas onde o osso esta mais exposto como joelhos e tornozelos fig 4 Selecione a velocidade II para zonas mais extensas e com pêlos mais resistentes fig 5 2 Estique sua pele co...

Страница 55: ... muito compridos você pode obter um melhor resultado 0 5 mm 1 Coloque a capa redutora com massageador no aparelho fig 10 B Esta capa só poderá ser colocada no aparelho em uma única posição 2 Ligue o aparelho fig 11 Aconselhamos ligar o aparelho na velocidade II 3 Estique a pele com uma mão fig 6 4 Posicione o aparelho perpendicular à pele com o liga desliga apontado para a direção que irá mover o ...

Страница 56: ...da atrás da mesma fig 15 4 Limpe os discos depilatórios e todas as peças acessíveis do aparelho com a escova de limpeza fig 16 Encaixe a cabeça depilatória no aparelho empurrando a na direção contrária da seta indicada atrás da mesma voltando assim a sua posição original fig 17 Garantia e AssistênciaTécnica Se precisar de informações ou se tiver qualquer problema por favor visite o site da Philips...

Страница 57: ...57 ...

Страница 58: ...www philips com u 4203 000 30442 ...

Отзывы: