Top Case Assemblies
4
-
30
Removal and Replacement
Top Case Assemblies
This section provides instructions for removing and replacing assemblies
found in the top case.
Lithium Backup Battery
The Lithium Battery maintains the unit’s stored information on the Control
PCA when the main battery is removed or depleted. A cable tie wrap and a
package of ProGold wipes are included in the Lithium Battery replacement
kit. Make sure that you clean the contact clips and new battery terminals with
a ProGold wipe and replace the cable tie wrap that holds the battery in place.
See Table 5-5 on page 5-8 for the replacement kit part number.
Removal
1. If possible, save the customer’s configuration onto a Data Card (or print
the configuration) so the configuration can be restored after the repair is
complete.
2. Using a pair of fine nose wire cutters, cut and remove the cable tie wrap
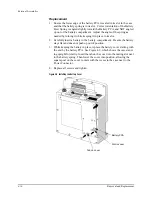
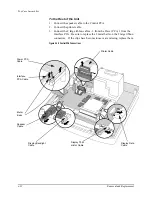
that holds the battery in place. Remove the battery from the holder. See
Figure 4-19.
Cleaning
a.
Thouroughly clean the contact clips and new battery terminals with a
ProGold wipe.
Replacement
CAUTION
Be sure to install the new battery with the correct orientation. Follow the
polarity markings on the bottom of battery holder (under the battery).
1. Install the new Lithium battery. Secure it in place with a cable tie wrap.
Pre-bend the tie wrap before sliding it under the battery holder from the
front - this will allow it to slide up alongside the printer connector as it
comes out on the other side. See Figure 4-19.
2. Use the Language Support Tool to restore the unit’s serial number and to
select whether SpO
2
hardware is installed or not. See "The Language
Support Tool" on page 4-67.
3. Enter Configuration Mode and reload the customer’s configuration from
the data card, or reconfigure the unit. See "Configuration Mode" on page
2-10.
4. Perform Performance Verification Testing as described in "Performance
Содержание Heartstart XLT
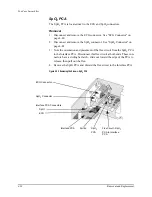
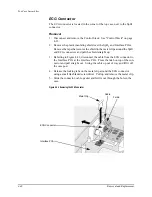
Страница 1: ...H E A R T S TA R T X LT S e r v i c e M a n u a l M 3 5 0 0 B M 5 5 0 0 B ...
Страница 2: ......
Страница 3: ...Service Manual M3500B HeartStart XLT M5500B Heartstart 4000 Defibrillator Monitor ...
Страница 6: ......
Страница 16: ......
Страница 20: ......
Страница 52: ......
Страница 110: ...Opening the Sealed Case 4 24 Removal and Replacement Figure 4 13 Battery Connector Location 4 Pin Battery Connector ...
Страница 195: ...M3500B M5500B Service Manual 6 17 System Functional Descriptions 6 Figure 6 3 Power Distribution and Fusing ...
Страница 205: ...M3500B M5500B Service Manual 7 9 Waveforms 150J continued 7 Waveforms 150J continued 150J 75 ohms 150J 100 ohms ...
Страница 206: ...Waveforms 150J continued 7 10 Specifications Waveforms 150J continued 150J 125 ohms 2ms div 150J 125 ohms 5 ms div ...
Страница 208: ...Waveforms 200J continued 7 12 Specifications Waveforms 200J continued 200J 75ohms 200J 100ohms ...
Страница 216: ......
Страница 223: ......
Страница 224: ...M3500 90900 Printed in USA February 2003 Second Edition M3500 90900 2 ...

