


7
1063_0_Product_Manual - October 27, 2010 2:54 PM
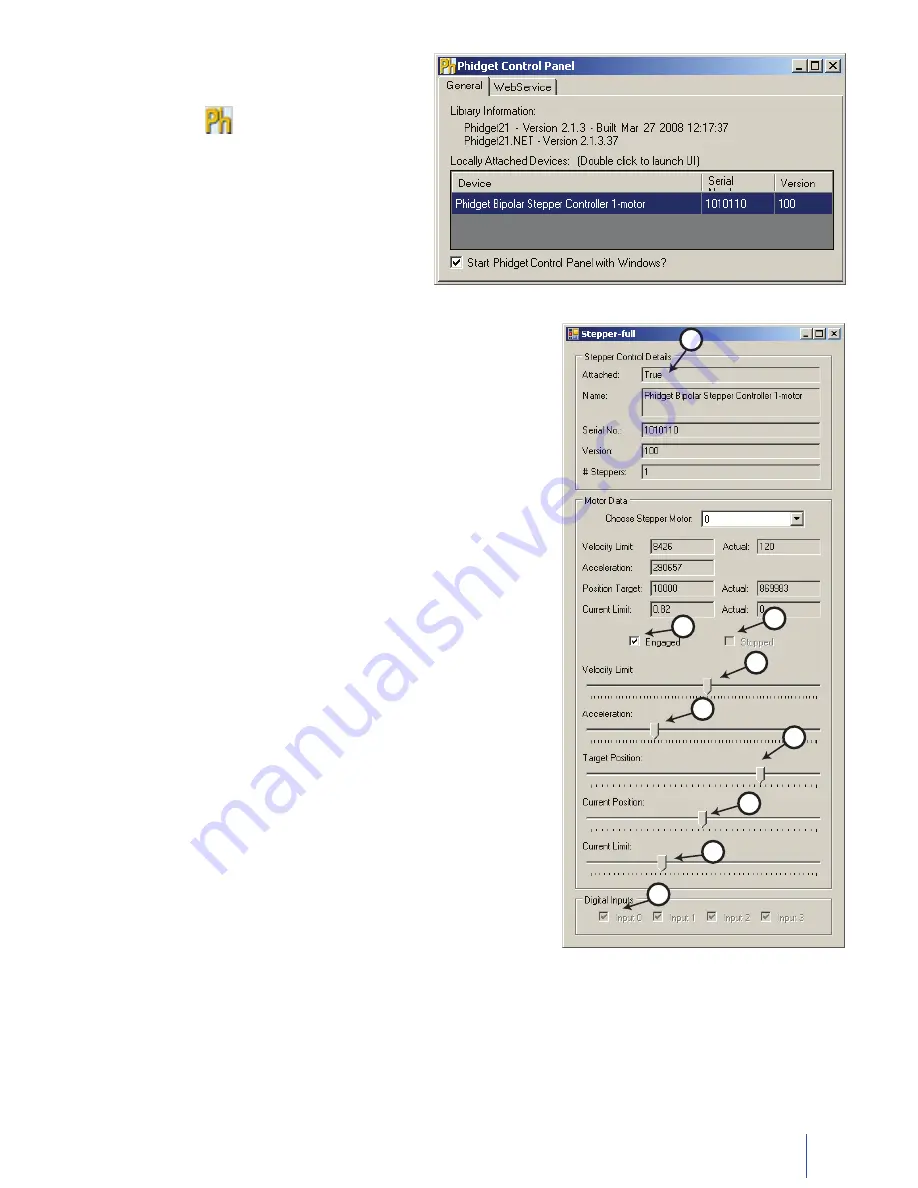
Double Click on the
icon to activate the Phidget
Control Panel and make sure that
Phidget Bipolar
Stepper Controller 1-Motor
is properly attached
to your PC.
Double Click on
1.
Phidget Bipolar Stepper Controller 1-Motor
in the Phidget Control Panel to bring up Stepper-full and check that
the box labelled Attached contains the word True.
Check the Engaged box to power up the motor.
2.
Move the Target Position slider to the right or the left. The target
3.
motor position will be displayed in the Position Target box and the
motor will start turning until the Actual position is the same as the
target.
Use the Velocity Limit slider to set the maximum velocity. The
4.
motor will accelerate until the Actual velocity is equal to the
Velocity Limit.
Use the Acceleration slider to increase or decrease the
5.
acceleration.
Use the Current Limit slider to modify the current going through
6.
the motor and affect torque.
When the motor has reached the position target, a tick mark will
7.
appear in the Stopped box.
Move the Current Position slider to change the position the device
8.
is currently at.
To test the Digital input, connect a wire between the digital input
9.
port 0 and the ground connector. The check mark in the Input 0
box should appear.
1
8
7
3
2
4
5
6
9
Testing Using Mac OS X
Click on System Preferences >> Phidgets (under Other) to activate the Preference Pane
•
Make sure that the
•
Phidget Bipolar Stepper Controller 1-Motor
is properly attached.
Double Click on
•
Phidget Bipolar Stepper Controller 1-Motor
in the Phidget Preference Pane to bring up the
Stepper-Full example. This example will function in a similar way as the Windows version, but note that it does
not include an Advanced Sensor Display.