background image


15A CHOP SAW 

240-3756 


Owner’s Manual


PRODUCT SPECIFICATIONS 

Rating: 

120 V, 60 Hz, AC 

Amperes: 

15 AMP 

Speed: 

3,800 RPM (no load) 

Blade diameter: 

14" (355 mm) 

Blade thickness: 

1/8" (3 mm) 

Arbor: 

1" (25.4 mm) 

Maximum  
workpiece size: 

Vice miter gauge to front 

Vice miter gauge to rear 

5

⅝x3⅝” deep (143x92 

mm) Rectangular section 

9

”x3” deep (229x76 mm) 

Rectangular section 

4¾” (121 mm) Round pipe   4½” (114 mm) Round pipe  

Weight: 

34 lb (15.5 kg) 

Need Assistance? 
Call us on our toll free customer support line: 
1-866-349-8665 


Technical questions


Replacement parts


Parts missing from package 


Содержание 240-3756

Страница 1: ... Arbor 1 25 4 mm Maximum workpiece size Vice miter gauge to front Vice miter gauge to rear 5 x3 deep 143x92 mm Rectangular section 9 x3 deep 229x76 mm Rectangular section 4 121 mm Round pipe 4 114 mm Round pipe Weight 34 lb 15 5 kg Need Assistance Call us on our toll free customer support line 1 866 349 8665 Technical questions Replacement parts Parts missing from package ...

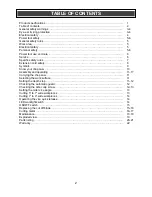
Страница 2: ...now your chop saw 10 Assembly and operating 11 17 Carrying the chop saw 11 Selecting the work surface 11 Setting the depth stop 11 12 Checking the automatic guard 12 Checking the arbor cap screw 12 13 Setting the miter vice angle 13 Cutting 5 to 7 wide workpieces 13 Cutting 7 to 9 wide workpieces 14 Operating the vice quick release 14 LED worklight switch 14 ON OFF switch 15 Replacing the cut off ...

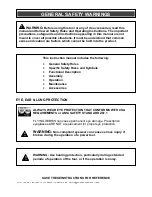
Страница 3: ...tool or any of its accessories read this manual and follow all Safety Rules and Operating Instructions The important precautions safeguards and instructions appearing in this manual are not meant to cover all possible situations It must be understood that common sense and caution are factors which cannot be built into the product ALWAYS WEAR EYE PROTECTION THAT CONFORMS WITH CSA REQUIREMENTS or AN...

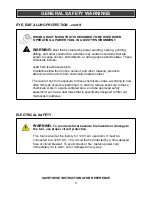
Страница 4: ...evel of risk from exposure to these chemicals varies according to how often this type of work is performed In order to reduce exposure to these chemicals work in a well ventilated area and use approved safety equipment such as a dust mask that is specifically designed to filter out microscopic particles SAVE THESE INSTRUCTIONS FOR REFERENCE WARNING To avoid electrical hazards fire hazards or damag...

Страница 5: ...hock When operating a power tool outdoors use an extension cord suitable for outdoor use Use of a cord suitable for outdoor use reduces the risk of electric shock See chart on Page 8 If operating a power tool in a damp location is unavoidable use a ground fault circuit interrupter GFCI protected supply Use of a ground fault circuit interrupter GFCI reduces the risk of electric shock Personal safet...

Страница 6: ... unfamiliar with the power tool or these instructions to operate the power tool Power tools are dangerous in the hands of untrained users Maintain power tools Check for misalignment or binding of moving parts breakage of parts and any other condition that may affect the power tool s operation If damaged have the power tool repaired before use Many accidents are caused by poorly maintained power to...

Страница 7: ...improperly installed Dust and abrasive materials should not be allowed to build up in the workshop Hot metal sparks could start a fire Do not remove the soft paper in the centre of the cut off blade Do not alter or enlarge the centre hole of the cut off blade as this could result in the blade shattering Always use a dust mask along with safety goggles when operating the chop saw Always use hearing...

Страница 8: ...our extension cord is properly wired and in good condition Always replace a damaged extension cord or have it repaired by a qualified electrician before using it Protect your extension cord from sharp objects excessive heat and damp or wet areas Use a separate electrical circuit for your power tools This circuit must not be less than 14 gauge wire and should be protected with either a 15 A time de...

Страница 9: ...Splash proof construction Watertight construction Protective grounding at grounding terminal Class I tools Revolutions or reciprocations per minute Diameter Off position Directional arrow Warning symbol Wear your safety glasses Wear hearing protection SYMBOLS WARNING Some of the following symbols may appear on the chop saw Study these symbols and learn their meaning Proper interpretation of these ...

Страница 10: ...matic guard Vice adjustment handle Cut off blade Vice miter gauge Vice quick release nut Trigger switch Arbor lock Base Swing arm Main handle Depth stop screw Safety chain Carrying handle LED worklight Motor end cap 17 mm Wrench ...

Страница 11: ... will not shift during operation of the chop saw Locating the chop saw near an electrical outlet will eliminate the need for an extension cord WARNING Never place the chop saw near any flammable liquids or items that can be damaged by the sparks thrown by the chop saw during cutting The hot sparks can ignite flammable liquids Hot metal sparks and sharp metal pieces will damage the work surface to ...

Страница 12: ...rise and fall freely when the swing arm is lowered and raised as outlined in 1 2 above If not clean any cuttings out from around the guard mechanism 3 Fig 4 CHECKING THE ARBOR CAP SCREW It is important to check the arbor cap screw to make sure the cut off blade is fully tightened WARNING Disconnect your chop saw from the power source before checking the arbor cap screw 1 Lift swing arm fully upwar...

Страница 13: ...ment mark 4 4 Tighten both miter gauge cap screws to lock the miter gauge in place NOTE Always make a test cut on a scrap workpiece to verify the miter angle setting CUTTING 5 to 7 WIDE WORKPIECES The vice is set up at the factory for cutting workpieces up to 5 in width This is the preferred set up If it is necessary to cut workpieces between 5 and 7 in width the miter gauge will have to be reloca...

Страница 14: ...lding the quick release nut upward in the released position pull the vice adjustment handle toward you to quickly open the vice 4 To quickly close the vice release the quick release nut and push the crank away from you 5 Use the crank to completely tighten the vice on the workpiece WARNING Always make sure the workpiece is flat against the chop saw base and securely held in the vice before turning...

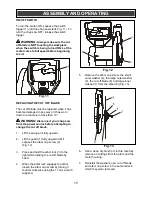
Страница 15: ...e the cut off blade 1 Lift the swing arm fully upward 2 Lift the guard 1 fully upward until it exposes the arbor cap screw 2 Fig 12 3 Press and hold the arbor lock 3 to the right while rotating the cut off blade by hand 4 When the arbor lock engages the arbor loosen the arbor cap screw by turning it counter clockwise using the 17 mm wrench supplied 5 Remove the arbor cap screw the small outer wash...

Страница 16: ...e miter gauge as required 3 Firmly lock the metal workpiece to be cut in the vice 4 Make sure you are wearing your safety goggles dust mask and hearing protection 5 Lower the cut off blade until it is about 1 above the workpiece NOTE The cut off blade MUST NOT be touching the workpiece when the motor switch is turned ON 6 While holding the chop saw handle firmly in your right hand turn the motor s...

Страница 17: ...es will wear down and require replacing The time intervals between replacements will vary depending upon the type of materials being cut and the hours of use It is recommended that the brushes be checked after each 10 hours of use When the length of the carbon brush reaches 1 4 6 35 mm the brushes should be replaced WARNING Unplug the tool from the power source 1 Use a 2 screwdriver and remove fou...

Страница 18: ...ep the air vents cleared of any built up dust to prevent the motor from overheating Remove accumulated dust and debris regularly using a soft DRY brush WARNING Use safety goggles when using an air jet to blow dust out of the chop saw DO NOT abuse power tools Abusive practices can damage the tool and the workpiece WARNING DO NOT attempt to modify this chop saw or create accessories Any such alterat...

Страница 19: ...19 EXPLODED VIEW ...
Страница 20: ...2 Spark arrestor 1 4 4050010038 Hex screw M16X170 1 5 2030280005 Connecting pipe cover 2 6 2050050034 Gemel torsional spring 1 7 2040320003 Connecting pipe 1 8 4060090011 Hex lock nut M16 1 9 2050050043 Hex screw M10X25 1 10 2030280002 Little flange plate 1 11 2030280001 Big flange plate 2 12 3140160001 Rubber 1 13 1270030037 Movable guard 1 14 2040320001 Screw M5 2 15 4040010036 Flat washer 8 2 1...

Страница 21: ...switch 1 42 4030010096 ST screw 3 9 12 6 43 2030050003 Cable plate 1 44 1190030054 UL power cable 1 45 3140010080 Cable guard 1 46 3120150002 Lower handle 1 47 2040320002 Chain lock pin 1 48 2030020017 6 flat washer 1 49 4040030013 6 spring washer 1 50 4060010006 M6 net 1 51 4010010108 6202 2RS bearing 1 52 1040070003 Motor rotor 1 53 4010010132 6200 2RZ bearing 1 54 3150260001 Air deflector 1 55 ...

Страница 22: ...rushes belts bits light bulbs and or batteries 2 shall be void if this tool is used for commercial and or rental purposes and 3 does not cover any losses injuries to persons property or costs This warranty does give you specific legal rights and you may have other rights which vary from state to state Be careful tools are dangerous if improperly used or maintained Seller s employees are not qualif...

Отзывы: