48
1
Gettin
g
Sta
rte
d
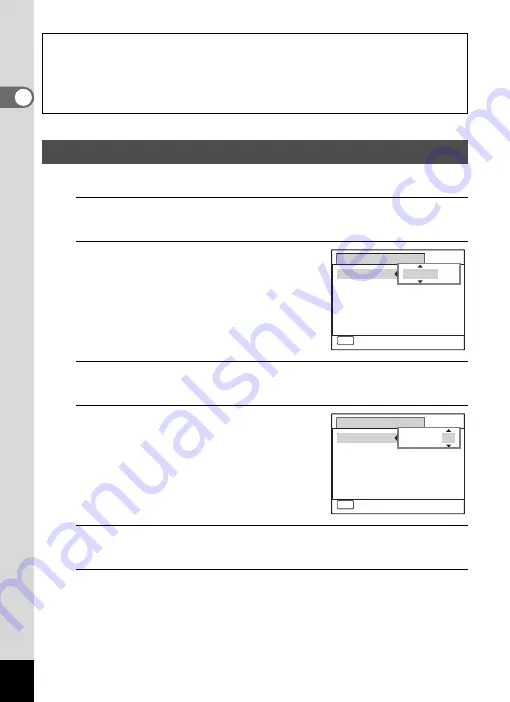
Set the current date and time and the display style.
1
Press the four-way controller (
5
).
The frame moves to [mm/dd/yy].
2
Use the four-way controller (
23
)
to choose the date format.
Choose from [mm/dd/yy], [dd/mm/yy] or
[yy/mm/dd].
3
Press the four-way controller (
5
).
The frame moves to [24h].
4
Use the four-way controller (
23
)
to select [24h] (24-hour display) or
[12h] (12-hour display).
5
Press the four-way controller (
5
).
The frame returns to [Date Format].
6
Press the four-way controller (
3
).
The frame moves to [Date].
The video output format (NTSC/PAL) is set to the format of the city selected in
[Hometown] on the [Initial Setting] screen. Refer to “List of World Time Cities”
(p.239) for the video output format of each city that will be set at the time of initial
setting, and “Changing the Video Output Format” (p.200) for changing the video
output format.
Setting the Date and Time
MENU
Date Adjustment
Cancel
Date Format
Date
Time
Settings complete
mm dd yy
01/01/2011
00:00
/ /
24h
MENU
MENU
Date Adjustment
Cancel
Date Format
Date
Time
Settings complete
01/01/2011
00:00
mm dd yy
/ /
24h
Содержание Optio RX18
Страница 16: ...Memo 14...
Страница 32: ...Memo 30...
Страница 53: ...2 Common Operations Understanding the Button Functions 52 Setting the Camera Functions 57...
Страница 160: ...Memo 158...
Страница 183: ...6 Recording and Playing Back Sound Recording Sound Voice Recording 182 Adding a Voice Memo to Images 186...
Страница 190: ...Memo 188...
Страница 191: ...7 Settings Camera Settings 190...
Страница 228: ...Memo 226...
Страница 256: ...254 9 Appendix W White Balance 112 Windows 211 World Time 195 Z Zoom x w 78 Zoom lever 52 54...
Страница 257: ...Memo...
Страница 258: ...Memo...
Страница 259: ...Memo...


