background image

EN-43

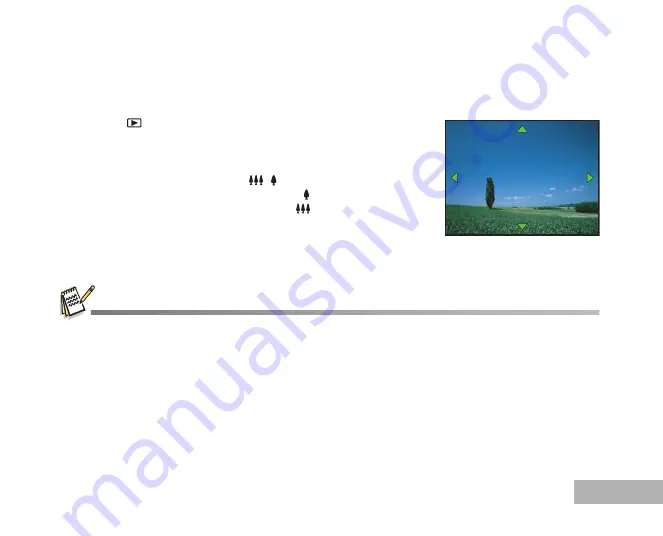
Magnifying Images

While reviewing your images, you may enlarge a selected portion of an image. This magnification allows you
to view fine details. The zoom factor displayed on the screen shows the current magnification ratio.

1. Press the 

 button.

„

The last recorded image appears on the LCD monitor.

„

To view the previous image, press the four-way controller (

W

).

„

To view the next image, press the four-way controller (

X

).

2. Adjust the zoom ratio by using the 

/

 button.

„

To enlarge the selected image, press the 

 button.

„

To return to the normal image, press the 

 button.

„

The magnification factor is displayed on the LCD monitor.

3. To view different portions of the images, press the four-way

controller (

STWX

) to adjust the display area.

„

The magnification factors range from 1.5X to 4X (within 6 stages: 1.5X, 2.0X, 2.5X, 3.0X, 3.5X and 4.0X).

„

Movies cannot be magnified during playback.

1.5X

1.5X

1.5X

Содержание Optio E20

Страница 1: ...yright as laid out in the Copyright Act and care should be taken here also To users of this camera There is a possibility that recorded data may be erased or that the camera may not function correctly...

Страница 2: ...erations This product supports PRINT Image Matching III PRINT Image Matching enabled digital still cameras printers and software help photographers to produce images more faithful to their intentions...

Страница 3: ...ny circumstances touch such exposed portions as there is a danger of receiving an electric shock Wrapping the strap of the camera around your neck is also dangerous Please take care that small childre...

Страница 4: ...ny battery leakage should come in contact with your eyes do not rub them Flush your eyes with clean water and get medical attention immediately If any battery leakage should come in contact with skin...

Страница 5: ...Do not insert the batteries with the positive and negative poles in the wrong orientation Doing so may cause the batteries to rupture or cause a fire Do not remove the external seal of the batteries...

Страница 6: ...camera from becoming moldy during storage Do not use the camera where it may come in contact with rain water or any other liquid because the camera is not weather water or liquid resistant Ensure tha...

Страница 7: ...ess forcefully on the LCD monitor This could cause breakage or malfunction Be careful not to sit down with the camera in your back pocket as this may damage the exterior of the camera or the LCD monit...

Страница 8: ...Setting the Date and Time 26 Formatting an SD Memory Card or Internal Memory 27 Using the LCD Monitor 28 TAKING IMAGES 29 Taking Images 29 Using the Mode Dial 30 Setting Image Resolution and Quality 3...

Страница 9: ...MERA TO COMPUTER 59 Step 1 Install the USB driver 59 Step 2 Connect the digital camera to your computer 60 Step 3 Download images or movie clips 61 Editing Software Requirements 62 Installing ACDSee f...

Страница 10: ...can be captured without using an SD Memory Card Support for SD Memory Card for memory expansion You may wish to expand the memory capacity by using an additional SD Memory Card USB connection Still i...

Страница 11: ...nents Digital Camera Quick Start Guide Operating manual CD ROM Software CD ROM S SW60 Camera Strap Video Cable USB Cable Two AA alkaline batteries for checking the camera s functionality Common Option...

Страница 12: ...1 2 3 4 5 7 8 6 Mode Dial 4 5 6 1 2 8 7 3 1 Shutter release button 2 Power switch 3 Mode dial 4 Flash 5 Self timer LED 6 Microphone 7 PC Video terminal 8 Lens Mode 1 Simple 2 Program 3 Portrait 4 Lan...

Страница 13: ...2 1 6 9 10 1 LED indicator 2 button button 3 Strap lug 4 button 5 button 6 Four way controller S button X button W button T button 7 button 8 MENU button 9 DC coupler cable cover 10 Battery card cover...

Страница 14: ...c Self timer 4 Focus mode Standard Macro Infinity 5 Number of shots available 6 Memory status Built in memory without card SD Memory Card 7 Battery Full battery power Medium battery power Low battery...

Страница 15: ...wer indicator 5 Index number of total number 6 DPOF indicator 7 Protect indicator 8 Date 9 Time 10 Four way controller guide 11 Aperture 12 Shutter speed 13 EV compensation 14 ISO sensitivity 15 White...

Страница 16: ...16 Movie Playback 1 Playback mode 2 Movie mode 3 File number of movie 4 Memory status 5 Battery power indicator 6 Index number of total number 7 Elapsed time 8 Date 9 Time 10 Four way controller guid...

Страница 17: ...the correct orientation as shown in the illustration 4 Close the battery card cover To remove the batteries turn the camera off before removing batteries and hold the camera with the battery card cov...

Страница 18: ...D CO2 1 Connect the DC terminal of the AC adapter to the DC input terminal of the DC coupler 2 Make sure that the camera is turned off and open the battery card cover Pull the battery card cover in t...

Страница 19: ...securely closed 5 Connect the AC plug cord to the AC adapter 6 Plug the AC plug cord into the power outlet Make sure to use only the AC adapter specified for the camera Damage caused by the use of an...

Страница 20: ...ake sure your camera is turned off before inserting or removing an SD Memory Card 2 Open the battery card cover 3 Insert an SD Memory Card in the correct orientation as shown in the illustration 4 Clo...

Страница 21: ...xisting data or formatting of the card Card locked appears on the LCD monitor in recording mode when the card is write protected Care should be taken if you remove the SD Memory Card immediately after...

Страница 22: ...or storing the card in direct sunlight or where it may be exposed to rapid changes in temperature or to condensation When using an SD Memory Card with a slow recording speed recording may stop while...

Страница 23: ...EN 23 Attaching the Camera Strap Attach the strap as shown in the illustration...

Страница 24: ...ED Indicator and Self timer Indicator Indicator State Description Activity LED indicator Solid green The digital camera is on LED indicator Blinking red and green USB communication transfer in progres...

Страница 25: ...oller ST to select the language you want 5 Press the button to confirm Set up1 Set up1 Set up2 Set up2 Set up3 Set up3 Format Format Sound Sound Date Adjust Date Adjust Language Language Format Sound...

Страница 26: ...ler T To select the time display in 12 hours or 24 hours format press the four way controller ST 5 Press the button after all fields are set The date illustration shown is for the purpose of explanati...

Страница 27: ...the four way controller ST to select OK then press the button to confirm When you format an SD Memory Card be aware that all data on the SD Memory Card will be deleted Protected images are also delete...

Страница 28: ...or may vary according to the current settings LCD monitor display mode changes each time you press the button in the following order when taking still images when recording movie clips Normal Display...

Страница 29: ...s Auto Focus feature automatically focuses the image The focus frame turns green if the subject is in focus Proper exposure is determined and locked at the same time 4 Press the shutter release butto...

Страница 30: ...re for taking still pictures You can adjust other functions such as flash mode or continuous shooting mode Portrait mode Lets you take pictures of people standing out with the background out of focus...

Страница 31: ...the button 4 Use the four way controller ST to select the desired setting then press the button to confirm 5 Follow the step 3 and 4 above to set the Quality Level The number of recordable images and...

Страница 32: ...x and the zoom bar is within the digital zoom area You can enlarge the subject to a maximum magnification equivalent to 12 times A useful feature as it is however the more the image is enlarged the mo...

Страница 33: ...Compose your scene and press the shutter release button The camera has four flash modes as below Flash mode Description Auto The flash discharges automatically according to the photographic condition...

Страница 34: ...has three focus modes as below Focus mode Description Standard Select Standard focus setting for most occasions when you want the camera to automatically determine the focus setting When using Standar...

Страница 35: ...setting using four way controller WX 4 Press the button to confirm the setting The indicator is displayed on the LCD monitor 5 Press the shutter release button halfway to lock the focus 6 Press the sh...

Страница 36: ...Auto Bracket You can also change the setting using the four way controller WX 4 Press the button to confirm the setting The indicator is displayed on the LCD monitor 5 Press the shutter release button...

Страница 37: ...Press the four way controller S and use S to select your desired self timer mode You can also change the setting using four way controller WX 5 Press the button to confirm the setting 6 Compose your s...

Страница 38: ...pressed This mode is useful for preventing camera shake 10 sec Self timer The image is captured about 10 seconds after the shutter is pressed This mode is suitable for the shots in which the photograp...

Страница 39: ...een bright and dark areas between the subject and the background is extremely high The EV compensation value can be set in the range from 2 0EV to 2 0EV 1 Rotate the mode dial to or 2 Press the power...

Страница 40: ...6 To cancel the setting press the MENU button and exit the menu Menu2 Menu2 Menu3 Menu3 Recorded Pixels Recorded Pixels Quality Level Quality Level White Balance White Balance Sensitivity Sensitivity...

Страница 41: ...and turn your camera on by pressing the power switch 2 Press the shutter release button to start recording 3 To stop recording press the shutter release button again The optical zoom function 3X can...

Страница 42: ...ages To view the previous image press the four way controller W To view the next image press the four way controller X For protected images movie clips mark will be displayed Refer to the section in t...

Страница 43: ...four way controller W To view the next image press the four way controller X 2 Adjust the zoom ratio by using the button To enlarge the selected image press the button To return to the normal image p...

Страница 44: ...For recorded movie clips the movie mode icon will be displayed For protected images movie clips mark will be displayed Refer to the section in this manual titled Protecting Images Movie Clips EN 48 fo...

Страница 45: ...tions can be performed during playback Four way controller W Reverse playback Four way controller S Pause The following operations can be performed while playback is paused Four way controller W Frame...

Страница 46: ...t Slideshow and press the button 3 Use the four way controller ST to set the playback interval then press the button You can choose from 3 sec 5 sec and 10 sec The slideshow starts The movie clips dis...

Страница 47: ...so select the image movie clip from the thumbnail display 4 Press the button to delete 5 Use the four way controller ST to select This Image or All Images as your preference then press the button This...

Страница 48: ...Press the MENU button then use the four way controller T to select Protect and press the button 4 Use the four way controller ST to choose the desired setting then press the button This Image Protect...

Страница 49: ...r appears on the selected image If you wish to cancel the protect function of a protected image select Unprotect Even protected images and movies will be deleted by formatting the SD Memory Card or th...

Страница 50: ...ices to be connected 1 Connect one end of the video cable to the PC VIDEO terminal of the digital camera making sure the shapes of both terminals match each other 2 Connect the other end to the video...

Страница 51: ...ize and press the button 4 Use the four way controller ST to select the desired setting then press the button to confirm 5 To change the image quality select Quality Change in the step 3 above and sel...

Страница 52: ...ntroller X to select Playback2 and use T to select Image Copy Press the button The confirmation screen appears 4 Use the four way controller ST to select OK and then press the to confirm When a file i...

Страница 53: ...ress the button then use the four way controller WX to select the desired image you want to print 2 Press the MENU button Use the four way controller ST to select DPOF then press the button 3 Use the...

Страница 54: ...ges stored on an SD Memory Card Before you perform the DPOF settings on your camera always remember to copy your images from the internal memory to an SD Memory Card first The print icon will appear o...

Страница 55: ...e four way controller X to select the Set up2 menu then use the four way controller T to select USB Con Press the button 3 Use the four way controller ST to select PictBridge then press the button 4 C...

Страница 56: ...s 3 Use the four way controller STWX to select as your preference then press the button Copies Specifies the number of prints You can select the number up to 10 Date If you select With images are prin...

Страница 57: ...g now on the LCD monitor The message will disappear after the printing is finished Then the screen returns to Select Printing Mode To cancel printing Pressing the button during print data transfer dis...

Страница 58: ...print images with DPOF setting you may choose DPOF AUTOPRINT in Select Printing Mode 2 To set Print Settings follow steps 5 to 6 in Print Mode EN 57 When connecting a printer which is not compatible...

Страница 59: ...nstallation on Windows 98 98SE The USB driver on the supplied CD ROM S SW60 is exclusively for Windows 98 and 98SE Windows 2000 ME XP users don t need to install the USB driver 1 Insert the enclosed C...

Страница 60: ...ial to and turn your camera on by pressing the power switch 2 Press the four way controller X to select the Set up2 menu then use the four way controller T to select USB Con 3 Press the button 4 Use t...

Страница 61: ...load transfer images by copying them from the Removable disk Untitled disk on a Macintosh to your computer hard disk drive Windows Open the removable disk and double click on the DCIM folder to open i...

Страница 62: ...me for PENTAX is compatible with Windows only QuickTime 7 available on the provided CD S SW60 cannot be installed on Windows OS other than 2000 XP QuickTime 6 is required to see QuickTime compatible m...

Страница 63: ...images Use tools such as red eye reduction crop sharpen blur and emboss to enhance or correct your images Image management tools such as exposure adjustment convert resize rename and rotate can be use...

Страница 64: ...ed Pixels Quality Level Quality Level Recorded Pixels Quality Level Select Select Exit Exit Select Exit Menu2 Menu2 Menu3 Menu3 Recorded Pixels Recorded Pixels Quality Level Quality Level White Balanc...

Страница 65: ...ion in this manual titled Setting Image Resolution and Quality EN 31 for further details 2816x2112 2304x1728 1600x1200 640x480 Quality Level Sets the quality compression rate at which the image is cap...

Страница 66: ...her details White Balance Sets the white balance when shooting under a variety of lighting conditions and permits photographs to be taken that approach the conditions that are seen by the human eye Au...

Страница 67: ...me but gives greater weight to the subject matter at the center Spot The exposure is determined by the small area in the center of the screen only Digital Zoom This sets whether or not to use digital...

Страница 68: ...ent degrees of color This is called Saturation High Medium Low Date Imprint The date of recording can be printed directly on the still images This function must be activated before the image is captur...

Страница 69: ...y controller STWX to select the desired setting then press the button 5 To exit the movie menu press the MENU button Item Functional Description Color Refer to the Still Picture Capture Menu s option...

Страница 70: ...ion item then press the button 4 Press the four way controller ST to select the desired setting then press the button 5 To exit the playback menu press the MENU button Slideshow Slideshow Protect Prot...

Страница 71: ...he data to read only to prevent images from being deleted by mistake Refer to the section in this manual titled Protecting Images Movie Clips EN 48 for further details DPOF Allows you to select the de...

Страница 72: ...ion rate of a recorded image Compresses images and overwrites an old size images with a newly compressed image Only quality changing to a lower quality level is available Refer to the section in this...

Страница 73: ...u rotate the mode dial to another mode Set up1 Set up1 Set up1 Set up2 Set up2 Set up3 Set up3 Format Format Sound Sound Date Adjust Date Adjust Language Language Format Sound Date Adjust Language Off...

Страница 74: ...27 for further details Sound This sets whether or not to mute the camera sound each time you press a camera button Loud Soft Off Date Adjust This sets the date and the time Refer to the section in th...

Страница 75: ...PictBridge Video Out Sets video output of the camera to match the video output system of the equipment that you are going to connect to the camera PAL NTSC Brightness This sets the brightness of the...

Страница 76: ...e photographs This creates a new folder The captured images are recorded to the newly created folder from number 0001 Reset Returns all basic settings to the digital camera s default settings Date Adj...

Страница 77: ...EN 77 CONNECTING THE DIGITAL CAMERA TO OTHER DEVICES VIDEO CABLE audio video equipment USB CABLE USB CABLE PictBridge Function PC SD Memory Card SD Card Reader PCMCIA Adapter Printer...

Страница 78: ...Card File format JPEG Exif 2 2 DCF Motion JPEG AVI Lens F no Wide angle 2 8 Telephoto 4 8 Focal length 5 5mm 16 5mm Equivalent to 35mm Camera 34 102 mm Focus range Normal 0 4m to infinity Macro 0 06m...

Страница 79: ...V in 0 3EV increments White balance Auto Daylight Cloudy Tungsten Fluorescent ISO Auto 64 100 200 Interface PC VIDEO terminal Power 2 x AA alkaline or Ni MH rechargeable batteries Two alkaline batteri...

Страница 80: ...on Close the battery card cover correctly Properly connect the AC adapter Camera suddenly powers down The function of Auto Power Off in the mode has been activated The battery has run out Turn the pow...

Страница 81: ...Mode Switch the mode dial to another mode Continuous shooting is not possible The capacity of the built in memory or SD Memory Card is full Insert SD Memory Card with available space or delete unwante...

Страница 82: ...ual capacity varies according to the shooting conditions and settings Resolution Quality Internal Memory SD Memory Card 32MB 64MB 128MB 256MB 512MB 1GB 2GB 2816 x 2112 Best 4 9 20 42 82 164 329 670 Be...

Страница 83: ...apacity of the internal memory and the SD Memory Card The values for the recording time may vary depending on the shooting conditions and settings The frame rate is 30 fps frames per second Image size...

Страница 84: ...st 26 Date Imprint 68 DC input terminal 18 Delete button 13 47 Deleting 47 Digital Zoom 10 32 67 69 DPOF 53 Drive Mode 14 35 E EV Compensation 14 39 F Flash Flash mode 14 33 Focus frame 14 15 29 Focus...

Страница 85: ...laying Back Movie 45 Portrait 12 14 30 Power Power switch 12 24 Program 12 14 30 Protect 48 71 Q Quality Change 51 72 Quality Level 31 65 66 R Recorded Pixels 14 31 65 66 Recording Movie 41 Reset 76 R...

Страница 86: ...6 T Thumbnail Display 44 Transferring files 59 Tripod socket 13 TV 50 U USB connection 10 55 59 60 75 USB driver 59 V Version 76 Video Out 75 W White Balance 14 40 66 Z Zoom bar 32 43 Zoom button 13 3...

Страница 87: ...agreed that the liability of the manufacturer or its representatives under all guarantees or warranties whether expressed or implied is strictly limited to the replacement of parts as hereinbefore pro...

Страница 88: ...nt for servicing please make sure that you are sending it to the manufacturer s authorized representatives or their approved repair shops unless you are sending it directly to the manufacturer Always...

Страница 89: ...me countries your local retailer may also take back your old product free of charge if you purchase a similar new one Please contact your local authority for further details By disposing of this produ...

Страница 90: ...mful interference to radio or television reception which can be determined by turning the equipment off and on the user is encouraged to try to correct the interference by one or more of the following...

Страница 91: ...nt with the standards Records maintained continue to reflect the equipment being produced can be expected to be within the variation accepted due to quantity production and testing on the statistical...

Отзывы: