85
4
Tak
ing Pi
cture
s
1
Press the
)
button in Capture mode to display
z
.
The central portion of the screen is magnified twice as large when
focusing.
2
Press the Zoom/
w
/
x
button.
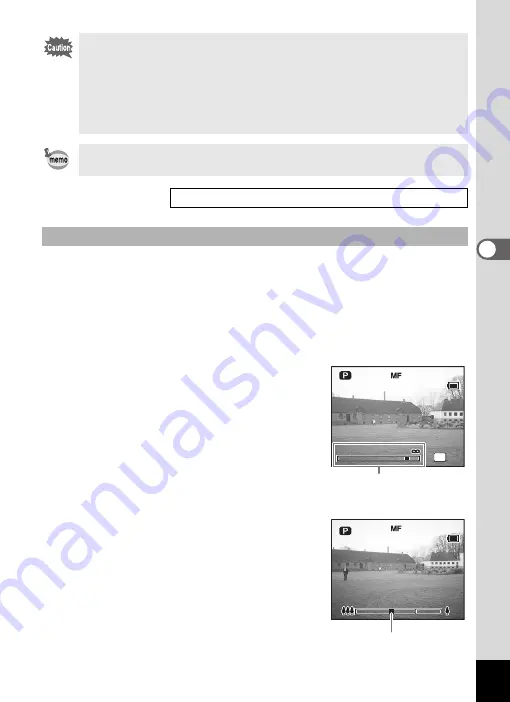
The MF indicator appears on the LCD monitor, indicating the
approximate distance to the subject. Using the indicator as a guide,
adjust the focus with the Zoom/
w
/
x
button.
x
: for distant focus
w
: for closer focus
3
Press the
4
button.
The focus position is set and the screen
returns to the normal display.
To set the focus position, you can also press
the shutter release button halfway or fully, or
wait for at least five seconds.
To readjust the focus, press the
)
button once to return to Step 1 above.
4
Press the Zoom/
w
/
x
button to
adjust the captured area.
When the focus position has been
determined, the LCD monitor display
returns to the normal picture range and the
zoom bar appears in the position where the
MF indicator was displayed for focusing.
To enlarge the subject or capture a broader
area, press the Zoom/
w
/
x
button to
adjust the captured range.
• Make sure that the surface of the lens is clean as any dirt on the
lens in
r
mode may cause the camera to focus on the dirt rather
than on the subject.
• If you take a picture while looking through the viewfinder when the
focus mode is set to
q
or
r
, the range of the resulting picture will
differ from what was seen in the viewfinder. Be sure to check the
image on the LCD monitor.
• The default setting is Autofocus mode.
• Only the digital zoom can be used in
r
mode.
Saving the Focus Mode
Manual Focus
OK
O K
O K
0.02
0.02
0.3
0.3
11
3 8
3 8
3 8
MF Indicator
1 0 0
1 0 0
1 0 0
Zoom bar
Содержание 750Z - Optio Digital Camera
Страница 33: ...Memo 31 ...
Страница 82: ...80 4 Taking Pictures Example of a 3D Picture Parallel Method ...


