151
6
Editin
g an
d Printi
ng Im
age
s
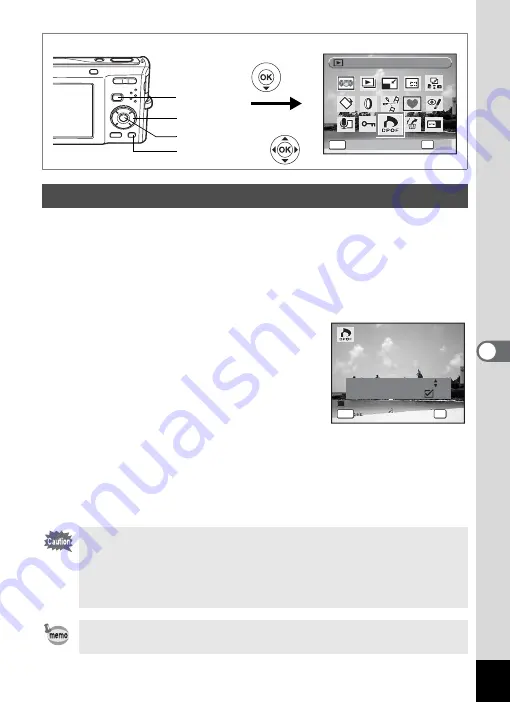
When you choose the number of copies and whether or not to insert the
date, the settings are applied to all the images stored in the camera.
1
Display the screen for DPOF settings in
Q
mode.
Refer to Steps 1 to 3 on p.149.
2
Use the four-way controller (
23
) to select [All Images].
3
Press the
4
button.
The message [DPOF setting for all images]
appears.
4
Choose the number of copies and
whether to insert the date or not.
Refer to Steps 6 and 7 in “Printing Single
Images” (p.150) for details of how to make
the settings.
5
Press the
4
button.
The DPOF settings for all the images are saved and the camera
returns to the DPOF setting screen.
Printing All Images
• The number of copies specified in the DPOF settings applies to all
the images. Before printing, check that the number is correct.
• If the pictures already have the date imprinted on them (p.105), do
not set Date
O
(On) in DPOF settings. Otherwise, the date could
be imprinted twice on your printed pictures.
Settings for single images are canceled when settings are made for
all images.
DPOF
DPOF
DPOF
OK
OK
OK
OK
MENU
Cancel
Cancel
Cancel
Four-way controller
4
button
Green button
Q
button
C o p i e s
D P O F s e t t i n g f o r
D P O F s e t t i n g f o r
a l l i m a g e s
a l l i m a g e s
D P O F s e t t i n g f o r
a l l i m a g e s
D a t e
D a t e
D a t e
C a n c e l
C a n c e l
C a n c e l
OK
O K
O K
O K
MENU
0 1
Содержание 17116 - Optio M50 8MP Digital Camera
Страница 73: ...71 4 Taking Pictures 7 Press the shutter release button fully The picture is taken ...
Страница 205: ...Memo ...
Страница 209: ...207 9 Appendix Z Zoom button 44 46 Zoom xw 78 ...
Страница 210: ...Memo ...
Страница 211: ...Memo ...


