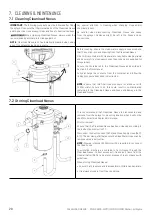


Instructions to replace Umbrella Valves
11
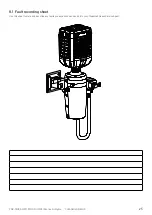
This operation can be carried out with the Cleanload Nexus fitted
in position and with the Suction Hose and Rinse Water Hose
connected to the sprayer.
!
WARNING
Always ensure that suction and rinse supplies
cannot be accidentally operated during this procedure.
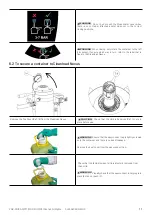
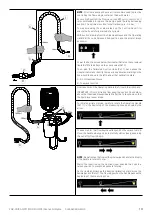
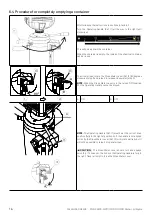
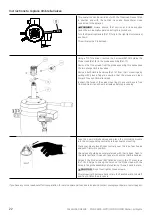
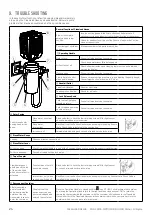
Turn the Operating Handle (Ref. 11) fully to the right (anti-clockwise)
as shown.
This will raise the Probe Head.
Using a "T10 Torx driver", remove the 2 screws (Ref. 19) holding the
Probe Head (Ref. 18) to the probe assembly (Ref. 17).
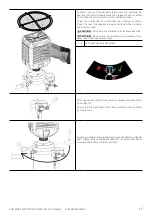
Remove the Probe Head from the probe assembly, this will expose
the two orange Umbrella Valves.
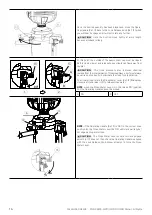
Remove both Umbrella Valves (Ref. 14) from their mountings by
pulling with gloved fingers, ensuring that the gloves are clean.
Discard the used Umbrella Valves.
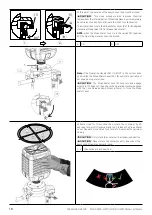
Inspect the faces of the valve mountings to ensure they are free
from debris, dirt and chemical residue before proceeding.
Take the new Umbrella Valves and place the protruding mounts
into the corresponding central hole in each valve mounting.
Place your clean gloved finger centrally over the top of each valve
and push firmly into position.
The valves should be securely retained with their edges flush to
the metal surface. If in doubt, repeat with another Umbrella Valve.
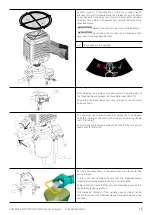
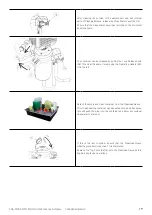
Reinsert the Probe Head (Ref 18) and screw in the 2 Torx screws
(Ref. 19). It helps to line up the holes on the Probe Head with the
holes in the probe assembly before placing this part back in place.
!
CAUTION
Do not overtighten these screws.
After screwing the screws back, rotate the handle back to the start
position to finish the procedure.
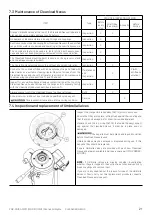
If you have any concerns about effective operation, for service, spare parts and service advice contact your sprayer dealer or service agent.
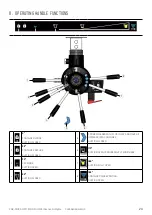
CLEANLOAD NEXUS
PNR-CN100-OIPM (10/12/21) ©2021 Pentair. All Rights.
22