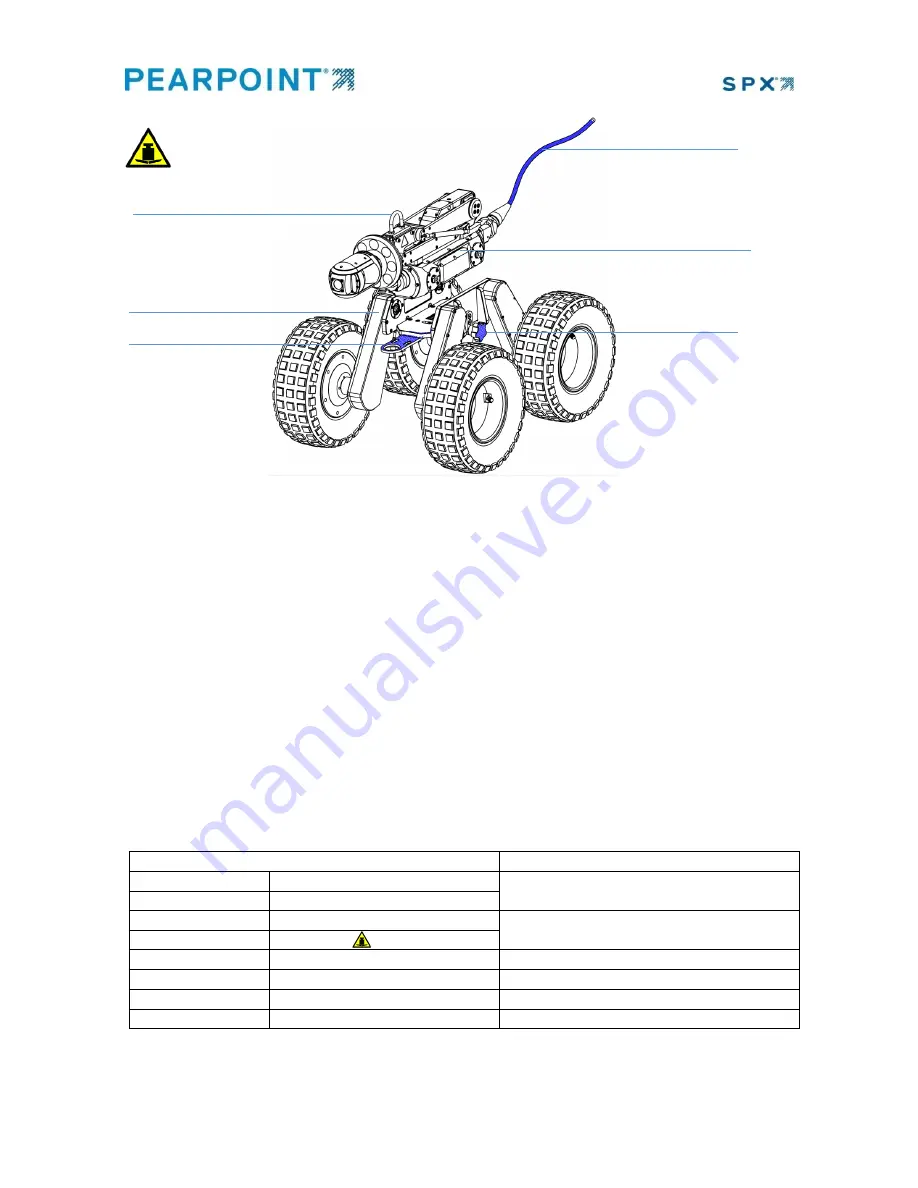
P356 Cradle Deployment and Operation Guide
Step 1: Install P356 Crawler into P356 Cradle
Place
P356 Crawler (3)
in
P356 Cradle (1)
. Choose whether the
Deploy Bracket (5)
is to face forwards or
backwards, set by whether the camera is to point upwards or downwards during deployment.
Push
P356 Crawler
to the opposite side of
P356 Cradle
from
Lobe screw (4)
and fully engage drives on that
side. Tighten
Lobe screw
until hand tight. The spring-loaded drive shafts of
P356 Cradle
engage
automatically when P356 Cradle Assembly is driven.
Step 2: Deploy P356 Cradle Assembly
Using a rope through
Deploy Bracket
, lower the P356 Assembly into position using
P350 Cable (2)
to guide
the Assembly if required. When it is in position, remove the rope. Set the wheel size to 170mm in the P350
‘Setup Equipment’ menu and begin your survey.
Step 3: After the survey
Lift P356 Cradle Assembly using a rope through
Deploy Bracket
. Again,
P350 Cable
may be used to guide
its position. Loosen
Lobe screw
to remove
P356 Crawler
from
P356 Cradle
, if required.
Specifications
Notes
Dimensions (H x W x L)
369 x 534 x 712mm / 14.5 x 21.0 x 28.1"
P356 Cradle only
Weight
22kg / 48.5lb
Dimensions (H)
524mm / 20.6"
Min height of Assembly, incl. P356 Crawler, Powered
Elevator (lowered), PTZ Camera and Lighthead
Weight
50kg / 110lb
Ordering information
Description
Sales Part Number
P356 Cradle
10/P356-CRADLE
P356 Crawler and other parts available separately
Wheel for P356 Cradle
10/P356-CRADLE-WHEEL
Single spare wheel 13"/325mm
P350 Cable (2)
Can be used to guide
the P356 Cradle during
deployment
Lobe screw (4)
To fix the P356 Crawler
in place in the Cradle
P356 Crawler (3)
With Powered Elevator,
PTZ camera, and
Lighthead
Deploy Bracket (5)
For rope, to deploy
the P356 Cradle
assembly
P356 Cradle (1)
Elevator Hook (6)
Do not use to
deploy P356 Cradle
Assembly
Heavy object: care must be taken when lifting


