background image

Manual 


13 

Battery 

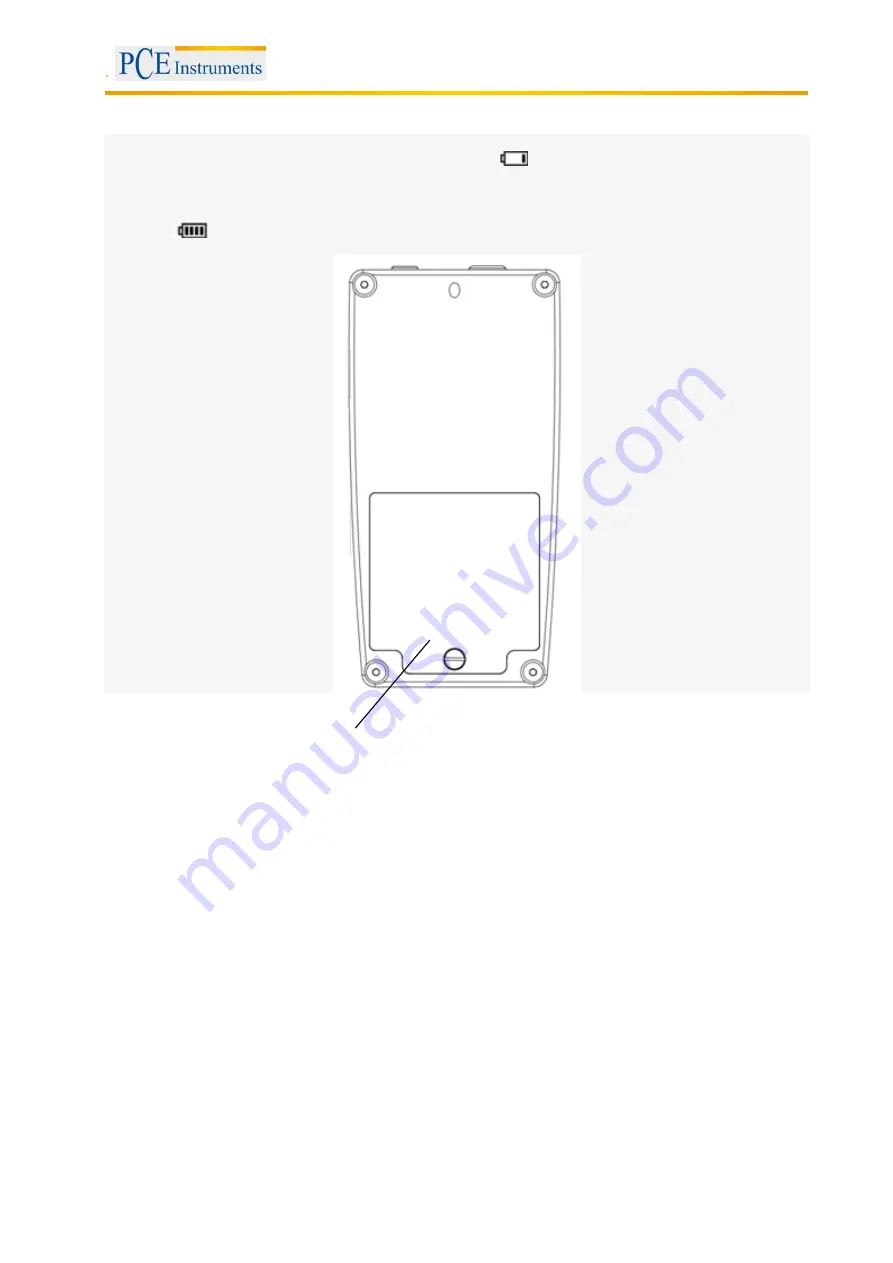
The main unit includes a rechargeable battery (charger, 4.2 V, 4800 mAh). You can find the battery lid on 
the back of the device. When the battery is flat the symbol 

“appears in the upper right corner from 

the main menu, to remind you to charge the battery in time. Plug one end of the charger into the left 
socket of the instrument and insert the plug into a 230 V outlet and charge the device completely. After 8 
hours, the device is fully charged; The minimum charging time is two hours. When the device is fully 
charged, “

“ is displayed in the upper right corner of the screen. 


Battery lid 

Содержание PCE-5000

Страница 1: ...er FL 33458 USA From outside US 1 Tel 561 320 9162 Fax 561 320 9176 info pce americas com www pce instruments com english www pce instruments com PCE Instruments UK Ltd Units 12 13 Southpoint Business...

Страница 2: ...System setup 17 8 2 1 Language option 17 8 2 2 Sound 17 8 2 3 Battery manager 17 8 2 4 Display 17 8 2 5 Date 17 8 2 6 Restore default 17 8 3 Save setup 17 8 3 1 Autosave 17 8 3 2 Result display 17 8...

Страница 3: ...ness tests of central axes thin walled pipes and vessels Hardness testing of tires and turbine rotor Hardness tests of cutting blades Hardness testing of welded parts Hardness tests of certain opening...

Страница 4: ...the recharger with wet or damp hands otherwise there is a danger of an electric shock Declaration Without the prior written consent of the Company and subsidiaries for all products that are referring...

Страница 5: ...ications Measurement range Rockwell 20 3 68 0 HRC 41 0 100 0 HRB 61 0 85 6 HRA Brinell 85 650 HB Vickers 50 999 HV Tensile strength 255 2180 N mm Accuracy Rockwell HRD 1 5 HR Brinell HB 3 Vickers HV 3...

Страница 6: ...ilicone 1 x RS 232 interface cable 1 x robust carry case 1 x user manual 4 1 Optional accessories Probes There are different probes depending on the testing forces available 10 N 50 N 98 N Supporting...

Страница 7: ...ystem description 5 1 Main structure and basic principle Front and back view of the ultrasonic hardness tester 1 2 6 3 4 5 1 4 pin socket 2 8 pin socket 3 Power button 4 USB interface 5 Operation pane...

Страница 8: ...Enter In measurement mode start measurement In menu back Menu During measurement open menu In menu back Power on off brightness Press shortly switch on off backlight Press long switch on off the devi...

Страница 9: ...can see how many measurements have to be made in the current test series In addition to that you can see in which slot the measured data has been stored Material information Here you can see which mat...

Страница 10: ...Manual 10 5 4 Measurement probe 8 pin socket Vickers diamond Note The standard probe is preset to 20 N Other probes are available as optional accessory...

Страница 11: ...300 16 Material hardness HV Diagonal line of the impression of the inspection stamp 800 68 600 79 300 111 Note The table only shows the values for the 20 N probe Minimum thickness of the tested objec...

Страница 12: ...ensions and weight of the part to be tested From the above analysis all probes request coating layer or surface layer less than 1 mm The hardness value will change if there is resonance The highest va...

Страница 13: ...er right corner from the main menu to remind you to charge the battery in time Plug one end of the charger into the left socket of the instrument and insert the plug into a 230 V outlet and charge the...

Страница 14: ...ar a clicking sound the connections are correct 7 2 Measurement To perform a measurement follow these steps 1 Press Power and move the ON OFF switch to ON so that the power supply is turned on You wil...

Страница 15: ...settings you need to stick to that setting Otherwise the measurement is not completed The ultrasonic hardness meter is a highly precise instrument Take care to always hold the probe with two hands in...

Страница 16: ...an rename the calibrations Use arrow and ENTER keys to confirm the entered data Note When in measurement mode you can also get into this mode by pressing the MAT key Hardness scale Here you can choose...

Страница 17: ...re the factory settings Please enter the password standard 888888 and press ENTER Then press ENTER again to confirm the reset Press the MENU key to cancel Note All data is going to be deleted This inc...

Страница 18: ...ibration is necessary 9 3 Calibration procedure 9 3 1 Calibration with two calibration standards Press MENU in the main menu Move to test setup and choose the Calibration setup Insert the password 888...

Страница 19: ...calibration settings you can also enter the tolerance thresholds If you have entered the upper and lowest value the instrument shows if the measured value is within that area every time you measure If...

Страница 20: ...use them or give them to a recycling company which disposes of the devices in line with law If you have any questions please contact PCE Instruments 11 Contact If you have any questions about our rang...

Отзывы: