background image

Mainboard User’s Manual

This publication, photographs, illustrations and software are under 
the protection of international copyright laws and all rights 
reserved. It does not allow any reproduction of this manual, 
content and any materials contained herein without the written 
consent of the authentic manufacturer. 
The information in this manual is subject to change without notice.
The manufacturer does neither represent nor warrant the contents 
hereof; and specifically disclaims any implied warranties of 
merchantability or fitness for any particular purpose. Furthermore, 
the manufacturer reserves the right to revise and change this 
publication from time to time, without the obligation of notifying 
any person of such revision or changes.

Trademarks

IBM, VGA, and PS/2 are registered trademarks of International 
Business Machines.
Intel, Pentium, Pentium-II, and MMX are registered trademarks of 
Intel Corporation.
Microsoft, MS-DOS and Windows 95/98/NT/2000 are registered 
trademarks of Microsoft Corporation.
PC-cillin and ChipAwayVirus are trademarks of Trend Micro Inc.
Award is a trademark of Award Software Inc.  
MediaRing Talk is a registered trademark of MediaRing Inc.
3Deep is a registered trademark of E-Color Inc.
It has been acknowledged that all mentioned brands or product 
names are trademarks or registered trademarks of their respective 
holders.  

Copyright © 2001

All Rights Reserved

M921 Series, V1.0A

VT8753/September 2001

Содержание M921 Series

Страница 1: ...evise and change this publication from time to time without the obligation of notifying any person of such revision or changes Trademarks IBM VGA and PS 2 are registered trademarks of International Bu...

Страница 2: ...Mainboard User s Manual II...

Страница 3: ...nal Devices 18 Chapter 3 BIOS Setup Utility 23 Introduction 23 Running the Setup Utility 24 Standard CMOS Features Page 25 Advanced BIOS Features Page 27 Advanced Chipset Features Page 30 Integrated P...

Страница 4: ...Mainboard User s Manual IV...

Страница 5: ...slot a CNR Communications and Networking Riser slot and an onboard 10BaseT 100BaseTX Network interface optional In addition this mainboard has a full set of I O ports including two PS 2 ports for mou...

Страница 6: ...es the bandwidth up to 266 MB s and performance necessary for even the most demanding Internet and 3D graphics Support for an 4xAGP interface providing vivid 3D graphics and video performance An ATA 1...

Страница 7: ...as well as 18 bit stereo full duplex codec with independent and variable sampling rates Further features include support for four analog line level stereo inputs Expansion Options The mainboard comes...

Страница 8: ...C and PHY in compliance with IEEE802 3u 100BASE TX 10BASE T and ANSI X3 263 TP PMD standards In compliance with ACPI 1 0 and the Network Device Class Power Management 1 0 High Performance achieved by...

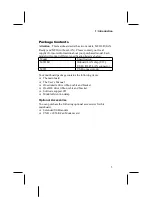
Страница 9: ...as below Model Specification M921LR Onboard LAN chip U12 USB RJ 45 LAN connector M921 USB connector only Your mainboard package contains the following items The mainboard The User s Manual One diskett...

Страница 10: ...a wrist strap you can discharge static electricity by touching the bare metal of the system chassis 3 Handle the mainboard carefully by the edges Avoid touching the components unless it is absolutely...

Страница 11: ...tly Install the mainboard in a system chassis case Connect any extension brackets or cables to connecting headers on the mainboard Install other devices and make the appropriate connections to the mai...

Страница 12: ...nboard User s Manual Mainboard Components Identify major components on the mainboard via this diagram underneath Note Those jumpers of mainboard not appearing in this illustration are for testing only...

Страница 13: ...nters or other parallel communications devices 5 Use the COM ports to connect serial devices such as mice or fax modems COM1 is identified by the system as COM1 3 COM2 is identified by the system as C...

Страница 14: ...ollow these instructions to install the CPU 1 Unhook the CPU socket s locking lever by pulling it away from socket and raising it to the upright position 2 Match the pin 1 corner of CPU socket to the...

Страница 15: ...n 3 3V unbuffered SDRAM memory modules The memory chips must be standard or registered SDRAM Synchronous Dynamic Random Access Memory The CPU supports 100MHz system bus The SDRAM DIMMS can synchronous...

Страница 16: ...on each side of the DIMM slot down 2 Align the memory module with the slot The DIMM slots are keyed with notches and the DIMMs are keyed with cutouts so that they can only be installed correctly 3 Ch...

Страница 17: ...JP2 Wake on Keyboard USB activity This jumper enables any USB keyboard activity to power up a system previously in a standby or sleep state Jumper Type Description Setting default JP2 3 pin Wake on K...

Страница 18: ...switch and LED connectors found on ATX or Micro ATX cases Refer to the table below for information Device Pins Empty 10 N C 9 Power ON OFF 6 8 Reset Switch 5 7 Green LED Indicator 2 4 HDD LED 1 3 Not...

Страница 19: ...mainboard If you want to install more than two IDE devices get a second IDE cable and you can add two more devices to the secondary IDE channel IDE devices have jumpers or switches to set the IDE dev...

Страница 20: ...unications Networking Riser CNR slot can be used to insert a CNR card 1 Remove a blanking plate from the system case corresponding to the slot you are going to use 2 Install the edge connector of the...

Страница 21: ...2 Mainboard Installation Connecting Optional Devices Refer to the following for information on connecting the mainboard s optional devices 17...

Страница 22: ...ont panel MIC Speaker Out header This header allows the user to install auxiliary front oriented microphone and line out ports for easier access Pin Signal Name Pin Signal Name 1 3 5 7 9 MICIN MICBIAS...

Страница 23: ...ts to the mainboard Pin Signal Name Pin Signal Name 1 3 5 7 9 VCC 5V USBP2 N port 2 USBP2 P port 2 GND Key pin 2 4 6 8 10 VCC 5V USBP3 N port 3 USBP3 P port 3 GND OC over current detect LUSB1 LUSB2 Fr...

Страница 24: ...to plug into the mainboard WOM1 connector This enables the Wake On Modem WOM1 feature When your system is in a power saving mode any modem signal automatically resumes the system You must enable this...

Страница 25: ...Signal Name 1 2 3 4 5 VCC No pin IRRX GND IRTX SIR Serial infrared port 1 The mainboard supports a Serial Infrared SIR data port Infrared ports allow the wireless exchange of information between your...

Страница 26: ...ll coordination between system components If the Setup Utility configuration is incorrect it may cause system s malfunction It can even keep your computer from booting properly If it happens you can u...

Страница 27: ...an use the cursor arrow keys to highlight any of the options on the main menu page Press Enter to select the highlighted option To leave the setup utility press the Escape key To cycle through the Set...

Страница 28: ...Select PU PD Value F10 Save ESC Exit F1 General Help F59 Previous Values F6 Fail Safe Defaults F7 Optimized Defaults Date Time Use these items to set up system date and time IDE Pri Master Pri Slave S...

Страница 29: ...value Halt On This item defines the operation of the system POST Power On Self Test routine You can use this item to select which types of errors in the POST are sufficient to halt the system Base Ex...

Страница 30: ...Delay Msec 250 Security Option Setup OS Select For DRAM 64MB Non OS2 HDD S M A R T Capability Disabled Video BIOS Shadow Enabled Small Logo EPA Show Disabled Item Help Menu Level Allows you to choose...

Страница 31: ...computer s application of looking for an operating system to load at start up time Boot Other Device If you enable this item the system will search for other booting devices if it fails to find one i...

Страница 32: ...em at the default HDD S M A R T Capability The S M A R T Self Monitoring Analysis and Reporting Technology system is a diagnostics technology that monitors and predicts device performance S M A R T so...

Страница 33: ...Control This item has several sub items Current FSB Frequency displays front side bus FSB frequency Current DRAM Frequency displays memory DRAM frequency DRAM Clock enables you to manually set the DR...

Страница 34: ...m the CPU to PCU bus are buffered when CPU to PCI Write Buffer is enabled or aren t when disabled When PCI Master 0 WS Write is enabled writes to the PCI bus are executed with zero wait states Enable...

Страница 35: ...F59 Previous Values F6 Fail Safe Defaults F7 Optimized Defaults VIA OnChip IDE Device This item has several sub items On Chip IDE Channel 0 1 enables or disables the PCI IDE channel IDE Prefetch Mode...

Страница 36: ...infrared chip Onboard Parallel Port assigns the I O address and interrupt request IRQ for the onboard parallel port Parallel Port Mode enables you to set the data transfer protocol for your parallel...

Страница 37: ...hat does not support Plug and Play USB Mouse Support Enable this item if you plan to use a USB mouse IDE HDD Block Mode Enable this field if your IDE hard drive supports block mode Block mode enables...

Страница 38: ...d ACPI Suspend Type S1 POS Power Management Option User Define HDD Power Down Disable Suspend Mode Disable Video Off Option Suspend Off Video Off Method DPMS Support MODEM Use IRQ 3 Soft Off by PWRBTN...

Страница 39: ...tem is set to Max Saving power saving modes occur after a short timeout If this item is set to Min Saving power saving modes occur after a longer timeout If the item is set to User Define you can inse...

Страница 40: ...by the normal power button on your system If the item is set to Instant Off then the power button causes a software power down If the item is set to Delay 4 Sec then you have to hold the power button...

Страница 41: ...ill not power on the system PowerOn by PCI Card enables PCI activity to wakeup the system from a power saving mode Wake Up On LAN Ring enables LAN or modem activity to wakeup the system from a power s...

Страница 42: ...F6 Fail Safe Defaults F7 Optimized Defaults PNP OS Installed Setting this option to Yes allows the PnP OS instead of BIOS to assign the system resources such as IRQ and I O address to the ISA PnP dev...

Страница 43: ...designed to overcome problems that can be caused by some non standard VGA cards This board includes a built in VGA system that does not require palette snooping so you must leave this item disabled A...

Страница 44: ...V 5 00V 12 00V Voltage Battery Current System Temp Current CPU Temp CPU FAN Speed CASE FAN Speed Item Help Menu Level Move Enter Select PU PD Value F10 Save ESC Exit F1 General Help F59 Previous Value...

Страница 45: ...enu Level Move Enter Select PU PD Value F10 Save ESC Exit F1 General Help F59 Previous Values F6 Fail Safe Defaults F7 Optimized Defaults Auto Detect DIMM PCI Clk When this item is enabled BIOS will d...

Страница 46: ...ll fail safe defaults for a specific option select and display that option and then press F6 Load Optimized Defaults Option This option opens a dialog box that lets you install optimized defaults for...

Страница 47: ...the password You cannot use more than eight characters or numbers The Set Supervisor User Password item differentiates between upper and lower case characters Press Enter after you have typed in the p...

Страница 48: ...n the Save and Exit dialog box appears press Y to save and exit or press N to return to the main menu Exit Without Saving Highlight this item and press Enter to discard any changes that you have made...

Страница 49: ...3 BIOS Setup Utility 45...

Страница 50: ...re The software on the support CD ROM is for Windows 95 NT 2000 and Windows 98 The installation procedure differs depending on which Operating System you have but the automatic installation is now for...

Страница 51: ...ll two drivers if you are running Windows 9x Windows 9x D M921LR IDE USB Driver The USB Driver allows the system to recognize the USB ports on the mainboard You need to install this driver if you are...

Страница 52: ...indows 98 The support software CD ROM disc loads automatically under Windows 98 When you insert the CD ROM disc in the system CD ROM drive the Autorun feature will automatically bring up the install s...

Страница 53: ...ROM drive icon in a file browser window Installing Software with Auto Setup To install support software for the system board follow this procedure 1 Click on the Setup button The install program will...

Страница 54: ...will need to follow the onscreen instructions confirm commands and allow the computer to restart as few times as is needed to complete installing whatever software you selected to install When the pro...

Отзывы: