background image

EN

124

EN

125

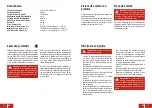
Technical Data

Nominal voltage

220 - 240V~ 50/60 Hz

Rated power

900 W

No-load speed (n

0

)

16000/min

Max. planing depth

3 mm

Max. planing width

82 mm

Max. rabbeting depth

16 mm

Weight

3.4 kg

Protection Class

/ II

Sound pressure level (L

pA

)

91.4 dB(A) / Uncertainty K = 3 dB(A)

Sound power level (L

wA

)

102.4 dB(A) / Uncertainty K = 3 dB(A)

Max. vibration emission (a

h

)

4.784 m/s

2

 / Uncertainty K = 1.5 m/s

2


Noise & Vibration

The declared vibration total value and the 

declared noise emission values   have been 

measured in accordance with a standard 

test method (EN 62841-2-14:2015) and may 

be used for comparing one tool with another. 

The declared vibration total value may also be 

used in a preliminary assessment of exposure.

Caution!

 The vibration and noise 

emission during actual use of the 

power tool can differ from the declared to-

tal value depending on the ways in which 

the tool is used, in particular, what kind of 

work piece is machined.

It is necessary to identify safety measures to 

protect the operator that are based on an es-

timation of exposure in the actual conditions 

of use (taking account of all parts of the op-

erating cycle such as the times when the tool 

is switched off and when it is running idle in 

addition to the trigger time).

Try to minimize the impact of vibration and 

noise. Exemplary measures to reduce vibra-

tion exposure include wearing gloves while 

using the tool, limiting working time, and us-

ing accessories in good condition.

Care & Maintenance

Dust collection system

Use of dust collection can reduce dust-related 

hazards.

To prevent personal injuries, make sure to 

connect a suitable vacuum cleaner or the col-

lecting bag 

2

 to the chip extraction port. The 

port is capable of a connector of 35 mm.

Replacement Parts

Warning!

 Replacement parts must 

conform with the requirements spec-

ified by the manufacturer. Therefore use 

original replacement parts only or spare 

parts authorised by the manufacturer. 

In case of service requests or spare parts, 

please contact your local HORNBACH store or 

write an email to: [email protected]

Caution!

 Make sure the tool is 

switched off and unplugged.

 - Clean the chip extraction ports regularly. To 

clean a clogged chip extraction port, use a 

suitable tool, e.g. a piece of wood or com-

pressed air. 

 - Never introduce your hand into the chip 

extraction port. Rotating parts could cause 

serious injuries.

 - Always keep the tool clean, dry and free of 

oil or grease.

 - Wear safety glasses to protect your eyes 

whilst cleaning.

 - For safe and proper working, always keep 

the machine and ventilation slots clean.

 - Regularly check to see if any dust or foreign 

matter has entered the grills near the mo-

tor and around the on/off switch. Use a soft 

brush to remove any accumulated dust.

 - If the body of the tool needs cleaning, wipe 

it with a soft damp cloth. A mild detergent 

can be used but nothing like alcohol, petrol 

or other cleaning agent.

 - Never use caustic agents to clean plastic 

parts.

 - Lubricate all moving parts at regular inter-

vals.

 - Periodically check all fixings. These could 

become loose with time due to vibration.

 - Store unused equipment in a dry, locked 

place out of the reach of children.

Caution!

 If the supply cord is dam-

aged, it must be replaced by the 

manufacturer or its service agent or simi-

larly qualified person in order to avoid haz-

ard.

Содержание PPL900B

Страница 1: ...900B bersetzung der Originalbetriebsanleitung Traduction de la notice originale Traduzione delle istruzioni originali Vertaling van de oorspronkelijke gebruiksaanwijzing vers ttning av originalbruksan...

Страница 2: ...feuchter Umgebung verwenden Schutzklasse II Doppelisolierung oder verst rkte Isolierung Lieferumfang 1x Elektrohobel 1x Sechskantschl ssel 1x Falztiefenanschlag 1x Parallelanschlag 1x Fangsack 1x Ver...

Страница 3: ...nbe triebnahme Vergewissern Sie sich dass das Elektrowerkzeug ausgeschaltet ist be vor Sie es an die Stromversorgung und oder den Akku anschlie en es aufnehmen oder tragen Wenn Sie beim Tragen des Ele...

Страница 4: ...aggefahr wenn sich das Schneidwerkzeug im Werk st ck verhakt f Den Hobel beim Arbeiten immer so hal ten dass die Hobelsohle flach auf dem Werkst ck aufliegt Sonst kann sich der Hobel verkanten und som...

Страница 5: ...gedr ckt halten Dann den Ein Ausschalter 10 gedr ckt halten 2 Sicherstellen dass das Werkst ck nicht wegrutschen kann Mit der Arbeit begin nen dabei das Werkzeug mit beiden H n den sicher halten Das...

Страница 6: ...Falzen den gew nsch ten Abstand am Parallelanschlag 7 einstellen So oft hobeln bis die ge w nschten Falzma e erreicht ist 2 Die aktuelle Spantiefeneinstellung kann an der Spantiefenskala 4 abgele sen...

Страница 7: ...gezogen ist Reinigen Sie den Spanauswurf regelm ig Verwenden Sie zum Reinigen eines verstopften Spanauswurfes ein geeignetes Werkzeug z B ein Holzst ck Druckluft etc Greifen Sie nicht mit den H nden...

Страница 8: ...rischen und elektronischen Ger ten zu entsorgen Dadurch tragen Sie zum Schutz der Ressourcen und der Umwelt bei HORNBACH ist in Deutschland verpflichtet bei Neukauf eines Elektro oder Elektro nikger t...

Страница 9: ...ype de protection II isolation renforc e tendue des fournitures 1x Rabot lectrique 1x Tendeur 1x But e de rabotage de feuillurage 1x Guide parall le 1x Sac collecteur 1x Capuchon Si des pi ces manquen...

Страница 10: ...ge impr vu S as surer que l interrupteur est positionn sur arr t avant de raccorder l appareil une source lectrique et ou un bloc de batterie de soulever ou de transporter l outil Le fait de porter un...

Страница 11: ...contre la pi ce couper f Pendant le travail toujours tenir le rabot de sorte que la semelle du rabot soit pos e plat sur la pi ce Dans le cas contraire le rabot se bloque et peut vous blesser g Ne ja...

Страница 12: ...enfonc Appuyer ensuite sur l interrupteur Marche Arr t 10 et le maintenir enfonc 2 S assurer que la pi ce usiner ne peut pas glisser Commencer travailler tout en maintenant l outil fermement des deux...

Страница 13: ...de parall le 7 afin de r aliser des feuillures Raboter aussi souvent que n cessaire pour obtenir la feuillure souhait e 2 La profondeur actuellement r gl e peut tre lue sur l indicateur sur le bouton...

Страница 14: ...e raccor der un aspirateur adapt l orifice d extrac tion des copeaux 2 L orifice est adapt un connecteur de 35 mm Pi ces de rechange Avertissement Les pi ces de re change doivent tre conformes aux exi...

Страница 15: ...triques et lectroniques Cela contribue la protection des ressources et de l environne ment HORNBACH s engage en Allemagne lors de l achat d un nouvel appareil lec trique ou lectronique HORNBACH s en...

Страница 16: ...tezione II isolamento rinfor zato Materiale compreso nella consegna 1x Piallatrice elettrica 1x Chiave inglese 1x Arresto profondit di scanalatura 1x Guida parallela 1x Sacchetto di raccolta 1x Tappo...

Страница 17: ...ettrici con il dito sull interruttore o attrezzi sotto carica con l interruttore sulla posizione ON causa frequente di incidenti d Rimuovere la chiave di regolazione o quella fissa prima di accendere...

Страница 18: ...della piallatrice poggi in modo piano sul pezzo da lavorare Altrimenti pu incastrarsi la piallatrice e causare delle lesioni g Non applicare mai su oggetti metallici chiodi o viti La piallatrice e l a...

Страница 19: ...l tasto on off 10 2 Assicurarsi che il pezzo da lavorare non possa scivolare Iniziare a lavorare tenen do l attrezzo con entrambe le mani Avvici nare l attrezzo acceso al pezzo da lavorare e spingerlo...

Страница 20: ...Impostare la distanza desiderata sulla guida parallela 7 per realizzare i bat tenti Eseguire la piallatura tante volte quanto necessario per realizzare il bat tente desiderato 2 L impostazione di prof...

Страница 21: ...ta 2 all apertura di estrazione dei trucio li L apertura compatibile con un connettore di 35 mm Pezzi di ricambio Avvertenza I ricambi devono essere conformi ai requisiti definiti dal pro duttore Util...

Страница 22: ...questo modo si contribuir alla salvaguardia delle ri sorse e dell ambiente In Germania la ditta HORNBACH obbligata a ritirare gratuitamente presso un punto vendita HORNBACH un vecchio dispositivo nel...

Страница 23: ...e omgevingen Beschermingsklasse II v ersterkte isola tie Leveringsomvang 1x Elektrische schaafmachine 1x Moersleutel 1x Groefdieptestop 1x Parallele geleider 1x Vangzak 1x Sluitkap Als er onderdelen o...

Страница 24: ...n d Verwijder stelsleutels voordat u het ge reedschap inschakelt Een sleutel die niet is weggehaald van het elektrische gereed schap kan letsel veroorzaken e Reik niet te ver Zorg te allen tijde voor...

Страница 25: ...rken altijd de schuurmachine op een manier vast dat de grondplaat in lijn is met het werkstuk Anders kan de schuurmachine scheef komen zitten en letsel veroorzaken g Schuur nooit over metalen voorwerp...

Страница 26: ...2 Zorg ervoor dat uw werkstuk niet kan weg glijden Begin te werken en houd het ge reedschap stevig met beide handen vast Beweeg het draaiende gereedschap in de richting van het werkstuk en druk het la...

Страница 27: ...ral lelle geleider 7 in om groeven aan te brengen Schuur zo vaak als nodig om de gewenste groef te realiseren 2 De huidige diepte instelling is af te le zen op de indicator op de diepte instel knop 4...

Страница 28: ...n geschikte stofzuiger of de vangzak 2 aan te sluiten op de spaanderverwijderingspoort Deze poort is geschikt voor aansluiting van 35 mm Vervangende onderdelen Waarschuwing Reserveonderdelen moeten vo...

Страница 29: ...recycling van elektrische en elektro nische apparaten Hierdoor levert u een bijdrage aan de bescherming van bronnen en het milieu HORNBACH is in Duitsland verplicht bij aankoop van een nieuw elektris...

Страница 30: ...Skyddsklass II f rst rkt isolering Leveransomfattning 1x elhyvel 1x Skruvnyckel 1x djupanslag vid falsning 1x Parallellanslag 1x Uppsamlingsp se 1x Lock Kontakta din HORNBACH butik om n gra de lar sa...

Страница 31: ...t tande kl der eller smycken H ll undan h r kl der och handskar fr n r rliga de lar L sa kl der smycken och l ngt h r kan fastna i r rliga delar g Om det finns anordningar f r anslutning av dammutsugn...

Страница 32: ...vibra tionsniv n f r ett helt arbetspass blir betyd ligt h gre b Ytterligare s kerhets tg rder ska vidtas f r att skydda anv ndaren mot vibra tionsskador Underh ll verktyget och dess tillbeh r h ll h...

Страница 33: ...ll inne str mbrytaren 10 2 Se till att arbetsstycket inte kan glida un dan H ll verktyget i ett stadigt grepp under arbetet F r verktyget mot arbetsstycket och tryck l ngsamt det fram t samtidigt som...

Страница 34: ...lanslaget 7 f r att g ra falsningen Hyvla s m nga g nger som kr vs f r att f nskad fals 2 Aktuell djupinst llning kan kontrolleras via indikatorn p djupinst llningvre det 4 2 BYTE AV HYVELST L Anv nd...

Страница 35: ...ll sp nutmat ningsporten eller anv nd uppsamlingsp sen 2 f r att undvika personskador Dammutsuget kan anslutas till en anslutning p 35 mm Reservdelar Varning Reservdelar m ste uppfylla kraven som ange...

Страница 36: ...av elektriska och elektroniska produkter D rmed bidrar du till att skydda resurserna och milj n I Tyskland r HORNBACH skyldiga att vid ink p av nya elektriska eller elektroniska apparater ta tillbaka...

Страница 37: ...s velk m obsahem par T da ochrany II zes len izolace Rozsah dod vky 1x Elektrick fr za 1x Kl 1x Zar ka hloubky dr ky 1x Soub n veden 1x Sb rn vak 1x Krytka Jestli e kter koli d l chyb nebo je po kozen...

Страница 38: ...k ho n ad od pojte ve ker nastavovac kl ny nebo kl e Kl nebo kl n p ipojen k rotuj c sti elektrick ho n ad m e zp sobit raz e Nep esahujte V dy pevn st jte na no hou a udr ujte rovnov hu Umo n v m to...

Страница 39: ...zn zp soby pou it n ad nebo nedostate n dr ba mohou m t za n sledek jin hod noty vibrac To m e podstatnou m rou zv it hladinu vibrac za celou dobu pr ce b Na ochranu u ivatele p ed inky vibra c lze p...

Страница 40: ...tla tko 1 Pot stiskn te a podr te vyp na 10 2 Zajist te aby obrobek nemohl sklouznout Za n te pracovat p i em pevn dr te sv n ad ob ma rukama Posu te zapnut n stroj k obrobku a pomalu ho zatla ujte v...

Страница 41: ...7astavte po a dovanou vzd lenost aby se vytvo ily l bky Hoblov n prove te tolikr t ko lik je pro po adovanou dr ku pot eba 2 Aktu ln nastaven hloubky lze zkont rolovat na ukazateli knofl ku nastaven...

Страница 42: ...chu Abyste zabr nili razu nezapome te k otvoru pro ods v n t sek p ipojit vhodn vysava nebo sb rn vak 2 K tomuto portu lze p ipojit spojku o pr m ru 35 mm N hradn d ly Varov n N hradn d ly mus odpov d...

Страница 43: ...v en m sb rn m m st pro recyklaci elektrick ch a elektronic k ch p stroj T m p isp v te k ochran zdroj a ivotn ho prost ed HORNBACH je v N mecku povinen p i zakoupen nov ho elektrick ho nebo elektroni...

Страница 44: ...bo vo vlhkom prostred Trieda ochrany II zosilnen izol cia Rozsah dod vky 1x Elektrick hobl k 1x Maticov k 1x H bkov doraz falcovania 1x Rovnobe n vodidlo 1x Zbern vak 1x Vie ko Ak niektor diel ch ba a...

Страница 45: ...dstr te v et ky pr padn nastavovacie alebo franc z ske k e Franc zsky k alebo in k nasaden na ot aj com sa dieli elektrick ho n stroja m e sp sobi poranenie os b e Nesiahajte pr li aleko Neust le udr...

Страница 46: ...a Deklarovan daje o vibr ci ch pred stavuj hlavn pou itie n stroja ale pri in ch pou itiach n stroja alebo nedo stato nej dr be sa m u daje o vibr ci ch l i Pritom m e d js k v razn mu zv eniu rovne v...

Страница 47: ...dla 1 Potom stla te a podr te hlavn sp na 10 2 Zabezpe te aby sa obrobok nemohol vy mykn Dr te n stroj pevne oboma ru kami a za nite pracova Pos vajte be iaci n stroj do obrobku a tla en m na stred z...

Страница 48: ...u o 0 1 mm 1 Ak chcete vytv ra dr ky nastavte po adovan vzdialenos na rovnobe nom vodidle 7 Hob ovanie opakujte pod a potreby na dosiahnutie po ado vanej dr ky 2 Aktu lne nastavenie h bky mo no skontr...

Страница 49: ...akciu triesok v dy pripojte vhodn vys va alebo zbern vak 2 Tento port je vybaven 35 mm konektorom N hradn diely Upozornenie N hradn diely musia sp a po iadavky pecifikovan v robcom Preto pou vajte len...

Страница 50: ...a recykl ciu elektrick ch a elektronick ch pr strojov T m prispejete k ochrane zdrojov a ivotn ho pros tredia HORNBACH je v Nemecku povinn pri novej k pe elektrick ho alebo elek tronick ho pr stroja z...

Страница 51: ...protec ie II izola ie nt rit Con inutul livr rii 1x Rindea electric 1x Cheie 1x Opritor ad ncime de f l uire 1x Ghidaj paralel 1x Sac colector 1x Capac Dac oricare dintre componente lipse te sau este...

Страница 52: ...a sculei electrice av nd degetul pe butonul ntrerup tor sau alimen tarea sculei electrice cu butonul de pornire ac ionat predispune la accidente d nainte de a porni scula electric ndep rta i cheile sa...

Страница 53: ...auza leziuni g Nu rindelui i suprafe e care con in obiecte metalice cui sau uruburi Cu itul de rindea i axul cu itului se pot de teriora ceea ce atrage dup sine cre terea vibra iilor INSTRUC IUNI DE S...

Страница 54: ...1 Apoi ap sa i i ine i ap sat butonul de pornire oprire 10 2 Ave i grij s nu alunece piesa de prelucrat ncepe i lucrul in nd ferm scula cu ambele m ini A eza i scula pornit pe piesa pre lucrat i mpin...

Страница 55: ...egla i distan a dorit la ghidajul paralel 7 Rindelui i de at tea ori p n c nd ob ine i fal ul dorit 2 Ad ncimea curent poate fi verificat pe indicatorul de pe butonul de reglare a ad ncimii 4 2 NLOCUI...

Страница 56: ...j s conecta i la portul de extrac ie a chii un aspirator adecvat sau sacul colector 2 Portul suport un conector de 35 mm Piese de schimb Avertizare Piesele de schimb trebu ie s respecte cerin ele spe...

Страница 57: ...cest mod contribui i la protejarea resurselor i a mediului nconjur tor Compania HORNBACH are urm toarele obliga ii n Germania s recep ioneze f r costuri un aparat uzat de acela i tip n sectorul comerc...

Страница 58: ...Protection Class II reinforced isolation Scope of delivery 1x Electric Planer 1x Spanner 1x Rabbeting depth stop 1x Parallel guide 1x Collecting bag 1x Cap If any parts are missing or damaged please...

Страница 59: ...e connected and properly used Use of dust collection can reduce dust related hazards h Do not let familiarity gained from fre quent use of tools allow you to become complacent and ignore tool safety p...

Страница 60: ...and periods Declaration of conformity We declare that the product described in Technical Data 900 W Electric Planer PPL900B manufactured for HORNBACH Baumarkt AG Hornbachstra e 11 76879 Bornheim Germa...

Страница 61: ...ton 1 Then press and hold the on off switch 10 2 Make sure your workpiece can not slip Start working while holding the tool firmly with both hands Move the running tool to the workpiece and push it fo...

Страница 62: ...7 in order to make rabbets Plane as often as necessary to achieve the desired rabbet 2 The current depth adjustment can be checked on the indicator of the depth adjustment knob 4 2 BLADE REPLACEMENT U...

Страница 63: ...prevent personal injuries make sure to connect a suitable vacuum cleaner or the col lecting bag 2 to the chip extraction port The port is capable of a connector of 35 mm Replacement Parts Warning Repl...

Страница 64: ...d appliances of the same type free of charge in HORNBACH stores when you purchase a new electrical or elec tronic appliance To take back up to 3 WEEE of the same type up to max 25 cm edge length free...

Отзывы: