


Page 102
– Bulletin 100-50-9.1
4. Press the
▲
button to scroll to the
e
(sensor
configuration menu); press
SET.
5. Press the
▼
button to scroll thru the options; press
SET
to enter parameter, change as needed; then press
SET.
6. Press
ESC
button three times to return to
default
display.
11.7 DIGITAL INPUT CONFIGURATION
The S3C Case Control supports separate digital inputs for
the following:
•
Doors (used when optional door switch is available for
walk in coolers)
•
Service (used when controller needs to be put in service
mode to shut down refrigeration, fans and defrost)
•
User (this input can be configured to switch controller
into dual temperature mode or defrost initiation)
To configure the User input:
1. From the
default
display, press the
button. The
display will show
.
2. Use the
▲▼
buttons to enter the
administrator
password and press
SET.
3. The display will show
; press
SET.
4. Press the
▲
button to scroll to the
e
(sensor
configuration menu); press
SET.
5. Press the
▲
button to scroll to
d
(digital input); press
SET.
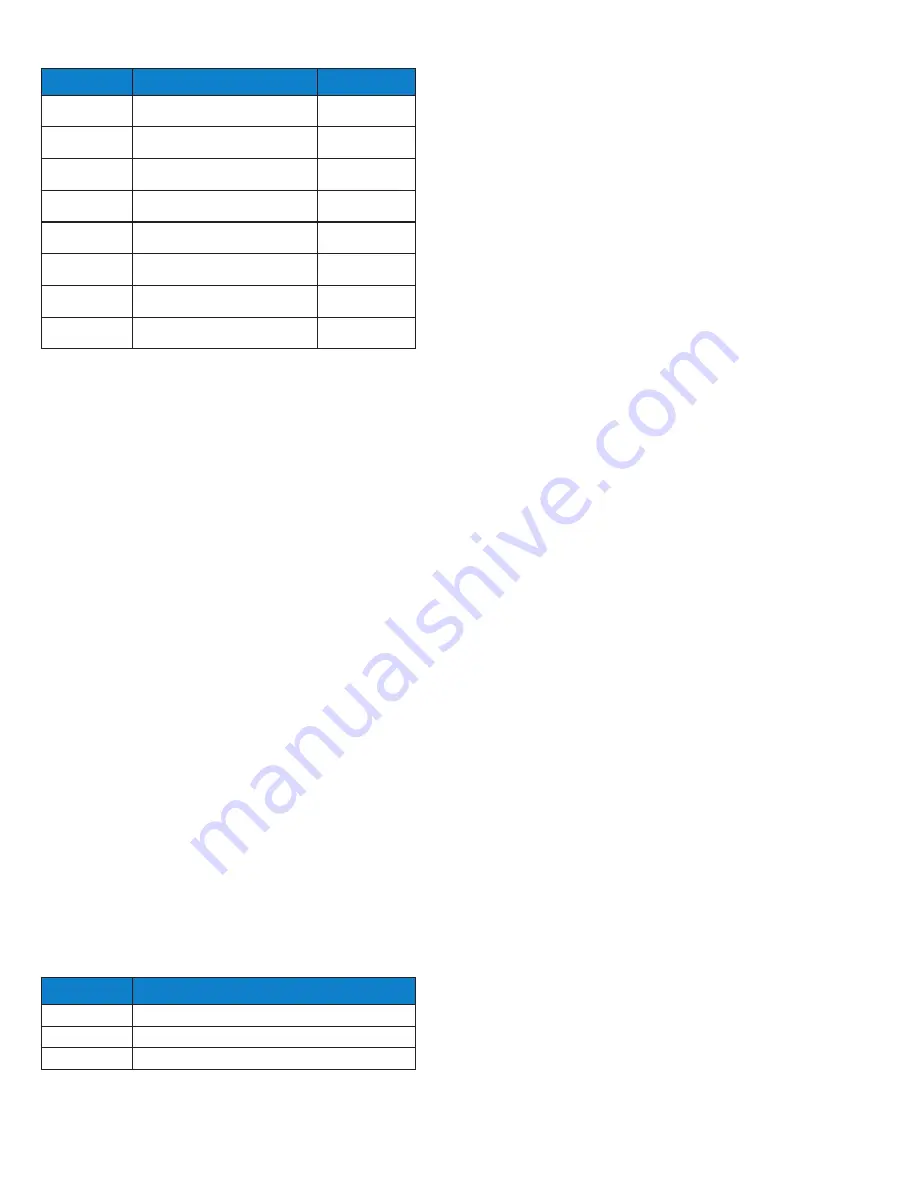
6. Scroll to the preferred configuration based on the
following chart; press
SET.
7. Press
ESC
button three times to return to
default
display.
Display
Description
Range
do
Dry bulb temperature
calibration offset
-10°F to 10°F
o
Relative humidity
calibration offset
-10°F to 10%
do
Discharge air temperature
calibration offset
-10°F to 10°F
o
Return air temperature
calibration offset
-10°F to 10°F
do
Defrost termination temperature
calibration offset
-10°F to 10°F
oo
Coil outlet temperature
calibration offset
-10°F to 10°F
o
Suction pressure
calibration offset
-10°F to 10PSIG
o
Auxiliary temperature
calibration offset
-10°F to 10°F
Display
Description
def
Defrost initiation
du
Dual temperature profile selection
oe
Not used
11.8 DISPLAY CONFIGURATION
The brightness of the side “Quick View” indicators on the
Display Module (DM) may be adjusted to suit individual
requirements. The indicators may also be turned off.
11.8.1 ADJUSTING QUICK VIEW INDICATOR
INTENSITY
1. From the
default
display, press the
button. The
display will show
.
2. Use the
▲▼
buttons to enter the
administrator
password and press
SET.
3. The display will show
.
4. Press the
SET
button and
will be displayed.
5. Press the
▲
button until
d
is displayed.
6. Press the
SET
button and
d
will be displayed.
7. Press the
▼
button until
(alarm intensity) is
displayed. This is the intensity of the Quick View
indicators during a temperature alarm condition.
8. Press the
SET
button and the current intensity value
will be displayed.
9. Use the
▲▼
buttons to adjust the intensity value up or
down (0 – 100%). To turn off quick view indicators for
alarms; set to 0%.
10. Press the
SET
button to enter the new value. The
display will revert to
.
11. Press the
▼
button once and
(normal intensity) is
displayed. This is intensity of the Quick View indicators
during normal operation (no alarm).
12. Press the
SET
button and the current intensity value
will be displayed.
13. Use the
▲▼
buttons to adjust the intensity value up or
down (0 – 100%). To turn off quick view indicators for
normal operation, set to 0%.
14. Press the
SET
button to enter the new value. The
display will revert to
.
15. Press the
ESC
button three times to exit the menu and
return to the
default
display.
11.9 FAN CONFIGURATION
The S3C offers multiple evaporator fan control options
along with an integrated fan fault alarming feature. The
controller is configured, by default, to fixed speed. If variable
fans or fixed two speed fans are required, consult Sporlan to
discuss the application.
1. From the
default
display, press the
button. The
display will show
.
2. Use the
▲▼
buttons to enter the
administrator
password and press
SET.
3. The display will show
.
4. Press the
SET
button and
will be displayed.


