3
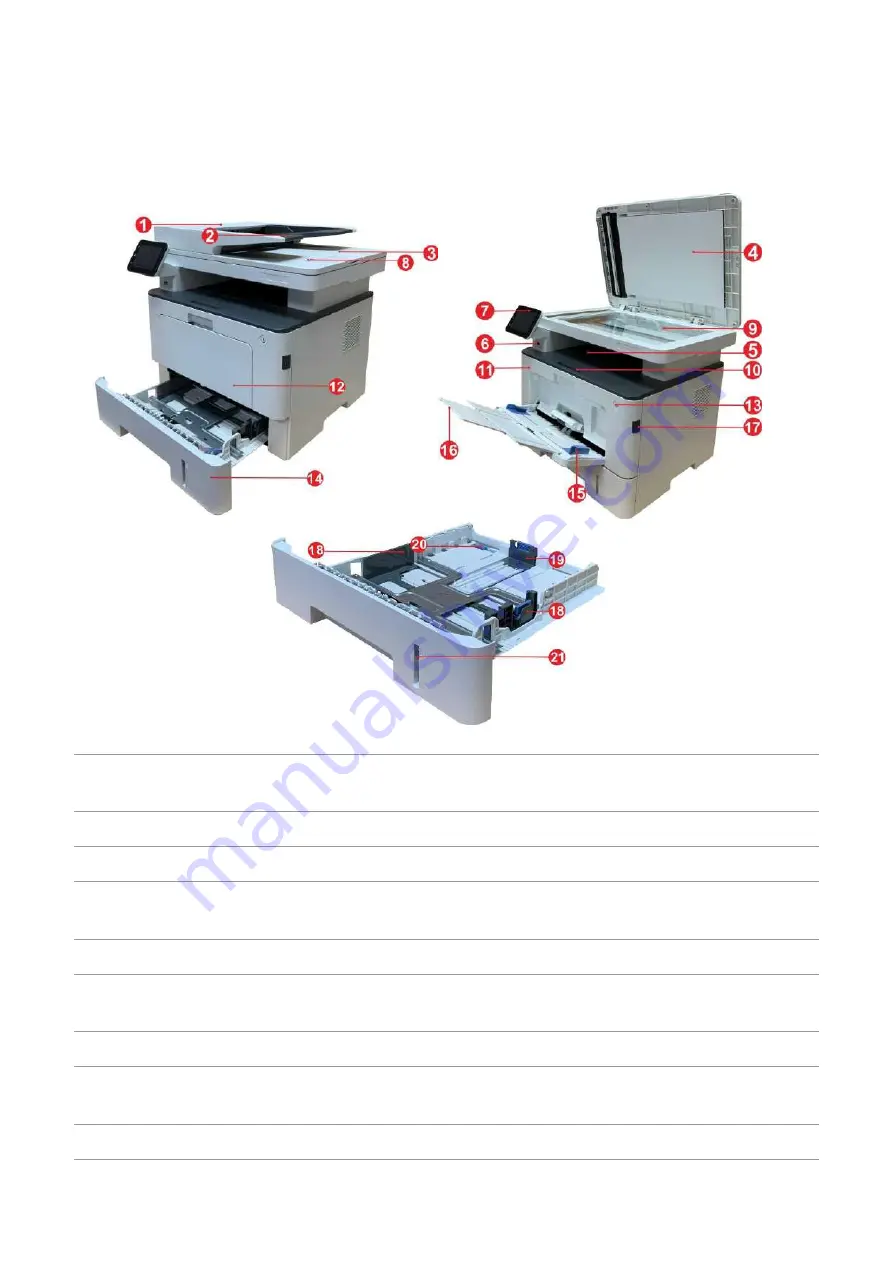
1.3. Product View
Side view
1
Cover of automatic document feeder
This is used to remove the paper jammed in scanning for
the ADF.
2
Feed tray of automatic document feeder This is used to place originals scanned from the ADF.
3
Exit tray of automatic document feeder
Prevent originals scanned from falling off.
4
Cover of scanner
Open the cover of scanner to place the scanned originals
on its glass plate.
5
Output Bin
For storing the printed paper.
6
Front USB interface
For USB flash disk printing and scanning into USB flash
disk.
7
Control Panel
Indicate printer status to conduct set operation.
8
NFC (Near Field Communication) label
Use mobile device to touch the tag to download or start the
mobile application and for Wi-Fi Direct.
9
Glass Platen
To put the original of tablet PC for scan.
Содержание BM5100FDN Series
Страница 89: ...76 6 Single click OK to finish printing setup Click Print to realize auto duplex printing...
Страница 115: ...102 3 After the window pops up click on Scan 4 Click on Open Scanner and the scan window will pop up...
Страница 146: ...133 6 Open the auto feed tray and wipe the pickup roller gently with dry lint cloth...
Страница 159: ...146 2 Gently pull the jammed paper out 3 Install paper tray...
Страница 162: ...149 1 Open the front cover and then remove the laser toner cartridge along the guide rail 2 Open the rear cover...
Страница 163: ...150 3 Open the fuser door using the handles on both sides 4 Gently pull the jammed paper out...
Страница 169: ...156 14 1 5 Paper jam of auto feed tray 1 Pull out the automatic tray 2 Gently pull the jammed paper out...
Страница 187: ......


