


PVIQ™ CONNECTIVITY SYSTEM USER MANUAL V 1.0
120
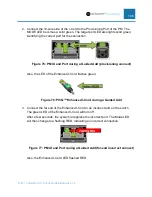
If sufficient slack cable is available, the terminated Mini-Com Jack Modules can be
installed into the PViQ™ Connectivity Panel prior to permanently mounting into the rack.
This will allow for flexibility and provide easier access to the panels.
NOTE: The PViQ™ Connectivity Panel accepts all Mini-Com Copper Modules.
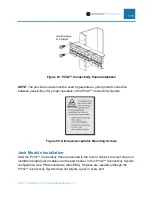
Figure 95: Side View of Jack Installation
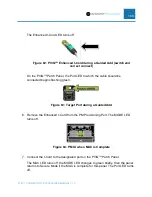
Installing the Interface Units
The next step is to install the Interface Units (IUs) on the individual panels. The IUs
attach to the front of the flat or angled patch panels and provide access to various
operational modes.
The PViQ™ Connectivity Panels are shipped from the factory with a blank Interface Unit
which must be removed prior to installing the PM or EM IU.
To remove the blank plastic interface unit, depress the locking tabs from the rear of the
panel (upper right and lower left) and gently push the unit forward (see below).
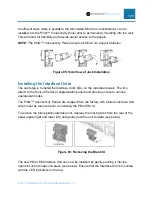
Figure 96: Removing the Blank IU
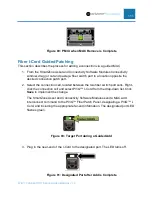
The new PM or EM Interface Unit can now be installed by gently pushing it into the
open slot until it snaps into place (see below). Ensure that the Interface Unit is mounted
with the LED indicators on the top.


