27
8.18. Remove the Plasma panel sec-
tion from the Cabinet assy
(glass)
1. Remove the plasma panel fastening screws (
×
13 )
and
remove the cabinet assy.
2. For leaving the cabinet assy from the plasma panel, pull
the bottom of the cabinet assy forward, lift, and remove.
8.19. Remove the Glass holders
1. Remove the Cabinet assy. (See section 8.18.)
2. Remove the screws (
×
14 ,
×
16 ).
3. Remove the Glass holder top rear and Glass holder bot-
tom rear.
4. Remove the screws (
×
8 ).
5. Remove the Glass holders (L, R).
6. Remove the Front glass.
7. Remove the Glass holder top front.
8. Remove the Glass holder bottom front.
9. Remove the screws (
×
2 ).
10. Remove the Rear cover hooks (L, R).
Содержание TH-P58S20M
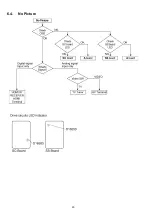
Страница 20: ...20 6 4 No Picture ...
Страница 38: ...38 ...
Страница 40: ...40 11 3 Wiring 2 ...
Страница 41: ...41 11 4 Wiring 3 ...
Страница 42: ...42 11 5 Wiring 4 ...
Страница 43: ...43 11 6 Wiring 5 11 7 Wiring 6 ...
Страница 44: ...44 ...
Страница 45: ...45 12 Schematic Diagram 12 1 Schematic Diagram Note ...
Страница 83: ...83 A B C D E F G H I 1 2 3 4 5 6 P MAIN BOARD COMPONENT SIDE ETX2MM812MSM ...
Страница 96: ...96 ...
Страница 98: ...98 14 1 2 Exploded View 2 ...
Страница 99: ...99 14 1 3 Packing 1 ...
Страница 100: ...100 14 1 4 Packing 2 ...
Страница 101: ...101 14 1 5 Packing 3 ...
Страница 105: ...105 14 2 Electrical Replacement Parts List 14 2 1 Replacement Parts List Notes ...


