121
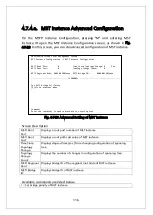
4.7.4.g MST Instance Topology Information
On the MSTP Instance Configuration, pressing "I" and entering MST instance
ID open the MST Instance Topology Information screen, as shown in Fig.
4-7-22. On this screen, you can do setting MST Instance Topology
Information.
Fig. 4-7-22 MST Instance Topology Information
Screen Description
MST Instance:
Displays selected MST instance ID.
Port
Displays the port number.
Trunk
Displays the group number (key) of the trunk if trunking is set.
Link
Displays the state of link.
UP
Link is established normally.
DOWN
Link is not established.
Desig.Root
Displays root bridge ID.
Desig.Cost
Displays cost under transmission.
Desig.Bridge
Displays bridge ID of a designated bridge.
Desig.Port
Displays port ID of a designated port. (Port ID is a combination of port
priority value and port number.)
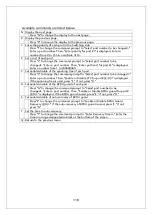
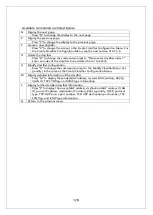
Available commands are listed below.
N Display the next page.
Press "N" to change the display to the next page.
P Display the previous page.
Press "P" to change the display to the previous page.
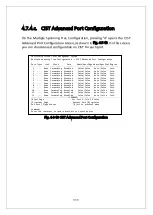
PN23129K/PN23129A Local Management System
MSTP Instance Configuration -> MST Instance Port Configuration
MST Instance: xx
Port Trunk Link State Role Priority Path Cost STP Status
---- ----- ---- ---------- ---------- --------- --------- ----------
1 --- Down Discarding Disabled 128 200000(A) Enabled
2 --- Down N/A N/A 0 0 N/A
3 --- Down N/A N/A 0 0 N/A
4 --- Down N/A N/A 0 0 N/A
5 --- Down N/A N/A 0 0 N/A
6 --- Down N/A N/A 0 0 N/A
7 --- Down N/A N/A 0 0 N/A
8 --- Down N/A N/A 0 0 N/A
9 --- Down N/A N/A 0 0 N/A
10 --- Down N/A N/A 0 0 N/A
11 --- Down N/A N/A 0 0 N/A
12 --- Down N/A N/A 0 0 N/A
-------------------------------- <COMMAND> -----------------------------------
Set Port Pr[i]ority [N]ext Page
Set Port Path [C]ost [P]revious Page
Set Port STP [S]tatus [Q]uit to previous menu
Command>
Enter the character in square brackets to select option
Содержание Switch-M12PWR
Страница 6: ...6 malfunction When stacking Switching Hubs leave a minimum of 20 mm space between them is required ...
Страница 17: ...17 Fig 2 2 Mounting to Wall ...
Страница 20: ...20 function does not work Therefore use a cross cable to connect them ...
Страница 28: ...28 command If you enter a command or setting not available an error message is shown in the explanation field ...
Страница 30: ...30 ...
Страница 36: ...36 ...
Страница 49: ...49 ...
Страница 69: ...69 ...
Страница 78: ...78 Quit to previous menu Quits the Advanced Switch Configuration Menu and returns to the Main menu ...
Страница 81: ...81 setting and the management VLAN status of VLAN ID 1 is UP ...
Страница 96: ...96 Press S Q Return to the previous menu ...
Страница 98: ...98 ...
Страница 122: ...122 Q Return to the previous menu ...
Страница 125: ...125 ...
Страница 130: ...130 ICMP Type Displays the ICMP type ...
Страница 136: ...136 802 1p Priority Displays priority of IEEE802 1p TCP SYN Flag Displays the TCP SYN flag ICMP Type Displays ICMP type ...
Страница 156: ...156 Threshold Displays the threshold of the number of packets per second ...
Страница 173: ...173 Fig 4 7 49 Display of values accumulated after resetting the counters ...
Страница 185: ...185 Q Return to the previous menu ...
Страница 211: ...211 Q Return to the previous menu ...
Страница 232: ...232 IEEE8021 PAE MIB IEEE802 1X IEEE8023 LAG MIB IEEE 802 3ad ...
Страница 237: ...237 IEEE 802 3af standard ...
Страница 240: ...240 P0813 1084 ...


