manualshive.com logo in svg
background image

RQTV0110-1B

GN

Basic operations ..........................................12
Control guide ................................................13
Making a recording ......................................15
The RESET function .....................................15
MENU operation ...........................................16
The radio .......................................................17
Sound field ....................................................18
Other functions ............................................20
Other settings ...............................................21
Remote control operation guide .................22
Specifications ...............................................23

Troubleshooting guide .................Back cover
Maintenance ..................................Back cover

Operations

Reference

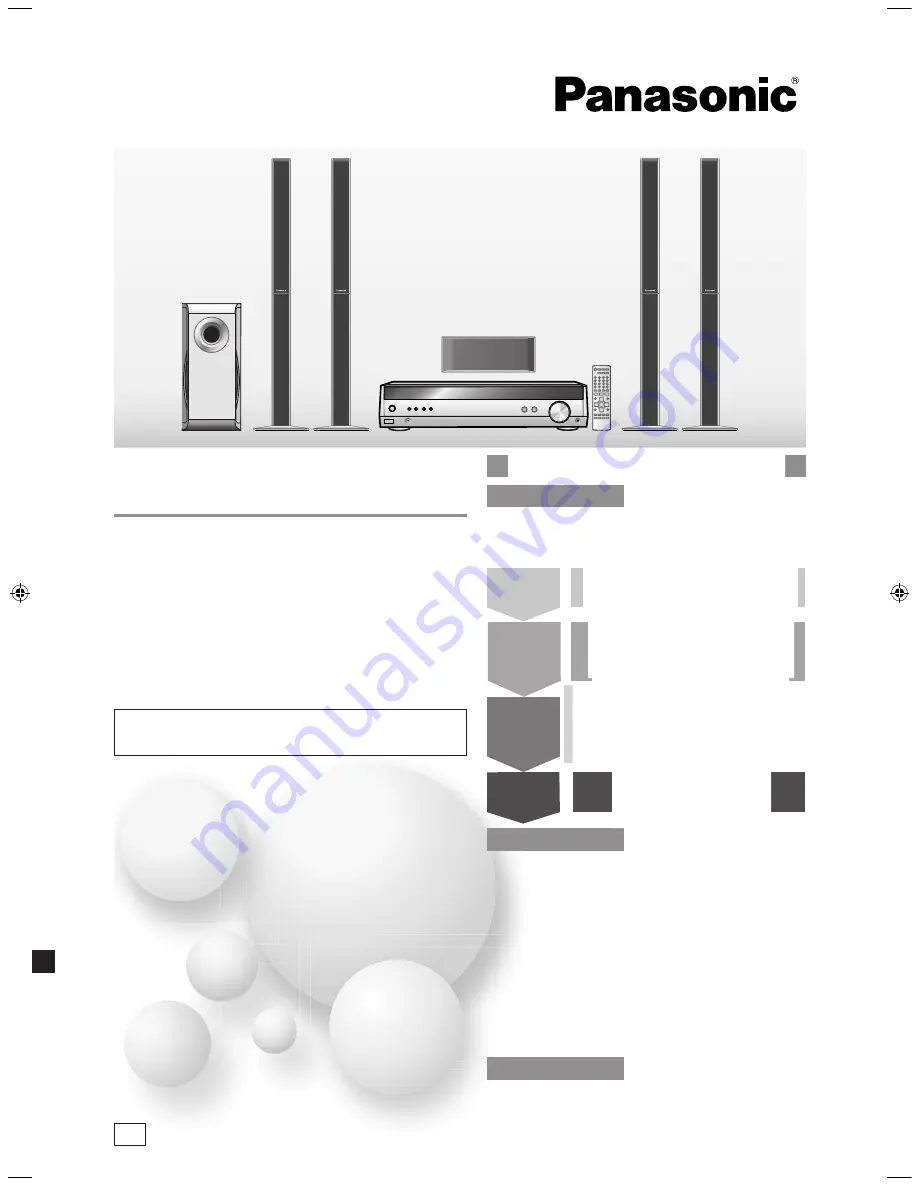
Operating Instructions 

Home Theater Audio System 

Model No.

 SC-HT40

SC-HT60

Safety precautions .........................................2
Supplied accessories ....................................3
The remote control .........................................3

Dear customer 

Thank you for purchasing this product.
Please read these instructions carefully before connecting, 
operating or adjusting this product. 
Please keep this manual for future reference.

Step 1 

Step 2

Step 3

Before use

Step 4 

SC-HT60

SC-HT60  is  used  in  the  illustrations  unless  otherwise 
mentioned.

SC-HT40GN-offset.indb   1

2/27/2006   11:36:45 AM

Содержание SC-HT40

Страница 1: ...tructions Home Theater Audio System Model No SC HT40 SC HT60 Safety precautions 2 Supplied accessories 3 The remote control 3 Dear customer Thank you for purchasing this product Please read these instructions carefully before connecting operating or adjusting this product Please keep this manual for future reference Table of contents Step 1 Speaker setup 4 Step 2 Home theater connections 8 Step 3 ...

Страница 2: ... unit is repaired disassembled or reconstructed by unqualified persons Extend operating life by disconnecting the unit from the power source if it is not to be used for a long time If you see this symbol Information on Disposal in other Countries outside the European Union This symbol is only valid in the European Union If you wish to discard this product please contact your local authorities or de...

Страница 3: ...f the unit MUSIC MOVIE SFC EFFECT C FOCUS LEVEL TEST ENTER VOLUME TV VIDEO MUTING VOLUME TOP MENU FUNCTIONS DIRECT NAVIGATOR SUB MENU PLAY LIST RETURN SUBWOOFER 1 2 3 7 0 8 9 10 4 5 6 u q g h PL SKIP SLOW SEARCH STOP PAUSE PLAY AV SYSTEM RECEIVER DVR DVD P TUNER BAND TV TV OFF t y TUNER DIRECT TUNING i INPUT SELECTOR TUNE MENU RETURN SETUP MUSIC PORT VOLUME ENTER Remote control signal sensor 7 met...

Страница 4: ... at the seating area Surround speakers left right Place on the side of or slightly behind the seating area higher than ear level Subwoofer The subwoofer can be placed in any position as long as it is at a reasonable distance from the TV Note that some experimentation can yield the smoothest low frequency performance Placement near a corner can increase the apparent output level but can result in u...

Страница 5: ...gh slot Press the speaker cable into the groove Cover Remove the cover from the bottom of the speaker and attach the speaker to the stand 1 Connect the speaker cables 3 2 Secure the speaker to the speaker stand white white with blue stripe Note Preventing the speakers from falling over Attach screw eyes not included to secure the speakers to a wall diagram on the left Obtain the screws appropriate...

Страница 6: ... 6 FRONT L FRONT L FRONT R FRONT R SURROUND L SURROUND L SURROUND R SURROUND R C center 1 FRONT L FRONT L 2 FRONT R FRONT R SURROUND L SURROUND L SURROUND R SURROUND R C center C center C center SUB subwoofer SUB subwoofer SUB subwoofer SUB subwoofer 3 3 4 4 5 5 6 6 1 2 3 4 5 6 1 2 3 4 5 6 1 2 FRONT L FRONT L 1 1 FRONT L 1 Front speaker L SC HT40 SB PF41 SC HT60 SB FS61 Front speaker R SC HT40 SB ...

Страница 7: ...335 mm apart onto the wall 3 2 Press the speaker cable into the groove Fasten screws white white with blue stripe SC HT60 Use new cables when attaching the speakers to the wall Front and surround speakers SC HT40 7 5 9 4 mm 3 0 4 0 mm 7 5 9 4 mm 30 35 mm 4 7 mm 3 0 4 0 mm Ensure that the screws are securely positioned when attaching the speakers to the wall The wall or pillar on which the speakers...

Страница 8: ...f 96 or 88 2 kHz It cannot decode Other digital signals such as MPEG Dolby Digital RF signals from a laser disc player Optical fibre cable not included Note SUB SPEAKERS HAUT PARLEURS R C SURROUND FRONT R L L 6Ω 4Ω 6 5 4 3 2 1 FM ANT AM ANT 75 Ω LOOP EXT LOOP ANT GND OPT 2 OPT 1 COAXIAL DVR DVD P TV DIGITAL IN TV GAME AUX AUDIO DVR DVD P L R L R L R R L IN IN OUT IN SPEAKERS R C SURROUND FRONT R L ...

Страница 9: ...reset some memory items after plugging in the unit FM indoor antenna included Adhesive tape Fix the end of the antenna where reception is best AM loop antenna included Black Red White Click Keep the antenna cord away from DVD players and other cords For best reception FM outdoor antenna not included Disconnect the FM indoor antenna The antenna should be installed by a competent technician FM outdo...

Страница 10: ... mode Press and hold Select DISTANCE DIG INPUT digital input Change the digital input settings for TV or DVR DVD P to coaxial if your equipment doesn t have an optical output terminal One of the terminals will remain unused whatever the setting The factory settings are TV DVR DVR DVD P OPT1 OPT2 Select DIG INPUT Adjusting speaker output level C center SR surround right and SL surround left can be ...

Страница 11: ...L SKIP SLOW SEARCH STOP PAUSE PLAY AV SYSTEM RECEIVER DVR DVD P TUNER BAND TV TV OFF t y i TUNE MENU RETURN SETUP ENTER VOLUME LEVEL TEST Step 4 Settings Press once to enter Change the setting Press once to enter Press once to enter Repeat for each speaker channel Exit the setup mode Press repeatedly until EXIT appears Press ENTER to completely exit the setup mode Select the input position Change ...

Страница 12: ... sound is in stereo regardless of the direction you are facing DRAMA For dramas and other material where dialog is important ACTION For action movies and other material where impact is important SPORTS To make you feel like you were in the stadium MUSICAL For musicals and other material where music is important GAME Enjoy gaming with more impact MONO For monaural sound Press to select a mode from ...

Страница 13: ...cel Dolby Pro LogicΙΙ and SFC PLΙΙ For selecting a Dolby Pro LogicΙΙ mode MOVIE MUSIC or PANORAMA MUSIC For selecting SFC modes LIVE POP ROCK VOCAL JAZZ DANCE or PARTY MOVIE For selecting SFC modes DRAMA ACTION SPORTS MUSICAL GAME or MONO Control guide TUNER BAND For switching the remote control to TUNER mode and selecting TUNER After selecting TUNER press and hold to switch between FM and AM SUBW...

Страница 14: ...us settings For returning to previous menus TUNE 3 4 For tuning the radio and selecting menu or setup items MUSIC PORT You can playback sound from portable audio equipment Reduce the volume to minimum before connecting and disconnecting the equipment Use an audio cord for connection kHz MHz Frequency unit indicators kHz AM or PCM sampling frequency MHz FM TUNED ST MONO Radio indicators TUNED A sta...

Страница 15: ... SETUP MUSIC PORT VOLUME ENTER INPUT SELECTOR Making a recording You can record to a unit connected to DVR DVD P OUT You can record any analog source except DVR DVD P IN 1 Press INPUT SELECTOR or to select the source to be recorded 2 Begin recording Follow your recording unit s operating instructions 3 Start the source to be recorded This unit cannot record digital sources Connect through the anal...

Страница 16: ... ENTER ENTER ENTER MENU RETURN SETUP kHz kHz Main menu Sub menu 1 Sub menu 2 Exit Press repeatedly until EXIT appears Press ENTER to completely exit the menu mode INPUT SELECTOR TUNE MENU RETURN SETUP MUSIC PORT ENTER TUNE MENU RETURN SETUP ENTER Press MENU once The radio page 17 Adjust the bass page 18 Adjust the treble page 18 You can adjust the balance of the front speakers page 18 Dim the disp...

Страница 17: ...it can receive are preset in channels 1 to 30 The AM stations the unit can receive are preset in channels 21 to 30 FM stations are replaced if any were preset in these channels Preparation Tune to either FM 87 50 MHz or AM 522 kHz Main unit 1 Press MENU to select TUNER AUTO MEMO 2 Press TUNE or to select START ENTER Select CANCEL to cancel The tuner presets all the stations it can receive into the...

Страница 18: ...C MOVIE SFC EFFECT C FOCUS LEVEL TEST ENTER VOLUME TV VIDEO MUTING VOLUME TOP MENU FUNCTIONS TUNER DIRECT TUNING DIRECT NAVIGATOR SUB MENU PLAY LIST RETURN SUBWOOFER 1 2 3 7 0 8 9 10 4 5 6 u q g h PL SKIP SLOW SEARCH STOP PAUSE PLAY AV SYSTEM RECEIVER DVR DVD P TUNER BAND TV TV OFF t y i SUBWOOFER EFFECT C FOCUS OFF INPUT SELECTOR TUNE MENU RETURN SETUP MUSIC PORT VOLUME ENTER TUNE MENU RETURN SET...

Страница 19: ...ot use this when the sound mode is STEREO Sound field You can adjust the effect of the Dolby Pro LogicΙΙ MUSIC and PANORAMA modes page 12 This adjustment helps you realize a more natural sound image when listening to music Move sound out into the front speakers to improve the overall front image or add sound to the center speaker to fix the center image You can choose a level between 0 the center sp...

Страница 20: ... change the setting Repeat the procedure from the beginning Other functions INPUT SELECTOR TUNE MENU RETURN SETUP MUSIC PORT VOLUME ENTER TUNE MENU RETURN SETUP ENTER VOLUME TV AV MUTING VOLUME SUBWOOFER 1 2 3 7 0 8 9 10 4 5 6 u q g h SKIP SLOW SEARCH STOP PAUSE PLAY AV SYSTEM RECEIVER DVR DVD P TUNER BAND TV TV t y i MUTING Main unit Dimmer Dim the display for better viewing in a darkened room 1 ...

Страница 21: ...th DTS and PCM but it isn t playing properly then select YES If this causes noise to occur return the setting to NO This setting is effective for each digital source D Changing the settings 1 Press and hold SETUP to enter the setup menu 2 Press TUNE or to select the item you want to change ENTER 3 Change the settings INPUT MODE 1 Press TUNE or to select TV or DVR ENTER 2 Press TUNE or to change th...

Страница 22: ...DVR DVD P DVR DVD P q PLAY TOP MENU DIRECT NAVIGATOR SUB MENU PLAY LIST FUNCTIONS TUNER DIRECT TUNING ENTER RETURN g STOP h PAUSE h PAUSE h PAUSE u SKIP i SLOW SEARCH t y SLOW SEARCH t y VOLUME MUSIC MOVIE SFC EFFECT C FOCUS LEVEL TEST ENTER VOLUME TV AV MUTING VOLUME TOP MENU FUNCTIONS DIRECT NAVIGATOR SUB MENU PLAY LIST RETURN SUBWOOFER 1 2 3 7 0 8 9 10 4 5 6 u q g h PL SKIP SLOW SEARCH STOP PAU...

Страница 23: ...equency range 110 Hz to 22 kHz 16 dB 120 Hz to 21 kHz 10 dB Dimensions W x H x D 92 mm x 135 mm x 95 4 mm Mass SB PF41 0 65 kg SB PS41 0 7 kg Front speaker SC HT60 SB FS61 Type 2 Way 2 Speaker Bass ref Speaker unit Full range 6 5 cm cone type x 1 4 Ω Tweeter 6 cm cone type x 1 4 Ω Input power IEC 90 W Max Output sound pressure level 82 dB W 1 0m Frequency range 85 Hz to 45 kHz 16 dB 100 Hz to 40 k...

Страница 24: ...Ι or SFC The source may be stereo Use Dolby Pro LogicΙΙ or SFC The speaker wires are touching each other Check all your speaker connections You cannot use Dolby Pro LogicΙΙ or SFC when input is PCM with sampling frequencies of 96 or 88 2 kHz 12 6 12 Sound Pages The radio cannot be tuned in or there is a lot of noise and interference There is a lot of noise when listening to AM The correct AM frequ...

Отзывы: