background image

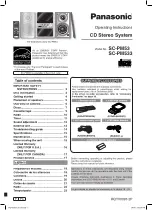
Operating Instructions

CD Stereo System

Model No.

 SC-PM53

SC-PM533

RQTV0097-2P


SC-PM533 is available in the U.S.A. only.

Before connecting, operating or adjusting this product, please 
read the instructions completely.
Please keep this manual for future reference.

Operations in these instructions are described using remote 
control, but you can do the operations with the main unit if the 
controls are the same.
Unless otherwise indicated, illustrations in these operating 
instructions are of SC-PM53 for the U.S.A. and Canada.
Your unit may not look exactly as illustrated.

La guía rápida en español se encuentra en la página 18 - 23.

The illustrations show SC-PM53.

P PC

Table of contents

IMPORTANT SAFETY 

INSTRUCTIONS ..................................  3

Disc information .....................................  3
Getting started ........................................  4
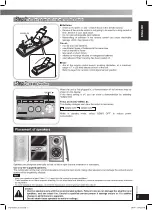
Placement of speakers ........................... 5
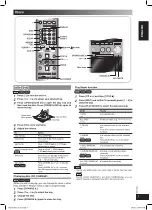
Overview of controls ..............................  6
Discs ........................................................  7
Cassette tape ..........................................  9
Radio ........................................................ 10
Timer ........................................................  11
Sound adjustment .................................. 12
External unit ............................................ 13
Troubleshooting guide ........................... 14
Specifi cations ......................................... 15
Maintenance ............................................  15
When moving the unit ............................ 15
Limited Warranty 

(ONLY FOR U.S.A.) ............................. 16

Limited Warranty 

(ONLY FOR CANADA) ........................ 17

Product Service ...................................... 17

SUPPLIED ACCESSORIES

SUPPLIED ACCESSORIES

Please check and identify the supplied accessories.
Use numbers indicated in parentheses when asking for 
replacement parts. (As of December 2005)

In the U.S.A. to order accessories, refer to “Accessory 
Purchases” on page 16.

1 x Remote control 

(N2QAYB000008)

1 x AM loop antenna

(N1DAAAA00001)

1 x AC power supply cord

(K2CB2CB00018)

1 x FM indoor antenna

(RSA0007-L)

2 x Remote control batteries 

Español

Español

Preparativos iniciales ............................  18
Colocación de los altavoces ................   18
Controles ................................................   19
Discos .....................................................   20
Cintas de casete ....................................   21
Radio .......................................................  22
Temporizador .........................................   23

RQTV0097_2P_EN.indd   1

RQTV0097_2P_EN.indd   1

2/6/06   3:33:54 PM

2/6/06   3:33:54 PM

Содержание SA-PM53-MULTI

Страница 1: ...Placement of speakers 5 Overview of controls 6 Discs 7 Cassette tape 9 Radio 10 Timer 11 Sound adjustment 12 External unit 13 Troubleshooting guide 14 Specifications 15 Maintenance 15 When moving the...

Страница 2: ...presence of important operating and maintenance servicing instructions in the literature accompanying the appliance Dear customer Thank you for purchasing this product For optimum performance and saf...

Страница 3: ...ay them on this unit MP3 WMA Files are treated as tracks and folders are treated as albums This unit can access up to 999 tracks 255 albums and 20 sessions Disc must conform to ISO9660 level 1 or 2 ex...

Страница 4: ...talled Connect the AM outdoor antenna without removing the AM loop antenna Run 5 to 12 m 16 40 feet of vinyl covered wire horizontally along a window or other convenient location L R HIGH 6 LOW 6 Gett...

Страница 5: ...etting is off you can show a demonstration by selecting DEMO ON Press and hold DEMO 7 The display changes each time the button is held down DEMO ON DEMO OFF While in standby mode select DEMO OFF to re...

Страница 6: ...o the AC power supply Music port jack 13 5 Treble selection 12 Disc tray open close 7 Disc skip search tape fast forward rewind tune preset channel selection time adjustment 9 Stop Demo 5 9 Remote con...

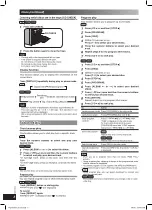
Страница 7: ...play or program play 1 Press CHANGE 0 2 Press 1 3 5 3 to select the tray 3 Change the disc 4 Press CHANGE 0 again to close the tray Play Mode function Play Mode function CD MP3 WMA 1 Press CD 6 and th...

Страница 8: ...re displayed To cancel Press REPEAT again REPEAT OFF is displayed and is cleared Program play Program play This function allows you to program up to 24 tracks CD 1 Press CD 6 and then STOP 7 2 Press P...

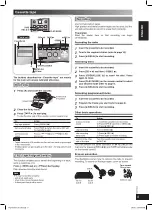
Страница 9: ...the leader tape so that recording can begin immediately Recording the radio Recording the radio 1 Insert the cassette to be recorded 2 Tune to the required station refer to page 10 3 Press REC 8 to s...

Страница 10: ...d hold PROGRAM to start presetting Manual presetting Manual presetting 1 Press PLAY MODE to select MANUAL 2 Press 4 REW 4 or 3 FF to tune to the required station 3 Press PROGRAM 4 Press numeric button...

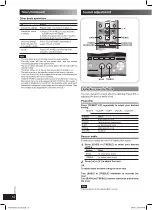
Страница 11: ...timer Preparation Turn the unit on and set the clock Timer Action Play timer Prepare the music source you want to listen to cassette disc number 1 5 radio or music port source and set the volume Recor...

Страница 12: ...e when the timer comes on the system turns on and engages MUSIC PORT as the source If you wish to playback or record from the portable audio equipment activate the equipment s play mode and increase t...

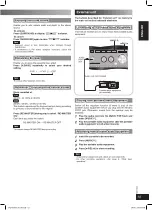
Страница 13: ...peripheral components and cables are sold separately For other recording operations refer page 9 Other basic operations Enjoying surround sound Enjoying surround sound Enable you to add natural width...

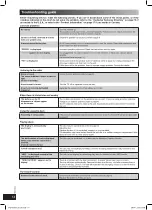
Страница 14: ...vision set nearby The picture on the TV disappears or stripes appear on the screen The location and direction of the antenna are incorrect If you are using an indoor antenna change to an outdoor anten...

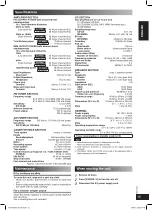
Страница 15: ...DA 44 1kHz MP3 WMA 32kHz 44 1kHz 48kHz Bit rate MP3 WMA 32kbps to 384kbps Decoding 16 20 24 bit linear Pick up Wavelength 785 nm Beam source Semiconductor laser Laser power CLASS 1 Audio output Disc...

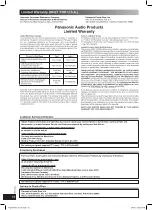
Страница 16: ...SING OUT OF ANY BREACH OF THIS WARRANTY As examples this excludes damages for lost time travel to and from the servicer loss of media or images data or other memory content The items listed are not ex...

Страница 17: ...05 238 2360 Email link Contact Us on www panasonic ca FOR PRODUCT REPAIRS please locate your nearest Authorized Servicente at www panasonic ca Link ServicentresTM locator under Customer support Panaso...

Страница 18: ...o Paso 3 3 Funci n de demostraci n Funci n de demostraci n Cuando el aparato se enchufe por primera vez puede aparecer en el visualizador una demostraci n de sus funciones Si el ajuste de demostraci n...

Страница 19: ...red de CA Conector de puerto de m sica 13 5 Selecci n de agudos 12 Abrir cerrar bandeja de disco 20 Omitir buscar disco avance r pido de cinta rebobinar sintonizar selecci n de canal presintonizado 21...

Страница 20: ...de modo de reproducci n Funci n de modo de reproducci n CD MP3 WMA 1 Pulse CD 6 y despu s STOP 7 2 Pulse DISC y antes de que pasen 10 segundos pulse 1 5 para seleccionar el disco 3 Pulse PLAY MODE en...

Страница 21: ...posici n normal Pueden usarse cintas de posici n alta y de metal pero el aparato no las grabar ni las borrar correctamente Preparaci n Rebobine la cinta original para que la grabaci n pueda comenzar d...

Страница 22: ...tica Presintonizaci n autom tica Mantenga pulsado PROGRAM para iniciar la presintonizaci n Presintonizaci n manual Presintonizaci n manual 1 Pulse PLAY MODE para seleccionar MANUAL 2 Pulse 4 REW 4 o...

Страница 23: ...ustar la hora de finalizaci n Hora de fi nalizaci n Para activar el temporizador 5 Pulse PLAY REC para encender el temporizador deseado PLAY Ninguna visualizaci n desactivado REC 6 Pulse y para apagar...

Страница 24: ...ic Puerto Rico Inc Ave 65 de Infanter a Km 9 5 San Gabriel Industrial Park Carolina Puerto Rico 00985 2005 Matsushita Electric Industrial Co Ltd Printed in Malaysia Panasonic Canada Inc 5770 Ambler Dr...

Отзывы: