background image

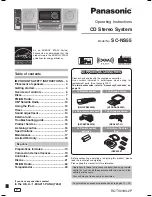
Operating Instructions

CD Stereo System

Model No.

 SC-NS55

RQTV0183-2P

As an ENERGY STAR

®

 Partner, 

Panasonic has determined that this 
product meets the ENERGY STAR

®


guidelines for energy effi ciency.

P

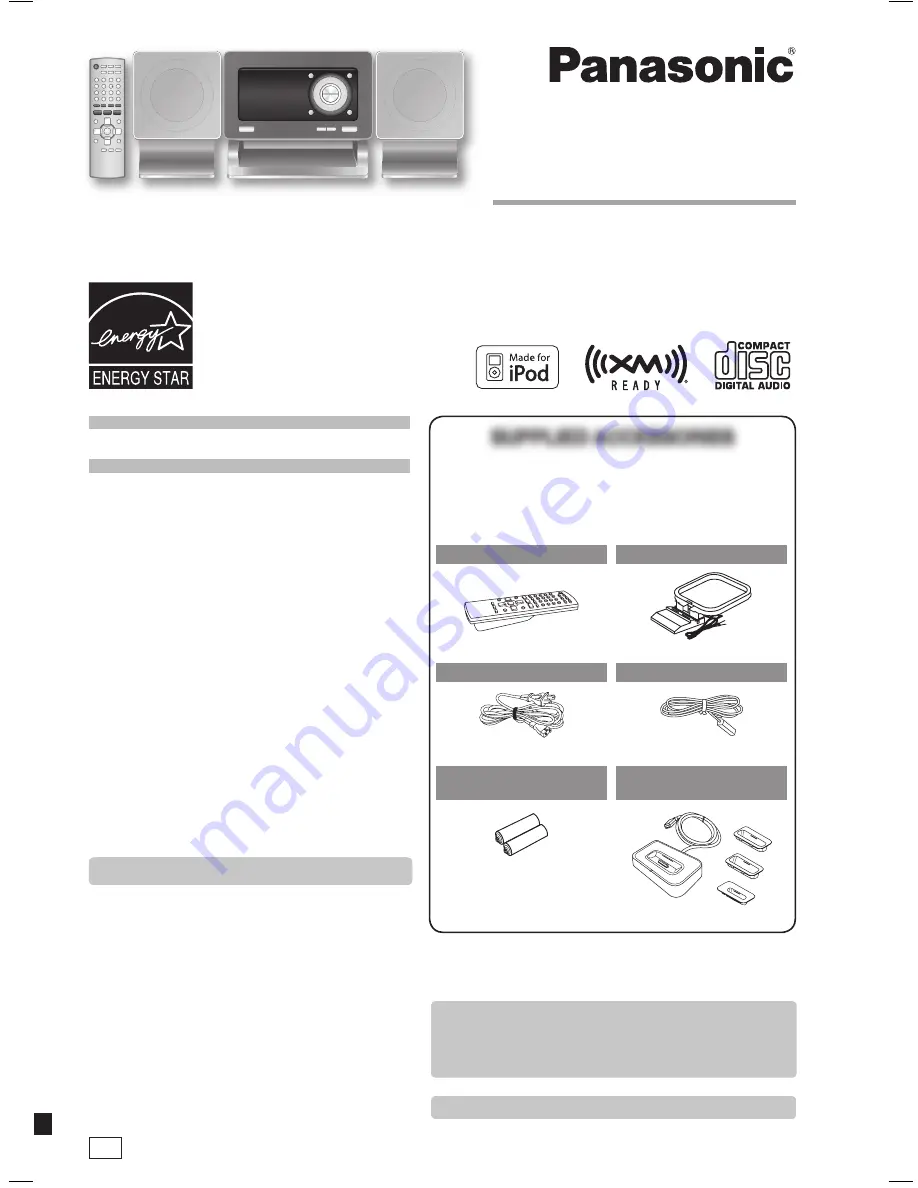
SUPPLIED ACCESSORIES

SUPPLIED ACCESSORIES

Please check and identify the supplied accessories.
Use numbers indicated in parentheses when asking for 
replacement parts. (As of January 2007)

To order accessories, refer to “Accessory Purchases” on 
page 18.

1 x Remote control 

(N2QAYB000090)

1 x AM loop antenna

(N1DAAAA00001)

1 x AC power supply cord

(K2CB2CB00018)

1 x FM indoor antenna

(RSA0007-L1)

2 x Remote control 

batteries 

1 x Universal Dock for 

iPod 

(RFE0205)

Español

Español

Preparativos iniciales .............................. 19
Colocación de los altavoces .................. 19
Controles .................................................. 20
Discos ....................................................... 21
FM/AM Radio ............................................ 22
Temporizador ........................................... 23

If you have any questions contact

In the U.S.A.: 1-800-211-PANA (7262)

Before connecting, operating or adjusting this product, please 
read the instructions completely.
Please keep this manual for future reference.

Operations in these instructions are described using remote 
control, but you can do the operations with the main unit if the 
controls are the same.

Your unit may not look exactly as illustrated.

La guía rápida en español se encuentra en la página 19 - 23.

Table of contents

IMPORTANT SAFETY INSTRUCTIONS ..  3
Placement of speakers ............................ 3
Getting started .........................................  4
Overview of controls ...............................  6
Discs .........................................................  7
FM/AM Radio ............................................  9
XM

®

 Satellite Radio .................................. 10

Using the iPod ......................................... 12
Timer ......................................................... 13
Sound adjustment ................................... 14
External unit ............................................. 14
Troubleshooting guide ............................ 15
Product Service ....................................... 16
Listening caution ..................................... 16
Specifi cations .......................................... 17
Maintenance ............................................. 17
Limited Warranty ..................................... 18

NS55_P-En,Sp.indd   1

NS55_P-En,Sp.indd   1

3/5/07   11:19:10 AM

3/5/07   11:19:10 AM

Содержание SA-NS55

Страница 1: ... Colocación de los altavoces 19 Controles 20 Discos 21 FM AM Radio 22 Temporizador 23 If you have any questions contact In the U S A 1 800 211 PANA 7262 Before connecting operating or adjusting this product please read the instructions completely Please keep this manual for future reference Operations in these instructions are described using remote control but you can do the operations with the m...

Страница 2: ...DUCE THE RISK OF ELECTRIC SHOCK DO NOT REMOVE SCREWS NO USER SERVICEABLE PARTS INSIDE REFER SERVICING TO QUALIFIED SERVICE PERSONNEL The exclamation point within an equilateral triangle is intended to alert the user to the presence of important operating and maintenance servicing instructions in the literature accompanying the appliance FCC Note This equipment has been tested and found to comply w...

Страница 3: ...ified service person if damage occurs or if a sudden change in performance is apparent Do not attach these speakers to walls or ceilings 10 Protect the power cord from being walked on or pinched particularly at plugs convenience receptacles and the point where they exit from the apparatus 11 Only use attachments accessories specified by the manufacturer 12 Use only with the cart stand tripod brack...

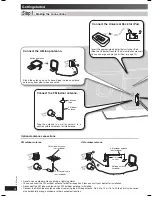
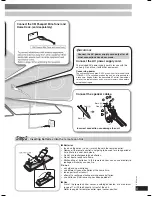
Страница 4: ...door antenna if an FM outdoor antenna is installed Connect the AM outdoor antenna without removing the AM loop antenna Run 5 to 12 m 16 to 40 feet of vinyl covered wire horizontally along a window or other convenient location Connect the AM loop antenna Stand the antenna up on its base Keep the loose antenna cord away from other wires and cords AM loop antenna Connect the FM indoor antenna Tape th...

Страница 5: ...f the unit Refer to page 6 for remote control signal sensor position Connect the XM Passport Mini Tuner and Home Dock sold separately To prevent interference with wireless equipment place the antenna away from other equipment that emits radio waves such as radio equipment and microwave oven Refer to page 10 for optimizing the reception XM Passport Mini Tuner and Home Dock Connect the speaker cable...

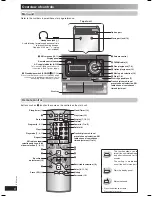
Страница 6: ...ning for prolonged periods of time to prevent hearing damage Plug type Ø3 5mm 1 8 stereo not included Top of unit Remote control Remote control Buttons such as 1 function the same as the controls on the main unit 2 Clock Timer 13 Play timer 13 Numeric 7 to 11 Delete 8 Track skip search tune preset channel selection XM radio channel search scan time adjustment 7 to 13 Program 8 9 11 Clear 8 Play mo...

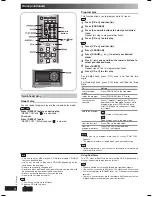
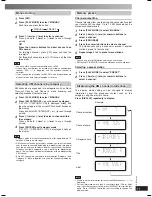
Страница 7: ...ack 1 ALBUM 1ALBUM MP3 one selected album on the disc Press ALBUM or to select the album RANDOM RND a disc randomly 1 ALBUM RANDOM 1ALBUM RND MP3 all tracks in one selected album randomly Press ALBUM or to select the album Note During RANDOM or 1 ALBUM RANDOM play you cannot skip to tracks that have been played The current play mode is cleared when you open the disc tray CD During RANDOM play you ...

Страница 8: ...ogram CD Repeat step 3 in the stop mode MP3 Repeat steps 3 to 5 in the stop mode clear the last track Press DEL in the stop mode clear all programmed tracks Press CLEAR in the stop mode CLR ALL is displayed Note When you try to program more than 24 tracks PGM FULL appears The program memory is cleared when you open the disc tray CD During program play you can search backward or forward only within...

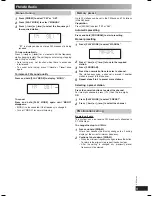
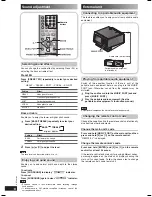
Страница 9: ...setting Automatic presetting Press and hold PROGRAM to start presetting Manual presetting Manual presetting 1 Press PLAY MODE to select MANUAL 2 Press 4 or to tune to the required station 3 Press PROGRAM 4 Press the numeric buttons to select a channel The station occupying a channel is erased if another station is preset in that channel 5 Repeat steps 2 to 4 to preset more stations Selecting a pre...

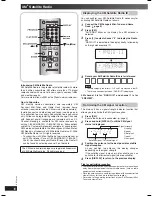
Страница 10: ...tivating XM Satellite Radio as follows 1 Connect the XM Passport Mini Tuner and Home Dock page 5 2 Press XM ANTENNA blinks on the display if no XM antenna is detected 3 Press 0 to select channel 0 to display the Radio ID RADIO ID is indicated in the display briefly followed by an 8 digit alphanumeric ID 4 Record your XM Satellite Radio ID here for reference Note To avoid ambiguity the letters I O ...

Страница 11: ... belonging to a broadcasting category of your choice and then to select a favorite channel from the chosen category Available categories vary according to broadcasting hours The unit does not display categories with no broadcasting XM channel Each XM channel may belong to two categories Category 1 and Category 2 Both categories are used for channel selection by category Memory preset Memory preset...

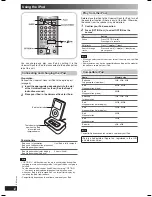
Страница 12: ... fully charged You can turn off this display by removing the iPod from the dock Compatibility depends on the software version of your iPod Play from the iPod Play from the iPod Before place the iPod to the Universal Dock for iPod turn off the equalizer function if there is any of the iPod Otherwise the sound from the speaker may be distorted 1 Confirm you iPod connection 2 Press OPTION 6 to select...

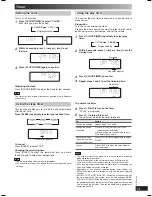
Страница 13: ... set the starting time Play timer indicator Start time 3 4 Press CLOCK TIMER to confirm Repeat steps 2 and 3 to set the finishing time Finish time To activate the timer 5 Press PLAY to turn on the timer PLAY is displayed 6 Press y to turn off the unit The unit must be off for the timer to operate To Action change the settings Repeat steps 1 to 4 and 6 change the source or volume 1 Press PLAY to cl...

Страница 14: ...io equipment Connecting to a portable audio equipment This feature enables you to enjoy music from portable audio equipment Audio cord not included Portable audio equipment not included Playing from portable audio equipment Playing from portable audio equipment Switch off the equalizer function if there is any of the portable audio equipment before you plug into the MUSIC PORT jack Otherwise sound...

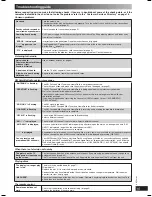
Страница 15: ...nal is too weak Reorient the XM Passport Mini Tuner and Home Dock for better reception LOADING is flashing The XM Passport Mini Tuner and Home Dock is receiving and decoding the broadcast information Wait a few seconds for loading to complete OFF AIR is flashing The selected XM channel is not currently broadcasting Select a different channel XM is displayed The selected XM channel is not available...

Страница 16: ... or assistance with product operation Refer to Customer Services Directory on page 18 Listening caution 34 Selecting fine audio equipment such as the unit you ve just purchased is only the start of your musical enjoyment Now it s time to consider how you can maximize the fun and excitement your equipment offers This manufacturer and the Electronic Industries Association s Consumer Electronics Grou...

Страница 17: ...laser Wavelength 785 nm Laser power CLASS 1 Audio output Disc Number of channels 2 channel Frequency response 20 Hz to 20 kHz 1 2 dB Wow and flutter Below measurable limit Digital filter 8 fs D A converter MASH 1 bit DAC SPEAKER SECTION Type 1 way 1 speaker system Speaker s FULL RANGE 8 cm 35 32 CONE type 6 Ω Impedance 6 Ω Input power IEC 15 W MAX Output sound pressure 79 05 dB W 1 0 m Frequency r...

Страница 18: ... USE OF THIS PRODUCT OR ARISING OUT OF ANY BREACH OF THIS WARRANTY As examples this excludes damages for lost time travel to and from the servicer loss of media or images data or other memory content The items listed are not exclusive but are for illustration only ALL EXPRESS AND IMPLIED WARRANTIES INCLUDING THE WARRANTY OF MERCHANTABILITY ARE LIMITED TO THE PERIOD OF THE LIMITED WARRANTY Some sta...

Страница 19: ...ropiada Estos altavoces no disponen de blindaje magnético No los ponga cerca de televisores ordenadores personales u otros dispositivos a los que afecte fácilmente el magnetismo No quite la rejilla frontal de los altavoces Precaución Use los altavoces sólo con el sistema recomendado De lo contrario se podrían dañar el amplificador y los altavoces y se podría ocasionar un incendio Consulte a un téc...

Страница 20: ...in de evitar lesiones auditivas Tipo de clavija Estéreo de Ø3 5 mm 1 8 de diámetro no suministrada Parte superior del aparato Mando a distancia Mando a distancia Buttons such as 1 function the same as the controls on the main unit Esta función de apagado automático le permite apagar el aparato en modo disco sólo después de 10 minutos sin utilizarlo El ajuste se mantiene aunque el aparato esté apag...

Страница 21: ...lse ALBUM o una vez y los botones numéricos en el modo de parada Función de modo de reproducción Función de modo de reproducción CD MP3 1 Pulse CD 6 2 Pulse PLAY MODE para seleccionar el modo deseado Modo Para reproducir 1 TRACK 1TR una melodía seleccionada del disco Pulse las teclas numéricas para seleccionar la pista 1 ALBUM 1ALBUM MP3 un álbum seleccionado del disco Pulse ALBUM o para seleccion...

Страница 22: ... 0 1 MHz Para cambiar el paso a 0 1 MHz 1 Mantenga pulsado FM AM Después de unos segundos la visualización cambiará a una visualización parpadeante de la frecuencia mínima actual 2 Continúe pulsando FM AM Si la frecuencia mínima cambia suelte el botón Para volver al paso original repita los pasos anteriores Después de cambiar el ajuste de asignación las frecuencias previamente preajustadas en la m...

Страница 23: ...temporizador PLAY se muestra en pantalla 6 Pulse y para apagar el aparato El aparato debe estar apagado para que funcionen los temporizadores Para Acción cambiar la configuración Repetir los pasos de 1 a 4 y 6 cambiar la fuente o el volumen 1 Pulse PLAY para cancelar el PLAY indicador del visualizador 2 Cambie la fuente o el volumen 3 Realice los pasos 5 y 6 compruebe la configuración si el aparat...

Страница 24: ...rth America One Panasonic Way Secaucus New Jersey 07094 http www panasonic com Panasonic Puerto Rico Inc Ave 65 de Infantería Km 9 5 San Gabriel Industrial Park Carolina Puerto Rico 00985 2007 Matsushita Electric Industrial Co Ltd Printed in Malaysia RQTV0183 2P L0107CH2037 En Sp ...

Отзывы: