background image

 SQT1404

 M0916KZ0

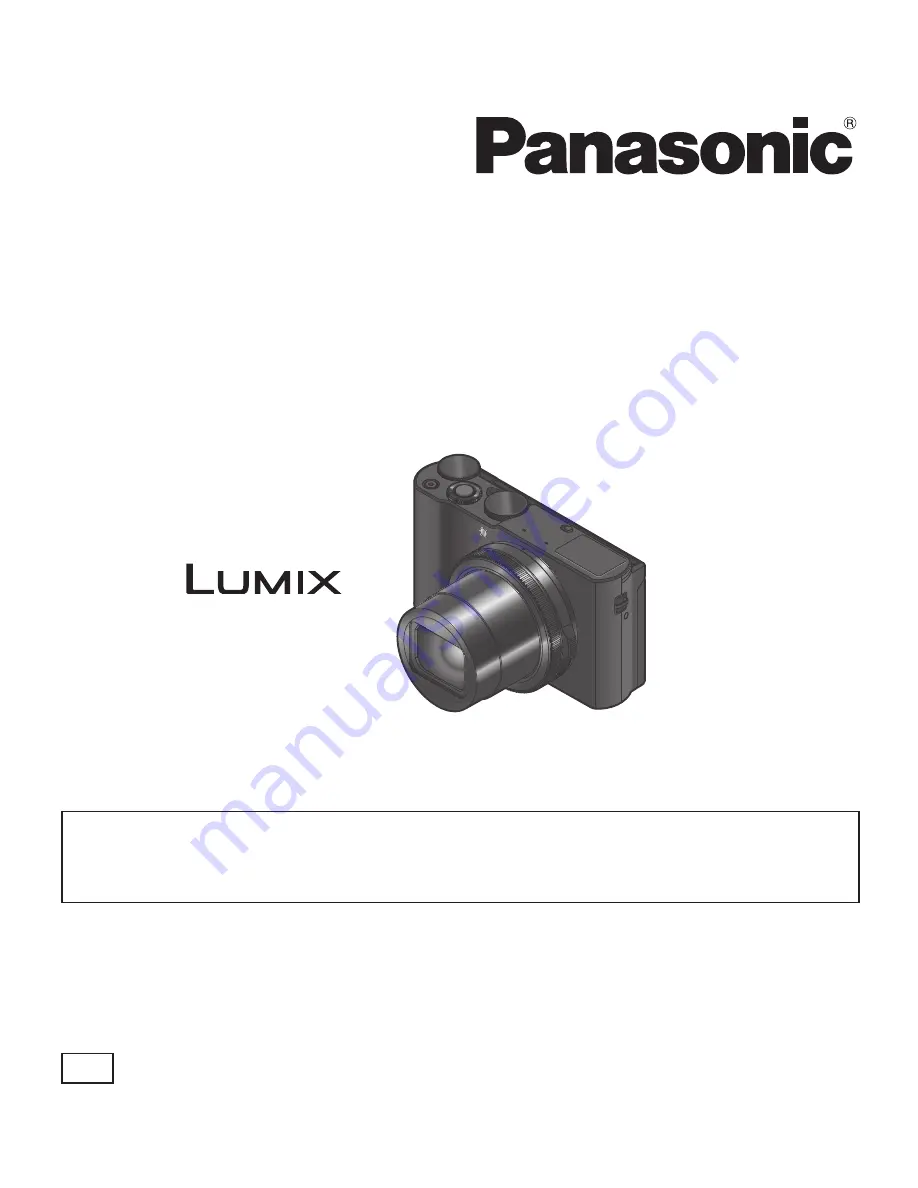
 Basic Operating Instructions

 Digital Camera


 Model No.

 DMC-LX10


 Please read these instructions carefully before using this product, and 
save this manual for future use.

 More detailed operating instructions are available in “Operating 
Instructions for advanced features (PDF format)”. To read it, download 
it from the website. (→48)

 GN

Содержание lumix DMC-LX10

Страница 1: ...DMC LX10 Please read these instructions carefully before using this product and save this manual for future use More detailed operating instructions are available in Operating Instructions for advanc...

Страница 2: ...es or discs or other published or broadcast material for purposes other than your own private use may infringe copyright laws Even for the purpose of private use recording of certain material may be r...

Страница 3: ...e AC adaptor is connected to an electrical outlet About the battery pack CAUTION Danger of explosion if battery is incorrectly replaced Replace only with the type recommended by the manufacturer When...

Страница 4: ...because doing so may result in noise adversely affecting the pictures and or sound Recorded data may be damaged or pictures may be distorted by strong magnetic fields created by speakers or large moto...

Страница 5: ...cally Bracket Recording 31 Recording Motion Picture 4K Motion Picture 32 4K Live Cropping 34 Playback Viewing your pictures 36 Light Composition 37 Menu Menu list 39 Wi Fi What you can do with the Wi...

Страница 6: ...DMW DCC15A optional or a card or disconnect the power plug from the outlet and wipe with a soft dry cloth Do not press the monitor with excessive force Do not press the lens with excessive force Do no...

Страница 7: ...Memory Card and SDXC Memory Card are indicated as card in the text This unit is compatible with UHS UHS Speed Class 3 standard SDHC SDXC memory cards The following SD standard based cards can be used...

Страница 8: ...8 Preparations SQT1404 ENG Names and Functions of Main Parts 1 2 3 4 5 6 7 8 9 12 13 14 15 23 17 18 19 21 20 22 16 24 25 26 27 28 29 30 31 10 10 11...

Страница 9: ...e button 24 Fn1 button 20 Playback button 36 21 Cursor button 17 22 MENU SET button 23 DISP button Use this to change display 24 HDMI socket 25 USB CHARGE socket 11 26 Release lever 10 27 DC coupler c...

Страница 10: ...eck that it is locked by lever Card Insert the card all the way firmly until it clicks Do not touch the terminals on the back of the card 3 Close the door Slide the release lever to the LOCK position...

Страница 11: ...off USB CHARGE socket This terminal is located at the bottom when the camera is in an upright position Always check the direction of the pins and hold the plug straight to insert or remove it If the c...

Страница 12: ...is too high or too low the operating time of the battery will become shorter The battery becomes warm after using and during and after charging The camera also becomes warm during use This is not a m...

Страница 13: ...ess MENU SET 3 Press to select the items year month day hour minute and press to set 4 Press MENU SET 5 When The clock setting has been completed is displayed press MENU SET 6 When Please set the home...

Страница 14: ...tio The maximum zoom ratio varies depending on the picture size i Zoom You can use the camera s intelligent resolution technology to increase the zoom ratio up to 2x higher than the original zoom rati...

Страница 15: ...focus is not aligned flashing Aperture value Shutter speed 2 Press the shutter button fully push the button all the way and take the picture Pictures can be taken only when the image is correctly foc...

Страница 16: ...erture then take pictures Shutter Priority AE Mode Determine shutter speed then take pictures Manual Exposure Mode Determine aperture and shutter speed then take pictures Creative Video Mode Determine...

Страница 17: ...l the button that is to be used is indicated by You can perform the following operations while recording Some items or settings cannot be selected depending on the mode or display style the camera is...

Страница 18: ...maintaining the distance to the subject for the extreme Wide position 3 cm MF Manual focus is convenient when you want to lock the focus to take pictures or when it is difficult to adjust focus using...

Страница 19: ...1 Rear dial Step Zoom Step Zoom Programme Shift Step Zoom Step Zoom Shutter speed adjustment Step Zoom Shutter speed adjustment Step Zoom Shutter speed adjustment 2 Step Zoom Shutter speed adjustment...

Страница 20: ...o touch and release the touch screen Be sure to touch the centre of the desired icon Drag To touch and slide your finger across the touch screen This can also be used to forward or rewind a picture du...

Страница 21: ...e setting methods vary depending on the menu item 4 Press Q MENU button repeatedly until the recording or playback screen reappears During recording the menu screen can also be exited by pressing the...

Страница 22: ...either the most recently used of Intelligent Auto Mode or Intelligent Auto Plus Mode 2 Point the camera at the subject When the camera identifies the optimal scene the icon for each scene turns blue f...

Страница 23: ...n Shots 3 Touch the slide bar If you select the left edge of the slide bar it will be set to Off In the case of Filter Select Shutter or Shots select from the icons Exit Exit 4 Touch Exit 5 Decide on...

Страница 24: ...nes trains Burst recording is performed while the shutter button is pressed and held Press and hold Recording is performed 4K Burst S S S S is an abbreviation of Start Stop For capturing unpredictable...

Страница 25: ...osition 37 To cancel the 4K Photo functions In step 2 select If the surrounding temperature is high or 4K photos are recorded continuously may be displayed and recording may be stopped halfway through...

Страница 26: ...case of recording with 4K Pre Burst proceed to the step 3 2 Drag the slide bar to perform rough scene selection 3 Drag to select the frame you want to save as a picture Touch to display the previous...

Страница 27: ...nd then perform the following operations Playback 4K PHOTO Bulk Saving Use to select the 4K burst files and press MENU SET If the burst time is 5 seconds or less all the frames can be saved as a pictu...

Страница 28: ...s button 2 Press to select ON and press MENU SET 3 Determine the composition and press the shutter button halfway Auto Focus activates and automatically detects the focus point on the screen If there...

Страница 29: ...ictures with the focus on the selected point a red frame will be displayed and pictures cannot be saved The edge of the screen cannot be selected Press Fn1 to switch to the Focus Stacking operations s...

Страница 30: ...ange Merging Combine the pictures with the selected focus position into one picture 3 When selecting Range Merging Touch the focus point Select positions at two or more points Focus positions between...

Страница 31: ...ture Bracket Press the shutter button to perform recording while adjusting the aperture Focus Bracket Press the shutter button to perform recording while adjusting the focus position White Balance Bra...

Страница 32: ...ures while recording motion pictures 2 Press the motion picture button again to end recording If the surrounding temperature is high or a motion picture is recorded continuously is displayed and recor...

Страница 33: ...th their file size set to FHD or HD in MP4 Files are split into smaller motion picture files for recording and playback when the file size exceeds 4 GB You can continue to record motion pictures witho...

Страница 34: ...old the camera firmly in place while recording A motion picture will be recorded at FHD 20M 25p under MP4 Pan Zoom in When you want to zoom in out set different angles of view for the cropping start a...

Страница 35: ...time Set operating time Immediately release the motion picture button or the shutter button after pressing it When the set operating time has elapsed recording automatically ends To end recording midw...

Страница 36: ...res are displayed with the motion picture icon Press to start playback If you press MENU SET during a pause you can create a picture from a motion picture Sending pictures to the WEB services If you p...

Страница 37: ...ipod or use a smartphone instead of the shutter and do remote recording 45 to control camera shaking Playback Light Composition 1 Use to select the 4K burst files and press MENU SET 2 Choose the combi...

Страница 38: ...t steps to select more frames to combine You can select up to 40 frames Press to select Save and press MENU SET When Range Merging is selected Select the first and last frames and the brighter parts o...

Страница 39: ...me name in other menu will also be changed automatically Rec Photo Style Filter Settings Aspect Ratio Picture Size Quality Sensitivity AF Mode AFS AFF AFC Metering Mode Burst Rate 4K PHOTO Bracket Sel...

Страница 40: ...r AF Half Press Release Quick AF Pinpoint AF Time Pinpoint AF Display AF Assist Lamp Focus Release Priority AF MF MF Assist MF Assist Display MF Guide Peaking Histogram Guide Line Center Marker Highli...

Страница 41: ...anguage Version Disp Exposure Comp Reset Self Timer Auto Off No Reset Reset Reset Wi Fi Settings Level Gauge Adjust Demo Mode Format Slide Show Playback Mode Location Logging RAW Processing 4K PHOTO B...

Страница 42: ...ing services Adding location information to pictures in the camera from a smartphone Combining motion pictures recorded with Snap Movie according to your preference on a smartphone Displaying still pi...

Страница 43: ...being used For the latest information on the Image App refer to the support site below http panasonic jp support global cs dsc This site is available in English only When downloading the app on a mobi...

Страница 44: ...he Wi Fi function in the setting menu 2 Select the SSID displayed on the screen of the camera 3 Start Image App 43 When the connection confirmation screen appears on the camera select Yes and press ME...

Страница 45: ...For details on how to close the application refer to the operating instructions of your device Taking pictures via a smartphone remote recording 1 Connect to a smartphone 44 2 Operate the smartphone...

Страница 46: ...Check the website below to download install the software The software is available for download until the end of October 2021 http panasonic jp support global cs soft download d_pfs99pe html Operating...

Страница 47: ...v10 6 v10 11 For details on the operating environment and how to use the SILKYPIX Developer Studio SE refer to the Help or the Ichikawa Soft Laboratory s support website LoiLoScope 30 day full trial...

Страница 48: ...MC LX10 dest GN Click the desired language Confirming URLs and QR codes with the camera Setup Online Manual Settings URL display QR Code display The URL or QR code will be displayed on the camera moni...

Страница 49: ...Ratio Picture Size Image size Panorama Shot Mode Picture effect Filter adjustment display EXPS Types of picture effects Filter Card displayed only during recording XXhXXmXXs Elapsed recording time 1 S...

Страница 50: ...reen 15 Focus Under low illumination Focus Starlight AF Wi Fi connection status Histogram Name 2 Travel elapsed days 3 Age in years months 2 Location 3 Current date time 3 Travel destination setting 3...

Страница 51: ...Xs Available recording time 1 Touch tab Touch zoom Touch Shutter Touch AE Peaking Self Shot 23 Function buttons 17 Colouring Defocus control function Brightness exposure Type of defocus Miniature Effe...

Страница 52: ...ra is turned on if the Profile Setup setting is set 3 This is displayed for about 5 seconds when the camera is turned on after setting the clock and after switching from Playback Mode to Recording mod...

Страница 53: ...tremely high or low temperature Reconnect the USB connection cable supplied and retry charging in a place where ambient temperature is 10 C to 30 C temperature conditions also apply to the battery its...

Страница 54: ...unit is placed on a metal table or shelf the connection may not be established easily because the camera is affected by radio waves Use the camera away from metal surfaces About a wireless access poin...

Страница 55: ...00 pixels Primary colour filter Lens Optical 3x zoom f 8 8 mm to 26 4 mm 35 mm film camera equivalent 24 mm to 72 mm Max Wide F1 4 to F11 Max Tele F2 8 to F11 Image Stabiliser Optical method Focus ran...

Страница 56: ...25th of a second to 1 16000th of a second Other than the above Exposure AE Programme AE P Aperture priority AE A Shutter priority AE S Manual exposure M AUTO Exposure Compensation 1 3 EV steps 5 EV t...

Страница 57: ...esponding Motion picture AVCHD Progressive AVCHD MP4 Audio compression format AVCHD Dolby Digital 2 ch MP4 AAC 2 ch Interface Digital USB 2 0 High Speed Terminal HDMI Micro HDMI Type D USB CHARGE USB...

Страница 58: ...ructure mode AC adaptor Panasonic SAE0012G Information for your safety Input 110 V 240 V 50 60 Hz 0 2 A Output 5 V 1 0 A Battery pack lithium ion Panasonic DMW BLH7E Information for your safety Voltag...

Страница 59: ...ck without worrying about the remaining battery charge The optional DC coupler DMW DCC15 cannot be used The AC adaptor optional can only be used with the designated Panasonic DC coupler optional The A...

Страница 60: ...es f Video Audio Heads from wear and tear in normal use c SD cards or USB devices g Information stored on Hard Disk Drive USB stick or SD card d User replaceable Batteries h DTV reception issues cause...

Страница 61: ...ed or replaced if the product fails to be of acceptable quality and the failure does not amount to a major failure If there is a major failure in regard to the product which cannot be remedied then yo...

Страница 62: ...the U S and other countries iPad iPhone iPod and iPod touch are trademarks of Apple Inc registered in the U S and other countries App Store is a service mark of Apple Inc Android and Google Play are...

Страница 63: ...63 SQT1404 ENG...

Страница 64: ...and Batteries Only for European Union and countries with recycle systems These symbols are only valid in the European Union and countries with recycle systems If you wish to discard this product pleas...

Отзывы: