115
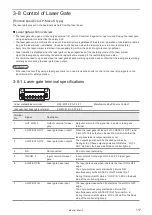
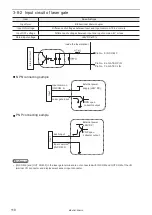
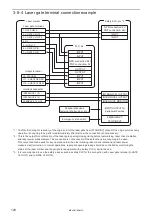
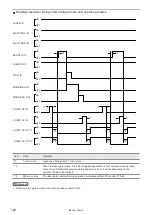
3-7 Interlock Connector
3-7-1 Connector type and signals
1
2
3
1
2
3
* This view is facing the connecting
surface.
Laser marker side
(Female connector)
User side: Attached accessory
(Male Connector)
Laser marker side connector
: SRCN2A13-3S
Japan Aviation Electronics Industry, Ltd.
[Attached item] User side connector
: SRCN6A13-3P
ンㄆㄇㄆㄓㄆㄏㄆ
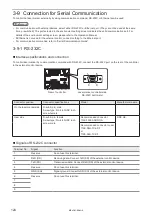
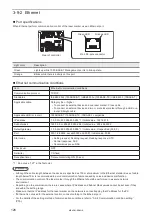
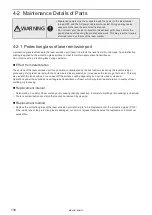
• The user side connector (male) is supplied with this product. In this attached interlock connector, INTERLOCK IN (No.3)
and INTERLOCK COM. (No.1) are short-circuited at the delivery state.
Signals and details of interlock connector
ワㄐㄕㄊㄆ
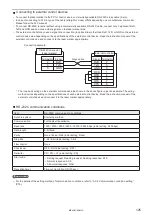
• INTERLOCK IN on the interlock connector are connected to the operating coil of the internal relay in the controller.
Connect INTERLOCK IN and INTERLOCK COM. with the non-voltage contact (dry contact) such as a relay or a switch.
Do not connect with the voltage contact such as a transistor.
No.
Name and description
1
INTERLOCK 1 COM. (on Interlock 1 connector)
INTERLOCK 2 COM. (on Interlock 2 connector)
Common terminal for the interlock connector.
Connect each INTERLOCK IN (No.3) and INTERLOCK COM. (No.1) with the non-voltage contact (relay output
terminal etc.) of the safety devices such as door, switch or safety PLC.
ンㄆㄇㄆㄓㄆㄏㄆ
• INTERLOCK 1 COM. and INTERLOCK 2 COM. are not connected to the common terminals (IN COM., OUT
COM.) of I/O terminal and I/O connector.
2
FEEDBACK 1 OUT (on Interlock 1 connector)
FEEDBACK 2 OUT (on Interlock 2 connector)
When both of INTERLOCK 1 & 2 IN are not connected with INTERLOCK 1 & 2 COM. respectively, the connection
between FEEDBACK 1 OUT - FEEDBACK 2 OUT becomes “CLOSE” status.
By using these terminals, the contact failure of Interlock internal circuit can be detected.
Since FEEDBACK 1 OUT and FEEDBACK 2 OUT are connected internally, the contact status of INTERLOCK 1
IN and INTERLOCK 2 IN cannot be monitored individually.
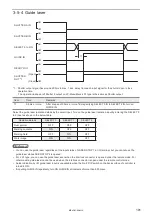
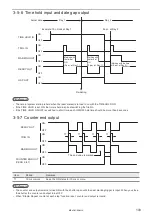
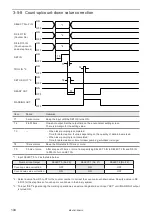
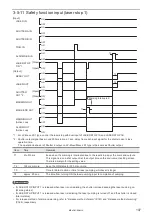
The connection between FEEDBACK 1 OUT and FEEDBACK 2 OUT is switched open and closed with a delay of
approx. 20 ms with reference to the status of INTERLOCK 1 IN and INTERLOCK 2 IN as shown below.
CLOSE
OPEN
CLOSE
OPEN
20ms
20ms
INTERLOCK 1 IN - INTERLOCK 1 COM.
INTERLOCK 2 IN - INTERLOCK 2 COM.
FEEDBACK 1 OUT - FEEDBACK 2 OUT
3
INTERLOCK 1 IN (on Interlock 1 connector)
INTERLOCK 2 IN (on Interlock 2 connector)
To enable the laser radiation, connect INTERLOCK IN (No. 3) and INTERLOCK COM. (No. 1) with the non-
voltage contact (dry contact) such as a relay or a switch.
When the connection between INTERLOCK IN (No. 3) and INTERLOCK COM. (No. 1) is opened, the laser
pumping is turned OFF and the shutter is closed.
ME-LPM-SSM-10
Содержание LP-M Series
Страница 16: ...16 MEMO ME LPM SSM 10...
Страница 27: ...27 Chapter 1 Specification ME LPM SSM 10...
Страница 37: ...37 Chapter 2 Preparation ME LPM SSM 10...
Страница 69: ...Chapter 3 Connection for External Control ME LPM SSM 10...
Страница 128: ...Chapter 4 Maintenance ME LPM SSM 10...
Страница 148: ...Troubleshooting ME LPM SSM 10...
Страница 169: ...Index ME LPM SSM 10...
Страница 172: ...172 MEMO No 9000 0066 34V ME LPM SSM 10...
Страница 173: ...No 9000 0066 34V...

