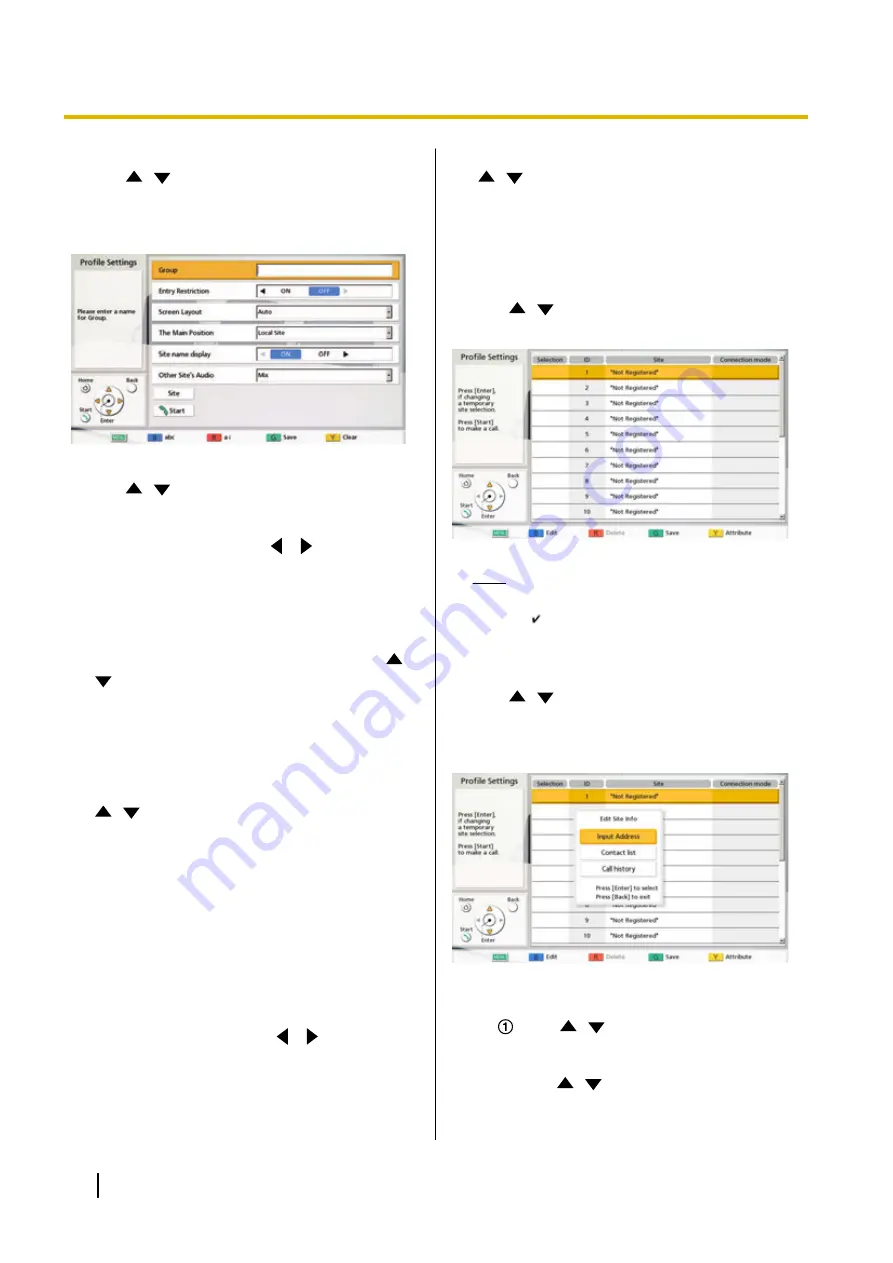
3.
Use
[
][
]
to select
""Not Registered""
.
4.
Press
[B]
.
•
The profile settings screen is displayed.
5.
Use
[
][
]
to select the following items for input:
"Group"
: Enter a name for the profile (up to 24
"Entry Restriction"
: Use
[
][
]
to select
whether to restrict sites that have not been
registered from joining a conference room.
–
"ON"
: Entry to conference rooms is restricted.
–
"OFF"
(default): Entry to conference rooms is
not restricted.
"Screen Layout"
: Press
[ENTER]
and use
[
]
[
]
to select the screen layout.
–
"Auto"
(default): Automatically changes the
layout depending on the number of parties
joining a video conference call.
–
"CP1"
to
"CP10"
: The selected screen layout
"The Main Position"
: Press
[ENTER]
and use
[
][
]
to select the screen to display as the main
display (display priority 1).
–
"Voice Activation 1"
: The site with the loudest
volume is automatically displayed as the main
display.
–
"Voice Activation 2"
: Your own site’s image is
displayed as the main display, and the site with
the loudest volume at the time is displayed as
display priority 2.
–
"Local Site"
(default): Displays your own site.
–
"Site 1"
to
"Site 20"
: Displays the image of the
selected connection as the main display.
"Site name display"
: Use
[
][
]
to select
whether to display site names during a
multiple-party connection.
–
"ON"
(default): Display site names.
–
"OFF"
: Do not display site names.
"Other Site's Audio"
: Press
[ENTER]
and use
[
][
]
to select whether to forcibly mute the audio
of other parties during a multiple-party connection.
–
"Mix"
: Audio is output that combines the audio
of the other party with that from the Main Site.
–
"Mute"
(default): Mutes the audio of other
parties.
6.
Use
[
][
]
to select
"Site"
and press
[ENTER]
.
•
The site selection screen is displayed.
Note
•
If there are no registered contacts with a
" " mark in the selection column, a call will
not be made even if
[START]
is pressed.
•
Press
[Y]
to return to the profile settings
screen.
7.
Use
[
][
]
to select
""Not Registered""
and
press
[B]
.
•
A dialogue box is displayed for selecting the
input method.
When
"Input Address"
is selected
•
The address input screen is displayed.
Use
[
][
]
to select the following items
for input:
"Connection mode"
: Press
[ENTER]
and
use
[
][
]
to select the connection mode
(communication type) and press
[ENTER]
.
94
User Manual
Document Version 2015-08
Contacts and Settings


