•
After changing the desired values,
you can press the ENTER button. You do not have to
perform the rest of the steps.
•
The clock starts immediately after the ENTER button is pressed.
•
You cannot leave a value empty.
•
You can clear the entry by pressing the CLEAR button.
•
To confirm your entry after storing data:
–
The STORE button light: Lights red
–
Confirmation Tone:
One beep: Your entry is accepted.
Three beeps: Your entry is rejected.
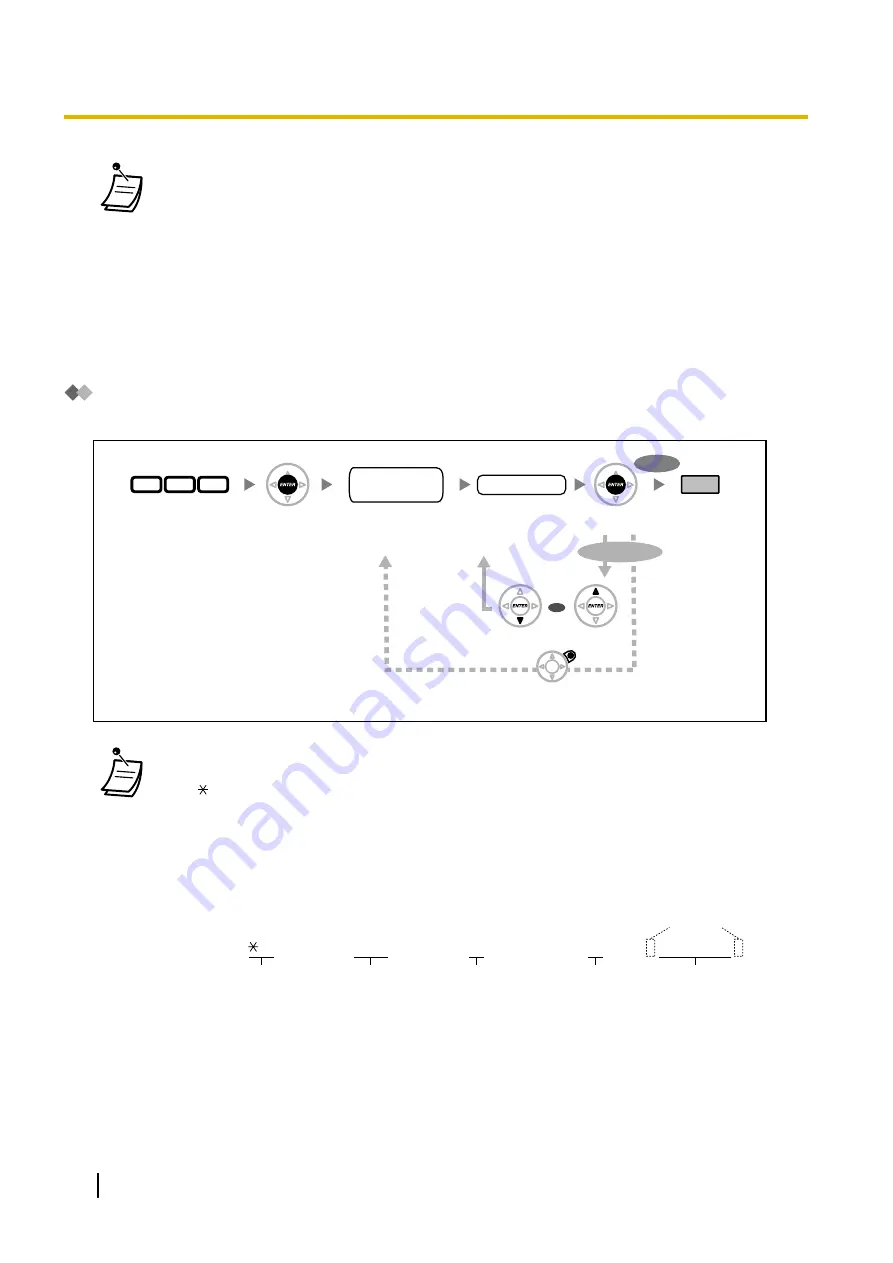
System Speed Dialling Number [001]
You can store the phone numbers of frequently dialled destinations.
Press
ENTER
.
Enter
001
.
Enter
system
speed dialling
number
(3 digits).
Enter
phone
number
(max. 32 digits).
Press
END
.
phone no.
Press
PREV
.
Press
NEXT
.
Press
CANCEL
.
To continue
To end
Press
ENTER
.
0
0
1
system speed
dialling no.
OR
•
If the desired number is more than 32 digits, divide the number and store it into more than
one speed dialling number.
•
" ", "#", FLASH/RECALL, PAUSE, and Secret (INTERCOM) can also be stored.
If you do not want to display the stored number when making a call, press the Secret
(INTERCOM) button before and after the numbers you wish to conceal.
If you store an outside party’s number, you should first store a line access number.
If you need to enter an account code, you can enter the specified account code before the
line access number.
<Example>
Account code feature no.
49
Account code
1234
Account code delimiter
#
Automatic line
access number
0/9
Phone number
SECRET
[ 123 4567 ]
210
User Manual
3.3.2 System Programming
Содержание KX-TDA150
Страница 14: ...14 User Manual Table of Contents ...
Страница 116: ... After you go on hook the caller can talk to the person who answers the page 116 User Manual 1 7 1 Paging ...
Страница 126: ... This step can be omitted 126 User Manual 1 8 2 Refusing Incoming Calls Do Not Disturb DND ...
Страница 168: ...Table 1 Standard mode 168 User Manual 1 13 2 Using the Directories ...
Страница 169: ...Table 1 Standard mode for RU model User Manual 169 1 13 2 Using the Directories ...
Страница 170: ...Table 2 Option mode 170 User Manual 1 13 2 Using the Directories ...
Страница 171: ...Table 2 Option mode for CE model User Manual 171 1 13 2 Using the Directories ...
Страница 172: ...Table 2 Option mode for RU model 172 User Manual 1 13 2 Using the Directories ...
Страница 174: ...174 User Manual 1 13 3 Accessing System Features System Feature Access ...
Страница 232: ...232 User Manual 4 3 1 What is This Tone ...
Страница 233: ...Index User Manual 233 ...


