122
4. Image Filters (ISIS)
The following image filters are provided with the ISIS driver.
To use the image filters:
1
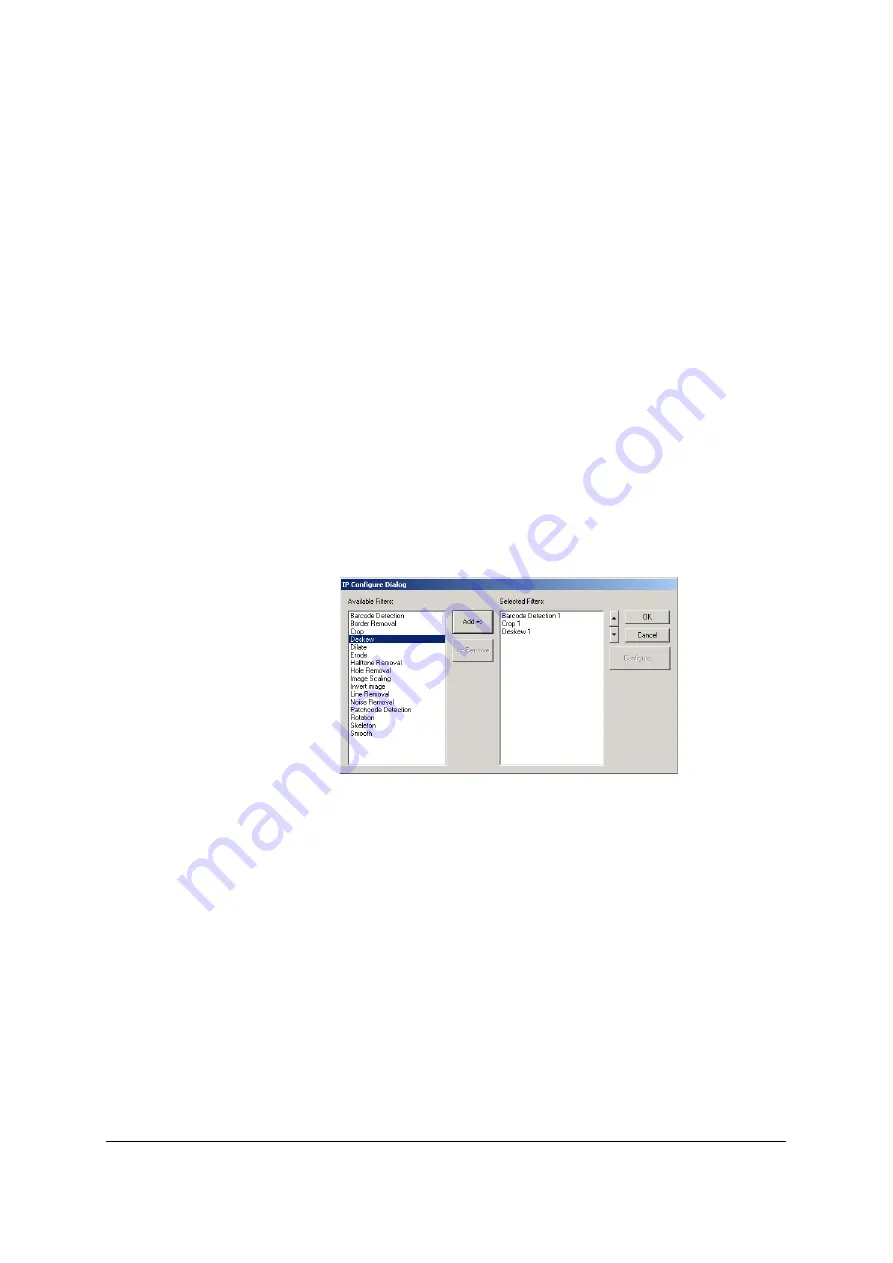
Click the [Configure...] button in the [Advanced Settings] dialog box. The [IP
Configure Dialog] dialog box now appears.
2
Select the image filter to be used from the [Available Filters] list, and press the
[Add] button.
3
The image filter added to [Selected Filters] is now displayed.
4
The sequence in which the filters are to be applied can be changed around by
clicking the names of the filters from the [Selected Filters] list and pressing the
[
p
] or [
q
] button.
5
To use the respective image filters, select the image filters from the [Selected
Filters] list, and press the [Configure...] button. The properties dialog box of the
selected image filter now appears.
6
When the [Help] button is pressed, the help file is displayed. For more detailed
information, refer to the image filter help.
• Barcode Detection
This recognizes barcodes.
• Border Removal
This removes the black areas around the images.
• Crop
This removes the white areas around the images.
• Deskew
This corrects the skew.
• Dilate
This makes the characters, etc. thicker.
• Erode
This makes the characters, etc. finer.
• Halftone Removal
This removes the halftones.
• Hole Removal
This removes the images of punched holes.
• Image Scaling
This enlarges or reduces the image size.
• Invert Image
This converts white into black and vice versa.
• Line Removal
This removes the lines.
• Noise Removal
This reduces the noise.
• Patchcode Detection
This recognizes patchcodes.
• Rotation
This rotate the images in 90-degree increments.
• Skeleton
This turns images into fine lines.
• Smooth
This removes protrusions and indentations from
text as well as lines.
Содержание KV-SS905C
Страница 12: ...12 ISIS driver screens Example S7065C 1 2 5 4 3 ...
Страница 13: ...13 1 7 10 6 8 9 ...
Страница 16: ...16 TWAIN driver screens Example S7065C 1 3 1 4 1 5 1 1 1 6 1 2 2 3 ...
Страница 17: ...17 1 1 1 10 1 7 1 8 1 9 4 5 ...
Страница 91: ...91 TWAIN configuration method 1 Click the Paper tab of the TWAIN dialog box and set the Margin check box to on ...


