22
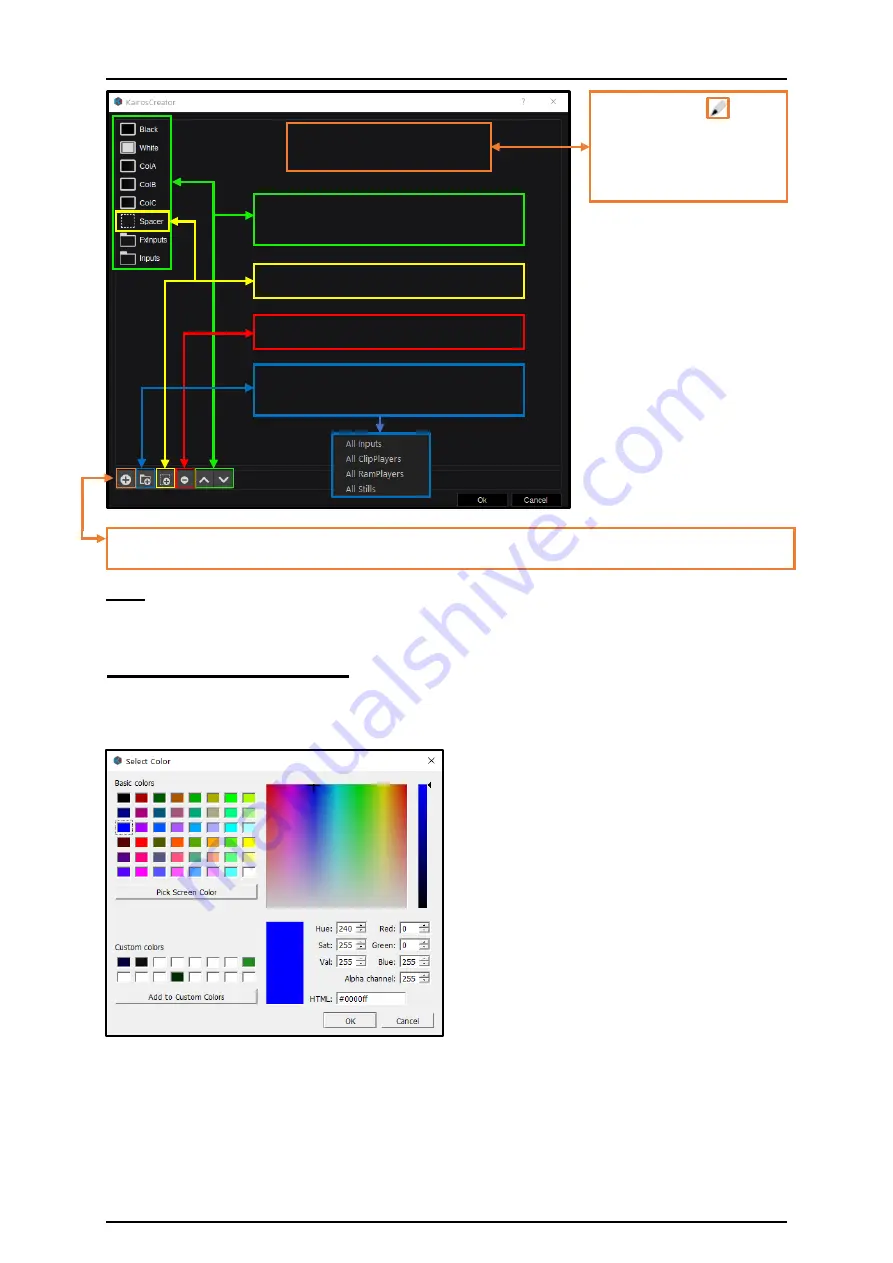
Open the “Select Source” window (described in section “3.2.1 Source/Input Selection” page 21) to add
individual sources.
Note:
The same “Source Option” dialog opens under the “Config” tab in “Aux” menu “3.3.8.1 Aux”
page 77.
3.2.3 Color Adjustments
The “Select Color” dialog will open wherever color adjustments are required. Clicking a Color-Box in
the “Parameter View” window, for example, allows you to set a specific color for every Background and
Layer per Scene.
Color & Saturation can be adjusted in the Color
pane together with the Luminance slider.
A Color can also be picked from the “Basic colors”
section.
Decimal values can be entered for “Hue, Sat, Lum”
or for individual “Red, Green, Blue.” Hexadecimal
color values can be entered in the “HTML” box.
Any change in one area updates the other areas
simultaneously. The according box is present as
well, only when “Alpha channel” is supported.
Use the “Pick Screen Color” function to pick a color
from anywhere on the computer screen surface,
including outside the GUI menu.
Up to 16 Presets can be saved in the “Custom
Colors” section.
Hit “OK” to confirm selection or “Cancel” to abort.
Picture 3.2.3.1
Changing the order of sources on a
Bus row.
“Spacer” for adding placeholder(s).
Add a full category of sources into a
Bus.
Picture 3.2.2.1
Click the pencil
symbol
in “Source Options” (Picture
3.2.1.4 on previous page), in
order to open this dialog
(Picture 3.2.2.1).
“Source Options” dialog
Delete selected source from a Bus.


