93
3
Inserter mode (optional)
When you want to staple or punch holes on the paper without going through any copying operation, place
sheets on the Inserter Unit (optional).
Also, when you want to insert blank sheets of paper at specified pages, place sheets on the Inserter Unit.
(
•
Be sure to place the same size of sheets of paper on the Inserter Unit and align them.
•
If the paper is fed from more than one paper source, such as the drawer, External Large Capacity
Feeder, bypass tray or Inserter Unit, set all sheets of paper in one size in the same direction.
Available paper size and type for the Inserter Unit
•
Note that some types of paper may not be applicable for the Inserter Unit due to their paper qualities,
even if you are using the paper listed above.
•
The use of the Inserter Unit has some restrictions on stapling and saddle stitching respectively.
(
P.87 “Maximum number of sheets for stapling”,
P.90 “Available conditions for saddle stitching”)
Setting paper on the Inserter Unit
Paper size
LD, LG, LT, LT-R, COMP
Media type
Plain paper (17 - 20 lb. Bond)
Thick paper (21 lb. Bond - 140 lb. Index)
Recycled paper
Special paper (e.g. OHP film, color paper)
(Contact a Panasonic-product distributor for details of the special paper available.)
Maximum number
of sheets can be set
17 - 20 lb. Bond: 100 sheets
21 lb. Bond - 140 lb. Index: Less than 0.47" in paper height (less than 0.28" in case
of special paper)
1
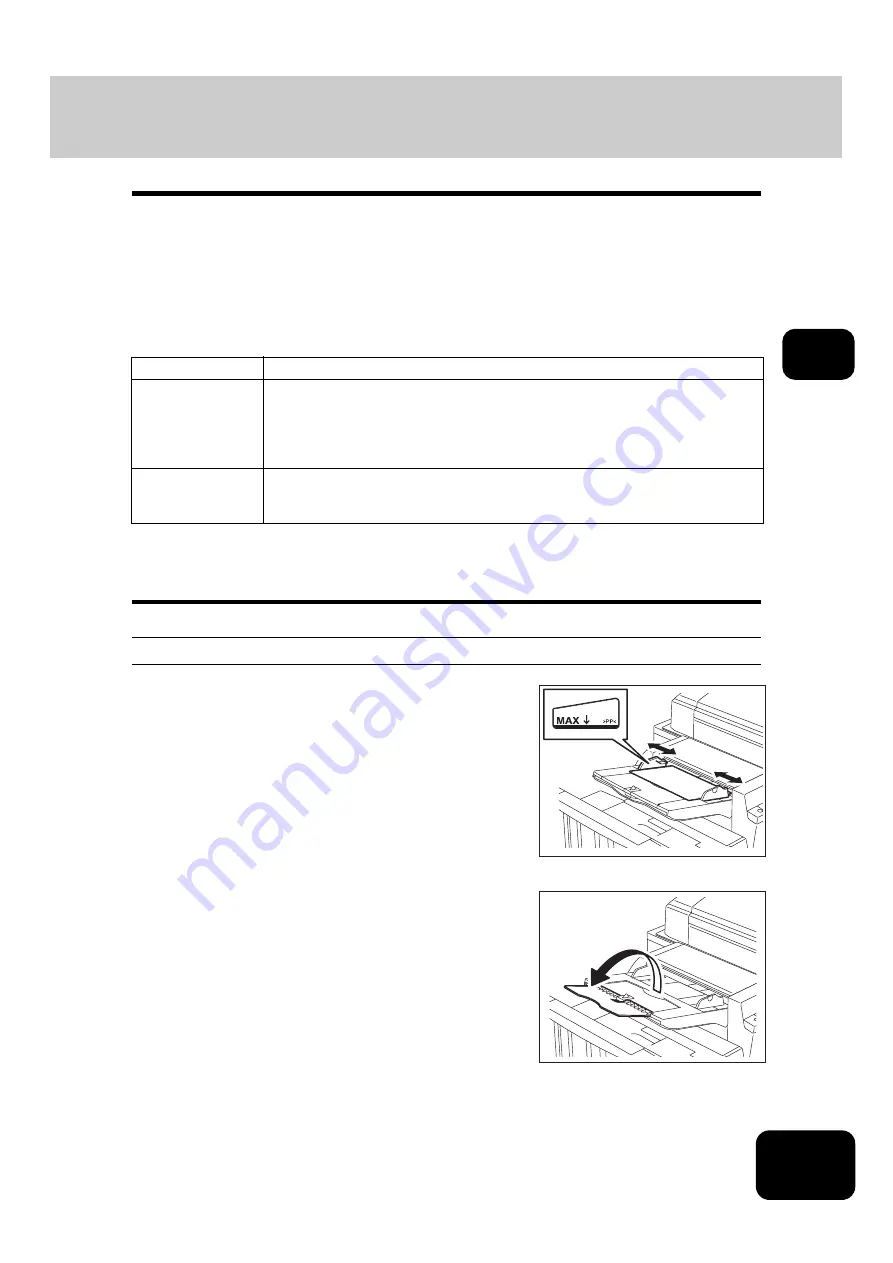
Place paper on the Inserter Unit and
adjust the side guides to the width of the
paper.
• Place the paper with its face up.
• Be sure that the top and bottom of the paper to be inserted are
the same as those of originals.
• Be sure that the height of the paper placed on the Inserter Unit
does not exceed the indicator on the side guide.
• When you place large-sized paper on the Inserter Unit, widen the
tray as shown in the illustration on the right.
Содержание DP-7240
Страница 6: ...4 CONTENTS Cont ...
Страница 73: ...71 3 2 Press the APS button 4 Press the START button ...
Страница 109: ...107 4 4 IMAGE ADJUSTMENT 1 Background Adjustment 108 2 Sharpness 109 ...
Страница 112: ...4 110 4 IMAGE ADJUSTMENT ...
Страница 119: ...117 5 4 Press the ENTER button Set Book type original 2 sided copy P 100 in duplex copying as well ...
Страница 151: ...149 5 5 Press the ENTER button Select other copy modes as required 6 Press the START button ...
Страница 153: ...151 5 5 Press the ENTER button Select other copy modes as required 6 Press the START button ...
Страница 178: ...176 6 e FILING 3 Changing Data of User Boxes Cont 6 7 Press the ENTER button The box settings are updated ...
Страница 192: ...6 190 6 e FILING ...
Страница 222: ...7 220 7 TEMPLATE ...
Страница 260: ...8 258 8 JOB STATUS ...
Страница 291: ...289 10 3 Press the GENERAL button 4 Press the TONER NEAR EMPTY DETECTION button 5 Press the YES button ...
Страница 315: ...313 11 11 MAINTENANCE 1 Daily Inspection 314 2 Simple Troubleshooting 315 ...
Страница 320: ...11 318 11 MAINTENANCE ...
Страница 335: ......


