background image

VQT0S19

For USA assistance, please call: 1-800-272-7033 or send e-mail to : [email protected]

For Canadian assistance, please call: 1-800-561-5505 or visit us at www.panasonic.ca

Operating Instructions

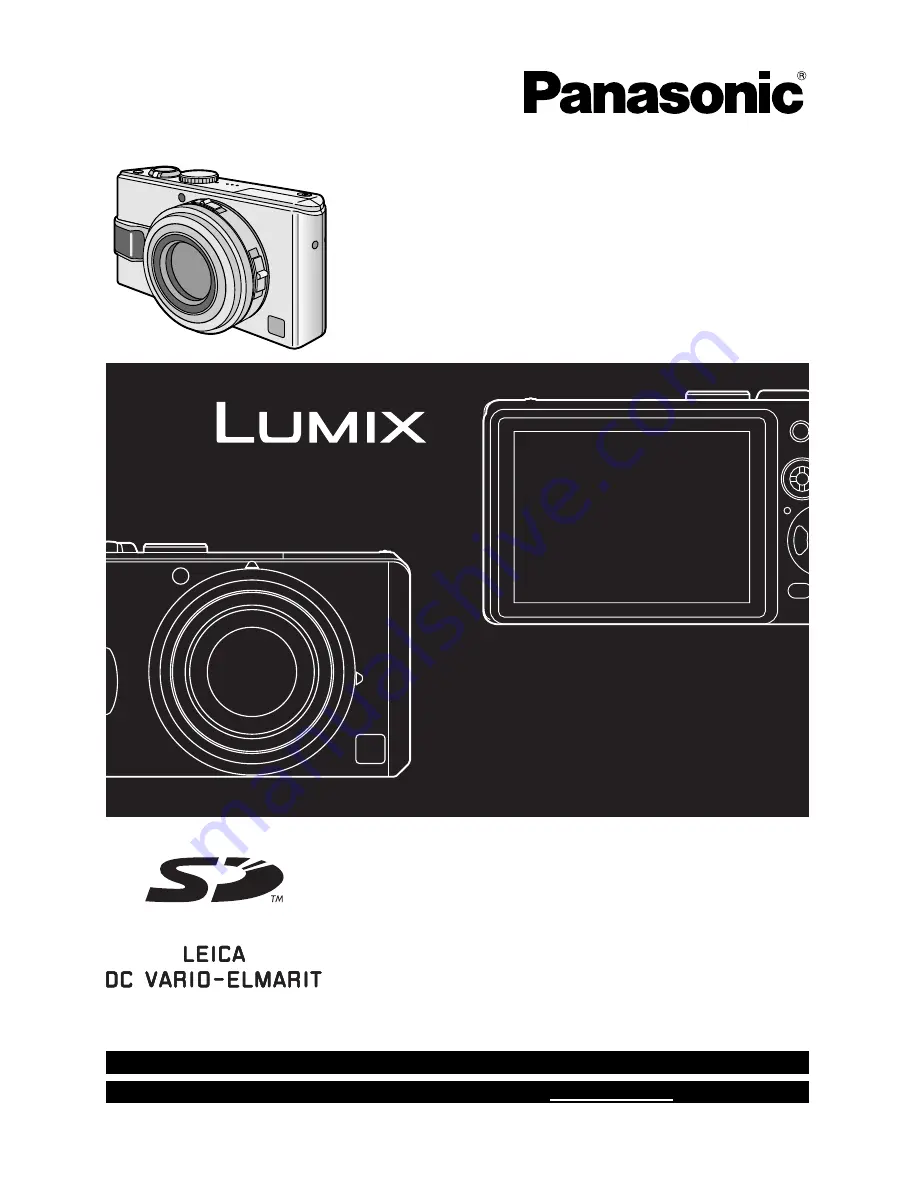
Digital Camera

Model No.

DMC-LX1PP

Before connecting, operating or

adjusting this product, please read

the instructions completely.

Содержание DMC-LX1K - Lumix Digital Camera

Страница 1: ...l to digitalstillcam panasonic com For Canadian assistance please call 1 800 561 5505 or visit us at www panasonic ca Operating Instructions Digital Camera Model No DMC LX1PP Before connecting operating or adjusting this product please read the instructions completely ...

Страница 2: ...a trademark Other names company names and product names printed in these instructions are trademarks or registered trademarks of the companies concerned WARNING TO REDUCE THE RISK OF FIRE OR SHOCK HAZARD AND ANNOYING INTERFERENCE USE ONLY THE RECOMMENDED ACCESSORIES AND DO NOT EXPOSE THIS EQUIPMENT TO RAIN OR MOISTURE DO NOT REMOVE THE COVER OR BACK THERE ARE NO USER SERVICEABLE PARTS INSIDE REFER...

Страница 3: ...between the equipment and receiver Connect the equipment into an outlet on a circuit different from that to which the receiver is connected Consult the dealer or an experienced radio TV technician for help FCC Caution To assure continued compliance follow the attached installation instructions and use only shielded interface cables with ferrite core when connecting to computer or peripheral device...

Страница 4: ... It may cause uneven colors on the LCD monitor or a malfunction of the LCD monitor In a place with drastic temperature changes condensation may form on the LCD monitor Wipe it with a soft dry cloth If the camera is extremely cold when you turn the camera on the image on the LCD monitor is slightly darker than usual at first However as the internal temperature increases it goes back to the normal b...

Страница 5: ...e of the camera is close to the ambient temperature to avoid condensation In case of condensation turn the camera off and then leave it for about 2 hours When the camera becomes close to the ambient temperature the fog disappears naturally n If you will not be using the camera for a long time Store the battery in a cool and dry place with a relatively stable temperature Recommended temperature 59 ...

Страница 6: ...elow PHOTOfunSTUDIO viewer Version 1 0E is referred to as PHOTOfunSTUDIO in these operating instructions Modes indicated here allow you to use the functions or settings described on this page Set the Mode dial to any of the modes to use the functions or settings Using the Optical Zoom You can make people and subjects appear closer with the 4 times optical zoom and landscapes can be recorded in wid...

Страница 7: ...layback basic Playing Back Pictures 49 9 16 25 Pictures Multi Playback 50 Using the Playback Zoom 51 Deleting Pictures 52 Recording pictures advanced Using the Mode Dial 54 Aperture priority AE 54 Shutter priority AE 55 Manual exposure 56 Motion picture mode 59 Scene mode 61 Portrait mode 62 Sports mode 62 Food mode 63 Scenery mode 63 Night portrait mode 64 Night scenery mode 64 Baby mode 65 Soft ...

Страница 8: ...ZE 99 Trimming the Pictures TRIMMING 100 Changing the Aspect Ratio ASPECT CONV 102 Clean up the Card CLEAN UP 103 Initializing the Card FORMAT 103 Playing Back Pictures with a TV Screen 104 Connecting to a PC or Printer Before Connecting with USB Connection Cable 4 USB MODE 105 Connecting to a PC 106 Connecting to a PictBridge compliant Printer 108 Others Screen Display 112 Cautions for Use 114 Me...

Страница 9: ...indicated as Charger n AV Cable K1HA08CD0008 n USB Connection Cable K1HA08CD0007 n CD ROM n Strap VFC4082 n Battery Carrying Case VYQ3509 n Lens Cap VYF3055 n Lens Cap String VFC4137 For information about optional accessories please refer to Digital Camera Accessory System P125 If any of the accessories are lost please contact Panasonic s parts department at 1 800 833 9626 For USA or in Canada cal...

Страница 10: ...r Button P44 r REV Button P37 q Flash Mode Button P40 e Backlight Compensation in Auto Mode P36 Exposure Compensation P45 Auto Bracket P46 White Balance Fine Adjustment P72 Button 7 LCD Monitor P27 112 8 Status Indicator 9 MENU Button P23 61 90 10 DISPLAY PWR LCD Button P27 11 Single Burst Mode P48 Delete Button P37 52 92 12 Lens barrel 13 Focus switch P31 83 86 1 2 3 4 5 6 11 10 9 8 7 12 13 ...

Страница 11: ...ap Strap Eyelet P21 24 DIGITAL AV OUT Socket P104 106 108 25 DC IN Socket P106 108 Please be sure to use genuine Panasonic AC adaptor DMW AC5 optional This camera cannot charge the battery even though the AC adaptor DMW AC5 optional is connected to it 26 Terminal Cover 27 Card Battery Door P15 16 28 Tripod Receptacle When you use a tripod make sure the tripod is stable with the camera attached to ...

Страница 12: ... When the camera is shipped the battery is not charged Charge the battery before use 2 Insert the battery and the card P15 16 3 Turn the camera on to take pictures Set the clock P22 1 Set the mode dial to L 2 Open the flash When using the flash P40 3 Press the shutter button to take pictures P31 4 Play back the pictures 1 Set the mode dial to Q 2 Select the picture you want to view P49 1 2 3 1 2 ...

Страница 13: ...HARGE indicator A turns off in about 130 minutes charging is completed 3 Detach the battery After charging is completed be sure to disconnect the charger from the electrical outlet The battery becomes warm after use charge or during charge The camera also becomes warm during use However this is not a malfunction with the camera The battery will discharge if left for a long time after charging Rech...

Страница 14: ...e When charging starts the CHARGE indicator lights n Charging error If the CHARGE indicator blinks at approximately 1 second intervals during charging a charging error has occurred In this case disconnect the charger from the electrical outlet detach the battery and then make sure both room and battery temperature are not too low or high If the room temperature is between 50 F to 95 F 10 C to 35 C...

Страница 15: ...ore the removed battery in the battery carrying case supplied P115 When fully charged battery has been inserted for more than 24 hours the clock setting is stored in the camera for at least 3 months even if the battery is removed The storing may be shorter if the battery is not charged sufficiently If more than 3 months has passed the clock setting will be lost In this case set the clock again P22...

Страница 16: ... upright Check the direction of the card 3 1 Close the card battery door 2 Slide the card battery door to the end and then close it firmly If the card battery door cannot be completely closed remove the card and insert it again The card and the data may be damaged if it is inserted or removed while the camera is on We recommend using Panasonic s SD Memory Card Use only the genuine SD card with SD ...

Страница 17: ...s The reading writing speed of an SD Memory Card is fast The SD Memory Card is equipped with a Write Protect switch 2 that can inhibit writing and formatting a card When the switch is slid to the LOCK side it is not possible to write or delete data on the card and format it When the switch is unlocked these functions become available You can use SD Memory Cards with the following capacities from 8...

Страница 18: ... 13 14 92 180 512 MB 18 115 230 26 28 180 350 1 GB 36 230 460 52 57 360 710 2 GB 74 470 930 105 115 740 1420 j EZ TIFF G H RAW TIFF G H Aspect ratio Picture size 2M 1920 1080 pixels 7M 3248 2160 pixels Quality 16 MB 2 13 25 0 4 8 0 32 MB 4 28 54 1 8 17 1 64 MB 9 58 110 2 17 35 3 128 MB 18 115 220 5 36 71 6 256 MB 36 230 430 10 70 135 13 512 MB 72 450 860 21 135 270 26 1 GB 145 910 1720 43 270 540 ...

Страница 19: ... 34 220 430 54 340 650 1 GB 69 440 860 105 680 1310 2 GB 140 890 1700 210 1360 2560 Aspect ratio Picture size 6M 2880 2160 pixels 4M 2304 1728 pixels Quality 16 MB 0 4 9 0 1 7 14 32 MB 1 9 19 1 2 15 29 64 MB 3 20 39 3 4 31 60 128 MB 6 40 79 6 9 62 120 256 MB 12 79 155 13 19 120 230 512 MB 24 155 300 26 38 240 470 1 GB 48 310 610 53 76 480 940 2 GB 98 630 1220 105 150 970 1860 EZ EZ TIFF G H TIFF G...

Страница 20: ...and the type of the card The number of recordable pictures may vary depending on subjects The remaining number of recordable pictures displayed on the screen is an approximation Aspect ratio Picture size 3M 2048 1536 pixels 2M 1600 1200 pixels Quality 16 MB 1 9 17 2 14 28 32 MB 3 19 37 4 30 59 64 MB 6 39 75 10 62 120 128 MB 12 79 150 20 125 240 256 MB 24 150 290 39 240 470 512 MB 48 300 590 78 480...

Страница 21: ...y attached to the camera When you turn the camera off carry the camera or play back the pictures attach the lens cap to protect the surface of the lens Detach the lens cap before turning on the camera in the recording mode When the mode dial is set to one of the recording modes and the camera is turned on with the lens cap attached the message REMOVE LENS CAP AND PRESS q BUTTON appears After remov...

Страница 22: ...e menu by pressing the MENU button 2 times after finishing the setting Check if the clock setting is correct after turning the camera off and on When a fully charged battery has been inserted for more than 24 hours the clock setting is stored in the camera for at least 3 months even if the battery is removed The storing time may be shorter if the battery is not charged sufficiently If more than 3 ...

Страница 23: ...ersa 4 Select the desired item 5 Set the desired value Press MENU to exit the menu If you are in recording mode you can exit the setup menu by pressing the shutter button halfway A SETUP REC SELECT EXIT W BALANCE AUDIO REC SENSITIVITY PICT SIZE QUALITY AUTO AUTO OFF 1 3 8M MENU MENU Be sure to press q at the end to determine the setting MF1 1 4 SETUP REC SELECT EXIT MONITOR BEEP AUTO REVIEW POWER ...

Страница 24: ...ot enlarged When using pictures with audio the auto review function works while recording the audio or the data into the card regardless of the setting on the auto review function The picture is not enlarged You cannot change the auto review setting when using auto bracket burst modes shooting motion pictures SELF PORTRAIT in scene mode and recording sound 5 POWER SAVE 1 MIN 2 MIN 5 MIN 10 MIN If ...

Страница 25: ...can be assigned from 100 to 999 When the folder number reaches 999 it cannot be reset We recommend formatting the card after saving the data on a PC or elsewhere To reset the folder number to 100 you must first reformat the card P103 After this perform NO RESET to reset the file number after which a screen appears asking whether you want to reset the folder number Select YES For details about file...

Страница 26: ...ure on the camera s LCD will be stretched vertically MF m ft m The focal distance is indicated in meters in manual focusing ft The focal distance is indicated by feet in manual focusing g SCENE MENU OFF SCENE MODE menu does not appear when setting the mode dial to R or S and the camera is operated in the scene mode currently selected If you change the scene mode press the MENU button to display th...

Страница 27: ...he screen can be turned on and off In recording mode P30 B Display C Display with histogram D Non display Recording guide line E Non display Histogram In playback mode P49 F Display G Display with recording information and histogram H Non display Displayed when you set birthday setting for BABY in scene mode P65 and WITH AGE is selected at taking pictures A DISPLAY PWR LCD 19 19 B C E D F2 8 1 25 ...

Страница 28: ...splayed on the LCD monitor Therefore the brightness and the color tone may look different from those in real life depending on the subject However this function does not affect recorded pictures n Recording guide line When you align the subject on the horizontal and vertical guide lines or the cross point of these lines you can take pictures with well designed composition by viewing the size the s...

Страница 29: ...ogram Example of histogram A Under Exposed B Properly Exposed C Over Exposed Histogram When the recorded picture and the histogram do not match each other under the following conditions the histogram is displayed in orange When the flash is activated When the flash is closed 1 When the brightness of the screen is not correct in dark places 2 When the exposure is not adequately adjusted The histogr...

Страница 30: ...utter speed you set O Manual exposure P56 The exposure is adjusted by the aperture value and the shutter speed which are manually adjusted i Motion picture mode P59 This mode allows you to record motion pictures with audio R Scene mode 1 P61 S Scene mode 2 P61 This mode allows you to take pictures depending on the recording scenes This mode also allows you to set SCENE MENU P26 on the SETUP menu t...

Страница 31: ...n press the shutter button halfway A Press the shutter button halfway to focus The focus indication 2 is lit and then the aperture value 3 and the shutter speed 4 are displayed You can change the shutter speed and aperture value with program shift P34 3 Take a picture B Press the shutter button fully to take the picture 3 2 4 When the subject is not focused When the subject is focused Focus indica...

Страница 32: ...hutter speed P55 56 n Focusing The focus range is 1 64 feet 50 cm to Z Wide 3 94 feet 1 2 m to Z Tele If you press the shutter button fully without prefocusing pictures may be blurry or unfocused When the focus indication is blinking the subject is not focused Press the shutter button halfway and focus on the subject again If the camera will not focus after a few tries turn it off and on and try a...

Страница 33: ...ction function n Exposure If you press the shutter button halfway when the exposure is not adequate the indication of the aperture value and the shutter speed turns red However the aperture value and the shutter speed do not turn red when the flash is activated The brightness of the screen may differ from that of recorded pictures Even though the subject appears dark on the screen the actual pictu...

Страница 34: ...en the focus switch is set to MF P83 When the Program shift is activated the Program shift indication 1 appears on the screen n Example of Program shift A Aperture value B Shutter speed If the exposure is not adequate when pressing the shutter button halfway the shutter speed turns red When 10 or more seconds have passed after the Program shift becomes effective the status to activate the Program ...

Страница 35: ...D ZOOM P78 n Other Settings in Auto mode In Auto mode other settings are fixed as follows For details refer to the pages corresponding to each item MENU MENU SET EXIT PICT SIZE REC 5 5M EZ 2M EZ QUALITY D ZOOM SELECT 8M MENU Focus range AF AFw MF 0 98 feet 30 cm to Z Tele 0 16 feet 5 cm to Z Wide White balance AUTO P71 ISO sensitivity AUTO P73 Picture Adjustment STD P79 Audio Recording OFF P75 Met...

Страница 36: ... of the picture If you press e while 0 is displayed 0 disappears and the backlight compensation function is canceled When you use the backlight compensation function we recommend using the flash You cannot set the following items in the Auto mode VIDEO OUT TV ASPECT The settings PICT SIZE QUALITY and D ZOOM on the Auto mode are applied to other recording modes You cannot use the following function...

Страница 37: ... 2 Enlarge and shift the picture 3 1 J4 J8 8 J4 J1 When you change the magnification or the position to be displayed the zoom position indication A appears for about 1 second to check where is enlarged n Recorded pictures can be deleted during the review Quick Deletion Once deleted pictures cannot be recovered Multi pictures or all pictures can be deleted Read P52 or P53 to operate them SCN1 SCN2 ...

Страница 38: ...ith the 4 times optical zoom and landscapes can be recorded in wide angle n To make subjects appear further away use Wide n To make subjects appear closer use Tele n To further increase the zoom Use the extended optical zoom P88 Use the digital zoom P78 SCN1 SCN2 1X 2X 3X 4X 19 W W T T 1X 1X 19 W W T T 4X 4X ...

Страница 39: ...pt the motion of the lens while the zoom lever is rotated When you record motion pictures i the zoom magnification is fixed to the value set at the start of recording The picture may have some distortion typical example vertical straight line bent outwards This is due to the lens aberration which is common to some extent with all photographic lenses Distortion may be more visible when using a wide...

Страница 40: ...ver the photo flash with your fingers or any other items n To close the flash Press the flash until it clicks Be sure to close the flash when not in use The flash setting is fixed to Forced OFF v while the flash closes n Switching to the appropriate flash setting Set the flash setting of the built in flash according to the scene to be recorded For the selectable flash settings refer to Available f...

Страница 41: ...this when you take pictures of people in low lighting conditions t Forced ON The flash is activated every time regardless of the recording condition Use this when your subject is back lit or under fluorescent light q Forced ON Red eye reduction In PARTY P67 or CANDLE LIGHT P66 in scene mode the flash mode is set to Forced ON Red eye reduction u Slow sync Red eye reduction When you take a picture w...

Страница 42: ... from ISO100 to ISO400 when you use the flash If picture noise becomes noticeable reduce the ISO sensitivity P73 or set NOISE REDUCTION in PICT ADJ to HIGH P79 ISO sensitivity Available flash control range AUTO 1 97 feet 60 cm to 13 5 feet 4 1 m Wide 0 98 feet 30 cm to 7 55 feet 2 3 m Tele ISO80 1 97 feet 60 cm to 5 91 feet 1 8 m Wide 0 98 feet 30 cm to 3 28 feet 1 0 m Tele ISO100 1 97 feet 60 cm ...

Страница 43: ...ns red when activating the flash and pressing the shutter button halfway When the flash is being charged the flash icon blinks red and you cannot take a picture even when you press the shutter button fully When taking a picture with the flash the white balance will be automatically adjusted except for k Daylight but the white balance may not be properly adjusted if the photo flash is insufficient ...

Страница 44: ...ed just before the recording In dark places the self timer indicator blinks and then it may turn on brightly to work as the AF assist lamp P77 for focusing on the subject The self timer is fixed at 2 seconds when you are using SELF PORTRAIT in scene mode P69 When you set the self timer in the burst mode the number of pictures taken at one time is fixed to 3 When using a tripod or in other cases se...

Страница 45: ...Exposure Value and it is the amount of light given to the CCD by the aperture value and the shutter speed The compensation range of the exposure will be limited depending on the brightness of the subject The exposure compensation value appears on the lower left of the screen The exposure value is memorized even if the camera is turned off You cannot compensate the exposure with STARRY SKY in scene...

Страница 46: ...he exposure is compensated the compensated exposure value appears on the screen When the flash is activated you can take only 1 picture When setting auto bracket you cannot use the audio recording function When setting auto bracket and the burst mode simultaneously auto bracket will be performed The exposure may not be compensated with auto bracket depending on the brightness of the subject Auto r...

Страница 47: ...d to Wide 1 and the zoom function cannot be activated Moreover you cannot take pictures The stabilizer function may not work in the following cases so take special care not to move the camera when pressing the shutter button When too much jitter occurs In digital zoom range When taking pictures while following subjects in motion When the shutter speed is extremely slow due to dark conditions or ot...

Страница 48: ...sh is activated you can record only 1 picture When setting auto bracket and the burst mode simultaneously auto bracket will be performed The ways to control the exposure and the white balance vary depending on the burst mode setting When the burst mode is set to D they are fixed to the values set for the first picture When the burst speed is set to E or F they are adjusted each time you take a pic...

Страница 49: ...ure can only be forwarded or rewound one by one When you forward or rewind a large number of pictures release w q once before reaching the picture to be played back then press w q to forward rewind pictures little by little This camera is based on the DCF standards Design rule for Camera File system which was established by the Japan Electronics and Information Technology Industries Association JE...

Страница 50: ...e BABY setting h and age settings n 16 25 pictures multi screen B 16 pictures C 25 pictures n To return to the normal playback Rotate the zoom lever towards T or press the MENU button or joystick The picture framed in an orange box appears n To delete a picture during a multi playback Press the A button When the confirmation screen appears press r to select YES and press q P52 Pictures will not be...

Страница 51: ...te a picture during the playback zoom Press the A button When the confirmation screen appears press r to select YES and press q P52 The more the picture is enlarged the more its quality deteriorates The playback zoom may not operate if pictures have been recorded with other equipment Even if the indication on the LCD monitor are turned off in normal playback mode P27 the magnification and enabled ...

Страница 52: ... Select the pictures to be deleted Repeat the above procedure The selected pictures appear with A When r is pressed again the setting is canceled After selecting pictures press A to confirm your selection The icon c blinks red if the selected picture cannot be deleted Cancel the protect setting P97 100 0001 1 19 10 00 DEC 20 2005 DELETE SINGLE SELECT SET MULTI ALL NO YES SELECT CANCEL MULTI DELETE...

Страница 53: ...off the camera while deleting Pictures that are protected P97 or that do not conform to DCF standards P49 will not be deleted When you delete pictures use a battery with sufficient battery power P14 or use with the AC adaptor DMW AC5 optional The more pictures there are to delete the more time it takes SELECT SET NO YES MULTI DELETE DELETE THE PICTURES YOU MARKED SELECT CANCEL MULTI DELETE ALL DEL...

Страница 54: ...ease Refer to P58 for the available range of the aperture value and the shutter speed If the subject is too bright set to a larger aperture value if too dim set to a smaller aperture value The brightness of the screen may differ from that of the actual pictures Check it using review function or setting to the playback mode The ISO sensitivity cannot be set to AUTO P73 When the recording mode is sw...

Страница 55: ... the screen may differ from that of the actual pictures Check it using review function or setting to the playback mode You cannot set the following items in Shutter priority AE Slow sync Red eye reduction u P41 AUTO in ISO sensitivity P73 When the recording mode is switched to Shutter priority AE the ISO sensitivity is automatically set to ISO100 even though it was set to AUTO beforehand When the ...

Страница 56: ...ndition of exposure C manual exposure assistance appears for about 10 seconds When the exposure is not adequate set the aperture value and the shutter speed again 3 Take the picture n Manual Exposure Assistance The manual exposure assistance is an approximation We recommend taking pictures and then checking them using the review function Manual exposure O 19 F2 8 1 30 A B F4 0 1 125 C The exposure...

Страница 57: ...de is switched to Manual exposure the ISO sensitivity is automatically set to ISO100 even though it was set to AUTO beforehand Compensating the Exposure P45 The brightness of the LCD may differ from the brightness of pictures you take Check the picture with review or play mode If the exposure is not adequate the aperture value and the shutter speed turn red when pressing the shutter button halfway...

Страница 58: ...8 0 8 to 1 2000 F7 1 F6 3 F5 6 8 to 1 1600 F4 9 F4 5 F4 0 8 to 1 1300 F3 6 F3 2 F2 8 8 to 1 1000 Available Shutter Speed Sec Per 1 3 EV Aperture Value 8 6 5 4 F2 8 to F8 0 3 2 2 5 2 1 6 1 3 1 1 1 3 1 1 6 1 2 1 2 5 1 3 2 1 4 1 5 1 6 1 8 1 10 1 13 1 15 1 20 1 25 1 30 1 40 1 50 1 60 1 80 1 100 1 125 1 160 1 200 1 250 1 320 1 400 1 500 1 640 1 800 1 1000 1 1300 F4 0 to F8 0 1 1600 F5 6 to F8 0 1 2000 ...

Страница 59: ...d This refers to the number of frames used in 1 second 2 Press the shutter button halfway When the subject is focused the focus indication 1 lights 3 Press the shutter button fully to start the recording The remaining recording time approximation appears on the screen The audio recording starts simultaneously from the built in microphone of the camera By pressing the shutter button fully again the...

Страница 60: ...with some types of card or if you use a card whose memory has been fragmented by repeated shooting and erasure Clean up the card with this unit beforehand for best results P103 We recommend using Panasonic s SD Memory Card Use only the genuine SD card with SD Logo When motion pictures recorded with this camera are played back on other equipment the quality of pictures and sounds may be deteriorate...

Страница 61: ... and the REC mode menu P70 T PORTRAIT P62 U SPORTS P62 f FOOD P63 V SCENERY P63 X NIGHT PORTRAIT P64 W NIGHT SCENERY P64 h BABY P65 e SOFT SKIN P66 g CANDLE LIGHT P66 a PARTY P67 Z FIREWORKS P67 b SNOW P68 d STARRY SKY P68 c SELF PORTRAIT P69 The following functions cannot be set in scene mode White balance P71 ISO sensitivity P73 Metering mode P75 Color effect P78 Picture adjustment P79 AF AE Loc...

Страница 62: ...ble for outdoors in the daytime The ISO sensitivity is automatically adjusted to the optimal value This mode allows you to take pictures of a fast moving subject e g When taking pictures of outdoor sports n Technique for Sports mode To record actions of the subject as if it were still the shutter speed becomes faster than usual This mode is more effective when taking pictures in the daytime on a c...

Страница 63: ...ity is automatically adjusted to the optimal value This mode allows you to take a picture of a wide landscape The camera focuses on a distant subject preferentially The focus range is 16 4 feet 5 m to Z The ISO sensitivity is automatically adjusted to the optimal value The Flash setting is fixed to Forced OFF v The setting on the AF assist lamp is disabled Food mode f 19 Scenery mode V 19 ...

Страница 64: ...dark places noises may become visible The flash is set to Slow sync Red eye reduction u and always functions in this mode The ISO sensitivity is automatically adjusted to the optimal value You cannot use CONT AF while in this mode PLEASE OPEN THE FLASH appears when the flash is closed This mode allows you to take a picture of a nightscape The landscape can be recorded vividly by using the slow shu...

Страница 65: ...date with e r 3 Press MENU to exit If you select WITH AGE but you haven t set the birthday a message appears Press MENU and follow steps 2 and 3 to enter the birthday The ISO sensitivity is automatically adjusted to the optimal value Whenever you turn the camera on in Baby mode or switch to Baby mode from any other scene mode your baby s age and the current date and time appear on the display for ...

Страница 66: ...automatically adjusted to the optimal value If there are other flesh colored elements in the shot they will also be softened The effect may not be as obvious if there isn t enough light Use this mode to get the most from the mood created by candlelight n Technique for Candle light mode This is most effective if you don t use the flash Use a tripod and the self timer P44 for best results Shoot with...

Страница 67: ...be set to Forced ON Red eye reduction q or Slow sync Red eye reduction u The ISO sensitivity is automatically adjusted to the optimal value This mode allows you to take beautiful pictures of fireworks exploding in the night sky The shutter speed or the exposure is automatically adjusted for taking pictures of fireworks n Technique for Fireworks mode We recommend using a tripod This mode is most ef...

Страница 68: ... shutter speed Press e r to select the shutter speed then press q The countdown screen appears when you press the shutter button Do not move the camera After the countdown is finished PLEASE WAIT is displayed for the same amount of time as the shutter speed you used This is to process the signals The shooting is canceled when you press the MENU button while the countdown screen is displayed The Fl...

Страница 69: ...n the picture may be blurred by slow shutter speed we recommend using the 2 seconds self timer P44 The available focus range is 0 98 feet 30 cm to 2 3 feet 70 cm You can take a picture of yourself with audio P75 In this time the self timer indicator lights up while recording the audio When you select self portrait mode c the zoom lever is automatically moved to Wide 1 The self timer can be set to ...

Страница 70: ...r W the page of the menu screen can be forwarded or reversed Close the menu by pressing the shutter button halfway or the MENU button after finishing the setting K W BALANCE P71 J SENSITIVITY P73 Z PICT SIZE P73 Q QUALITY P74 R AUDIO REC P75 R METERING MODE P75 M AF MODE P76 CONT AF P77 N AF ASSIST LAMP P77 AF AE LOCK P85 O D ZOOM P78 T COL EFFECT P78 U PICT ADJ P79 M FLIP ANIM P79 SCN1 SCN2 EXIT ...

Страница 71: ... set the white balance to a mode except AUTO manually 1 The range that is controlled by the auto white balance adjustment mode of this camera 2 TV screen 3 Cloudy sky Rain 4 Sunlight 5 White fluorescent light 6 2 hours after dawn and before sunset 7 1 hour after dawn and before sunset 8 Halogen lamp 9 30 minutes after dawn and before sunset 10 Incandescent light bulb 11 Sunrise and sunset 12 Candl...

Страница 72: ...alance This is fixed to AUTO in Auto mode 0 When taking a picture with the flash the white balance will be automatically adjusted except for k Daylight but the white balance may not be properly adjusted if the photo flash is insufficient About the white balance fine adjustment The white balance icon on the screen turns red or blue if you have performed white balance fine adjustment You can set the...

Страница 73: ...e card Fewer pixels also means it is easier to send pictures by e mail or use them on a homepage n When the aspect ratio setting is j n When the aspect ratio setting is n When the aspect ratio setting is h Refer to P59 when using motion picture mode i EZ is an abbreviation for Extended Optical Zoom P88 Pictures may appear like a mosaic depending on the subject or the recording condition The number...

Страница 74: ...rded in TIFF or RAW Auto bracket Burst mode AUDIO REC AUDIO DUB RESIZE TRIMMING Refer to P18 to 20 for the number of recordable pictures You can process RAW format files with either PHOTOfunSTUDIO on the included CD ROM or ArcSoft PhotoImpression Use your computer to do processing beyond what this camera is able For advanced photograph processing use software compatible with Panasonic s RAW format...

Страница 75: ...ded You cannot record pictures with audio in auto bracket burst mode when the quality is set to TIFF or RAW or STARRY SKY in scene mode P68 For setting see page 70 You can switch to the following metering modes This is fixed to Multiple R in Auto mode 0 Audio Recording AUDIO REC R SCN1 SCN2 Metering Mode METERING MODE R Multiple This is the method in which the camera measures the most suitable exp...

Страница 76: ...ing on all the AF areas The focus position is not predetermined because it is set to the position the camera automatically determines at the time of focusing If you want to determine the focus position to take pictures switch the AF mode to 1 area focusing 1 area focusing high speed or Spot focusing mode You cannot change the AF mode setting when using FIREWORKS or SELF PORTRAIT in scene mode P61 ...

Страница 77: ...ra to focus on the subject in low light conditions When you press the shutter button halfway in dark places or other situations an AF area wider than usual appears and the AF assist lamp 1 turns on Be sure of the following points when the AF assist lamp is in use Do not look into the AF assist lamp closely Do not cover the AF assist lamp with your fingers or other objects AF assist lamp is fixed t...

Страница 78: ...igital zoom When using the digital zoom the picture quality becomes deteriorated In the digital zoom range the stabilizer function may not be effective When using the digital zoom use a tripod and the self timer P44 for best results The AF area is displayed with a size wider than usual and set only to a point on the center of the screen in the digital zoom range If you set the QUALITY to RAW P74 t...

Страница 79: ...pturing pictures of the subject in sequence moving the camera little by little and aligning the pictures the subject looks as if it is moving Picture Adjustment PICT ADJ CONTRAST HIGH Increases the difference between the brightness and the darkness in the picture LOW Decreases the difference between the brightness and the darkness in the picture SHARPNESS HIGH The picture is sharply defined LOW Th...

Страница 80: ...mation You can check the recorded picture with r and the previous or following picture with w q Delete unnecessary pictures with A button You can record up to 100 pictures The number of recordable pictures displayed is an approximation 4 Select CREATE MOTION PICTURE EXIT REC SELECT D ZOOM COL EFFECT PICT ADJ FLIP ANIM OFF OFF 3 3 MENU MENU FLIP ANIM SELECT EXIT CREATE MOTION PICTURE DELETE STILL P...

Страница 81: ...dio burst mode and auto bracket and the direction detection function The pictures in each frame do not appear in normal review P37 If you execute CREATE MOTION PICTURE flip animation is made from all pictures recorded for flip animation Delete unnecessary pictures Flip animations may not be played back by other equipment The audio is not recorded on flip animations however you may hear varying lev...

Страница 82: ...TIVITY P73 PICT SIZE P73 QUALITY P74 PICT MODE P59 1 Press and hold the joystick to show the shortcut menu in recording mode The Quick setting menu appears 2 Select the menu and press to enter The menu items depend on the selected recording mode SCN1 SCN2 EXIT SELECT AUTO AUTO AUTO 8M 2 AUTO AUTO ISO80 ISO100 ISO200 ISO400 AUTO 8M EXIT SELECT 2 ...

Страница 83: ... q to select MF then move the joystick e r to focus A MF indication B Focal distance e Further r Closer The manual focusing assistant C appears The MF assistant disappears 2 seconds after you stop operating the joystick The moving focus indication D disappears 5 seconds after you stop operating the joystick 3 Take the picture MF F2 8 1 30 B C ft 15 6 3 1 5 D A 1 30 F2 8 ...

Страница 84: ...s is a technique to focus on the point to take pictures in advance when it is difficult to focus on the subject with auto focus due to its quick motion This function is suitable when the distance between the camera and the subject is certain You can also record with manual focus in motion picture mode i When starting the recording the focus is fixed When you focus on the subject in Wide the focus ...

Страница 85: ...icators light if they are correct 3 Move the camera back to the shot you want to take and press the shutter button fully n AF Lock 1 Aim the AF area at the subject 2 Press the AF AE LOCK button to fix the focus To cancel press the AF AE LOCK button again The focus indicator lights if it is correct 3 Move the camera back to the shot you want to take and press the shutter button fully n AE Lock 1 Ai...

Страница 86: ...he camera the effective focus range depth of field is significantly narrowed Therefore you will have difficulty in focusing on the subject if the distance between the camera and the subject is changed after focusing on the subject When the camera lens is at a distance beyond the available range from the subject the subject may not be focused even if the focus indicator lights The available flash r...

Страница 87: ... ratio Depending on the aspect ratio setting the edges of the picture may be cut off when printing Try the following to see whether you can print without cutting the edges off Some photography shops can handle pictures shot in the j aspect ratio Enquire before sending them for printing If your printer has trimming and border settings change the settings so that there is no trimming and no border R...

Страница 88: ...oom works by extracting the center of the picture and expanding it for a higher telephoto effect So for example if you choose 5 5M 5 5 million pixels out of the total 8M 8 million possible with the CCD are taken in your shot The extended optical zoom allows you to increase the zoom ratio without the reduction in picture quality you get with digital zoom The icon appears when you zoom while using a...

Страница 89: ... pause Press e during motion picture playback Press e again to cancel pause You can hear audio from the speaker To adjust the sound volume refer to P25 You cannot use the zoom function while playing back or pausing motion pictures The file format that can be played back with this camera is QuickTime Motion JPEG Some QuickTime Motion JPEG files recorded by a PC or other equipment may not be played ...

Страница 90: ...n can be forwarded vice versa After selecting the item change the settings as described on the following pages a SLIDE SHOW P91 FAVORITE P92 j ROTATE DISP P93 b ROTATE P94 l DPOF PRINT P95 g PROTECT P97 R AUDIO DUB P98 e RESIZE P99 f TRIMMING P100 i ASPECT CONV P102 CLEAN UP P103 0 FORMAT P103 SELECT EXIT SLIDE SHOW DPOF PRINT PLAY 1 3 ROTATE ROTATE DISP FAVORITE MENU OFF ON MENU Menu items ...

Страница 91: ...Show stops In motion picture playback Slide Show is not available When you set AUDIO to ON and then play back a picture with audio the picture changes when the audio finishes Playing Back with Slide Show SLIDE SHOW ALL For playing back all pictures For showing pictures in your favorites list DURATION Select intervals of 1 2 3 5 seconds or MANUAL AUDIO By setting it to ON the audio from pictures re...

Страница 92: ...how feature with your favorites list see page 91 n To delete all pictures except those in your favorites list 1 During playback select ALL DELETE EXCEPT 2 Delete the pictures Favorites setting FAVORITE SELECT EXIT SLIDE SHOW DPOF PRINT PLAY 1 3 ROTATE ROTATE DISP FAVORITE MENU OFF ON SET MENU 100 0001 1 19 A 10 00 DEC 20 2005 SELECT CANCEL MULTI DELETE ALL DELETE ALL DELETE EXCEPT MULTI ALL DELETE...

Страница 93: ... display pictures recorded by holding the camera vertically or pictures rotated in ROTATE function in the rotated direction 1 Select ON to set it When you select OFF the pictures are displayed without being rotated Refer to P49 for how to play back pictures When you take pictures by holding the camera vertically read Correct posture for taking good pictures on P32 carefully The direction detection...

Страница 94: ...le format for still pictures to which recording information and other can be added established by JEITA Japan Electronics and Information Technology Industries Association When ROTATE DISP is set to OFF ROTATE function is disabled When pictures are recorded by holding the camera vertically the pictures are played back vertically the pictures are rotated You may not be able to rotate images shot on...

Страница 95: ... prints can be set from 0 to 999 The number of prints icon d appears When the number of prints is set to 0 DPOF print setting is canceled n Multi setting Select the pictures and set the number of prints Repeat the above procedure The number of prints can be set from 0 to 999 The number of prints icon d appears When the number of prints is set to 0 DPOF print setting is canceled Setting the Picture...

Страница 96: ...inter DPOF print setting is a convenient function when you print pictures with printers supporting PictBridge P108 DPOF is the abbreviation for Digital Print Order Format This feature allows you to write print information or other into the images on the card and to use such information on the DPOF compliant system If the file is not based on the DCF standard the DPOF print setting cannot be set DC...

Страница 97: ...ct setting first While this feature protects the pictures from accidental erasure formatting the card will permanently delete all data P103 The protect setting may not be effective in other equipment Sliding the Card Write Protect switch A to LOCK prevents the picture from deletion even if the protection is not set The following functions cannot be used with protected pictures ROTATE P94 AUDIO DUB...

Страница 98: ...riginal audio is overwritten 2 Stop audio recording Press r to stop recording Even if you do not press r after about 10 seconds the audio recording stops automatically You cannot record audio on motion pictures flip animations protected images or images recorded as TIFF or RAW You may not be able to record audio on images shot on other equipment Adding Audio to Recorded Pictures AUDIO DUB R SELECT...

Страница 99: ...orded in the 2 5M resolution Pictures recorded as TIFF or RAW Motion pictures Flip animation Pictures with audio 2 Select the size and set it Sizes smaller than the recorded picture are displayed n When the aspect ratio setting is j n When the aspect ratio setting is n When the aspect ratio setting is h Resizing the Pictures RESIZE e SELECT SET EXIT 100_0001 1 19 RESIZE MENU EZ EZ 3072 1728 pixels...

Страница 100: ...reated You may not be able to resize pictures you have shot on other equipment For menu operations see page 90 Use this function when you trim unnecessary parts of the recorded picture 1 Select the picture to trim and set it The following pictures cannot be trimmed Motion pictures Flip animation Pictures with audio Images recorded as TIFF or RAW SELECT SET CANCEL RESIZE DELETE ORIGINAL PICTURE MEN...

Страница 101: ...tected you cannot overwrite the trimmed picture When you select NO a trimmed picture is newly created It may not be possible to trim pictures recorded with other equipment The picture quality of the trimmed picture may be deteriorated If you trim a picture the number of pixels may be fewer in the trimmed picture than in the original 100_0001 1 19 TRIMMING ZOOM EXIT MENU EXIT TRIM SHUTTER 100_0001 ...

Страница 102: ...verwrite the pictures with the changed aspect ratio When you select NO a picture with the changed aspect ratio is newly created You cannot change the aspect ratio of pictures taken as TIFF or RAW motion pictures or still pictures with audio You may end up with a higher resolution picture after changing to a different aspect ratio Changing the Aspect Ratio ASPECT CONV i EXIT MENU SELECT PROTECT TRI...

Страница 103: ...ot engaged For menu operations see page 90 1 Select YES to format Usually it is not necessary to format the card Format the card when the message MEMORY CARD ERROR appears Do not format the card on a computer Always format on the camera Once the card is formatted all data including protected images are irretrievably erased Please confirm that all data is transferred to your PC before proceeding wi...

Страница 104: ...g pictures in other countries When setting VIDEO OUT on the menu you can view pictures on a TV in other countries regions which use the NTSC or PAL system Even if you set menu selection for VIDEO OUT to PAL the output signal is still NTSC in the recording mode n Playback pictures on TV with SD Memory Card slot You can put your SD Memory Card in a television with an SD Memory Card slot to show stil...

Страница 105: ...nnect the camera to a printer supporting PictBridge select PictBridge PTP P108 When PC is selected the camera is connected via USB Mass Storage communication system When PictBridge PTP is selected the camera is connected via PTP Picture Transfer Protocol communication system If you have connected with a USB connection cable PICTURE IS DISPLAYED FOR 4 3 TV FOR 16 9 SETUP q TV ASPECT or similar may ...

Страница 106: ...mera on and set USB MODE to PC in the setup menu P105 If you have set USB MODE to PictBridge PTP the computer may show an error message Click Cancel to close the dialog and disconnect the cable from the computer Change the setting to PC and reconnect the cable 2 Connect the camera to a PC via the USB connection cable B supplied Connect the USB connection cable with the f mark facing the w mark on ...

Страница 107: ...hausted during communication the recorded data may be damaged When you connect the camera to the PC use a battery with sufficient battery power P14 or the AC adaptor DMW AC5 optional If the remaining battery power becomes low during communication the alarm beeps In this case stop the communication immediately While ACCESS is being displayed do not disconnect the USB connection cable For Windows 20...

Страница 108: ...t the USB connection cable with the f mark facing the w mark on the DIGITAL socket Hold C and then insert or pull the USB connection cable straight If the remaining battery power becomes low during communication the alarm beeps In this case stop the communication immediately It may take time to print some pictures Therefore we recommend using a battery with sufficient power P14 or the AC adaptor D...

Страница 109: ...t be printed on the picture n NUM OF PRINTS Set the number of prints n PAPER SIZE Possible paper sizes on the camera The items are listed on 1 2 and 2 2 Press r to select the desired item These items cannot be displayed when the printer does not support the paper sizes 100_0001 1 19 PRINT PLEASE SELECT THE PICTURE TO PRINT SELECT PictBridge SINGLE PICTURE SELECT CANCEL PRINT WITH DATE PRINT START ...

Страница 110: ...t to the printer again You can change the DPOF print setting by pressing the MENU button P95 2 Select PRINT START and then print out the picture Refer to P109 for print setting Press the MENU button to cancel printing F Settings on the printer are prioritized G 1 page with no frame print H 1 page with frame print I 2 pages print J 4 pages print SINGLE PICTURE SELECT CANCEL PRINT WITH DATE PRINT ST...

Страница 111: ...s not a malfunction The setting on the printer may have priority over the setting on the camera in the date print Also check the date print setting on the printer If the printer does not support date printing the date cannot be printed on the picture If your printer is not compatible with TIFF or RAW the JPEG pictures associated with them will be printed If there is no associated JPEG the printing...

Страница 112: ...seconds AF AE Lock display P85 19 Current date and time It is displayed for about 5 seconds when turning the camera on setting the clock and after switching from the playback mode to the recording mode Zoom P38 Extended optical zoom P88 Digital zoom P78 20 Shutter speed indication P31 21 Aperture value indication P31 22 Program shift indication P34 23 Backlight compensation P36 C Exposure compensa...

Страница 113: ...9 Page number Total pictures 10 Histogram P29 11 Recording information 12 Favorites setting P92 13 Recorded date and time 14 Power LCD indication P28 15 Age display P65 16 Audio playback P89 In Motion picture mode 17 Flip animation P79 Favorites indicator P92 10 00 DEC 20 2005 100_0001 1 19 ISO100 AUTO 1 1 2 8 4 5 6 7 9 16 17 10 12 13 11 3 PLAY AUDIO F2 8 1 25 P 14 15 30fps VGA 10fps VGA 30fps QVG...

Страница 114: ...not use the camera near radio transmitters or high voltage lines If you record near radio transmitters or high voltage lines recorded pictures or sounds may be adversely affected Make sure to use the supplied cords and cables If you use optional accessories use the cords and the cables supplied with them Do not extend the cords and the cables Do not spray insecticides or volatile chemicals onto th...

Страница 115: ...erting a damaged battery in the camera will damage the camera When you go out bring charged spare batteries Be aware that the operating time of the battery will become shorter in low temperatures such as outdoors at a ski resort When you travel be sure to prepare the supplied charger to charge the battery on the spot Dispose of an unusable battery The battery has a limited life Do not throw the ba...

Страница 116: ... SOME PICTURES If the pictures are not based on the DCF standard the DPOF print cannot be set MEMORY CARD ERROR FORMAT THIS CARD The format of the card cannot be recognized by this camera Format the card again with this camera Save your data to your computer then use this unit to reformat the card PLEASE TURN CAMERA OFF AND THEN ON AGAIN This message appears when the camera does not operate proper...

Страница 117: ...pes of card or if you use a card whose memory has been fragmented by repeated shooting and erasure Clean up the card with this unit beforehand for best results P103 A FOLDER CANNOT BE CREATED The card is full so you cannot create a folder Save your data to your computer then use this unit to reformat the card MOTION MODE IS NOT AVAILABLE IN 3 2 ASPECT SET THE ASPECT SWITCH IN 4 3 OR 16 9 You canno...

Страница 118: ...ect Is the subject out of the focus range P32 When you cannot focus on the subject even if you tried many times turn the camera off once and turn it on again The recorded picture is blurred When taking a picture in shaded areas or indoors the shutter speed becomes slow and the Optical Image Stabilizer function may not work properly In this case we recommend holding the camera with both hands firml...

Страница 119: ...hese pixels do not affect the recorded pictures Noise appears on the LCD monitor In dark places noise may appear to maintain the brightness of the LCD monitor This does not affect the pictures you are recording A vertical red spectrum appears on the LCD monitor This is called smear It is specific to CCD not a malfunction It appears when the subject has a bright part It is recorded on motion pictur...

Страница 120: ...res for you You can use ROTATE P94 to rotate the pictures when necessary Images are grainy or noisy Check that ISO sensitivity isn t too high or that shutter speed isn t too slow Reduce ISO sensitivity P73 In PICT ADJ set NOISE REDUCTION to HIGH P79 Improve the ambient light Folder or file name appears as and the display goes black The picture may have been changed on a computer or taken on a diff...

Страница 121: ...f printed images are cut off Some photography shops can handle pictures shot in the j aspect ratio P87 Enquire before sending them for printing If your printer has trimming and border settings change the settings so that there is no trimming and no border Read your printer s operating instructions Cannot upload pictures to your computer Check the connections Check that the computer has correctly r...

Страница 122: ...clock again When you take a picture before setting the clock 0 00 0 0 0 is recorded The lens clicks When brightness has changed due to the zoom or the movement of the camera or other the lens may click and the picture on the screen may be drastically changed however the pictures are not affected The sound is caused by automatic adjustment of the aperture It is not a malfunction The camera gets hot...

Страница 123: ...peed 60 to 1 2 000th Burst recording Burst speed max 3 frames second high speed 2 frames second low speed 2 frames second unlimited Number of recordable pictures max 9 frames standard 5 frames fine Depends on the capacity of the card unlimited Performance in burst recording is only with SD Memory Card MultiMediaCard performance will be less Motion picture recording Aspect ratio j 848 480 pixels 30...

Страница 124: ...ased on Exif 2 2 standard QuickTime picture with audio Motion pictures QuickTime Motion JPEG audio recordable Interface Digital USB 2 0 Full Speed Analog video audio NTSC PAL Composite Switched by menu Audio line output monaural Terminal AV OUT DIGITAL AV USB Dedicated jack 8 pin DC IN Dedicated jack 2 pin Dimensions 4 1 8 W 2 1 4 H 1 D 105 7 mm W 55 8 mm H 25 6 mm D excluding the projection part ...

Страница 125: ...C5 AC Adaptor The battery cannot be recharged in the camera even if you supply it with AC power RP SDK02U1A RP SDH01GU1A RP SDH512U1A RP SD512BU1A RP SDH256U1A RP SD256BU1A RP SD128BU1A RP SD064BPPA RP SD032BPPA 2 GB SD Memory Card 1 GB SD Memory Card 512 MB SD Memory Card 512 MB SD Memory Card 256 MB SD Memory Card 256 MB SD Memory Card 128 MB SD Memory Card 64 MB SD Memory Card 32 MB SD Memory C...

Страница 126: ...complete street address In CANADA please contact your local Dealer for more information on Accessories Accessory Description Price Each Quantity Total Price Subtotal Your State Local Sales Tax Shipping Handling 6 95 Total Enclosed Ship To Mr Mrs Ms First Last Phone Day Street Address Night City State Zip TO OBTAIN ANY OF OUR DIGITAL CAMERA ACCESSORIES YOU CAN DO ANY OF THE FOLLOWING VISIT YOUR LOC...

Страница 127: ...pleted form and your Proof of Purchase along with your unit to Panasonic Services Company 1705 N Randall Road Elgin IL 60123 7847 Attn Digital Camera Repair Request for Service Notice USA Only Please include your proof of purchase Failure to do so will delay your repair To further speed your repair please provide an explanation of what wrong with the unit and any symptom it is exhibiting ...

Страница 128: ...t carry in or mail in your product during the warranty period If non rechargeable batteries are included they are not warranted This warranty only applies to products purchased and serviced in the United States or Puerto Rico This warranty is extended only to the original purchaser of a new product which was not sold as is A purchase receipt or other proof of the original purchase date is required...

Страница 129: ...IES EXCEPT AS LISTED UNDER LIMITED WARRANTY COVERAGE THE WARRANTOR IS NOT LIABLE FOR INCIDENTAL OR CONSEQUENTIAL DAMAGES RESULTING FROM THE USE OF THIS PRODUCT OR ARISING OUT OF ANY BREACH OF THIS WARRANTY As examples this excludes damages for lost time travel to and from the servicer loss of media or images data or other memory content The items listed are not exclusive but are for illustration o...

Страница 130: ...asonic com You may also contact us directly at 1 800 332 5368 Customer Orders Only Panasonic Services Company 20421 84th Avenue South Kent WA 98032 6 am to 5 pm Monday Friday 6 am to 10 30 am Saturday PST Visa MasterCard Discover Card American Express Check Product Repairs Centralized Factory Servicenter Panasonic Services Company 1705 N Randall Road Elgin IL 60123 7847 Attention Digital Camera Re...

Страница 131: ...6 109 Deleting Pictures 52 Digital Zoom 78 DPOF Print 95 E Exposure 33 Exposure Compensation 45 Extended optical zoom 88 F Favorites setting 92 Fine 74 Fireworks mode 67 Flip Animation 79 Focusing 32 Folder Composition 107 Food mode 63 Formatting 103 H Highlight display 28 Histogram 29 I ISO Sensitivity 73 J Jitter 33 L Language setting 26 LCD Monitor 4 27 112 Lens Cap 21 M Manual exposure 56 Manu...

Страница 132: ...er LCD function 28 Power save 24 Prefocus 84 Program shift 34 Protect 97 Q Quality 74 R RAW 74 Recording guide line 28 Reset 25 Resize 99 Review 37 Rotate 94 Rotate Display 93 S Scene menu 26 61 Scene mode 61 Scenery mode 63 Self portrait mode 69 Self timer 44 Setting Date Time 22 25 Setup Menu 23 Shutter tone 25 Slide Show 91 Snow mode 68 Soft skin mode 66 Sports mode 62 Spot focusing 76 Standard...

Страница 133: ...o se envía la cámara la batería está sin carga Cárguela antes del uso 2 Inserte la batería y la tarjeta 3 Encienda la cámara para sacar las imágenes Ajuste el reloj 1 Ajuste el disco del modo a L 2 Abra el flash Cuando usa el flash 3 Oprima el botón del obturador para sacar las imágenes 4 Reproduzca las imágenes 1 Ajuste el disco del modo a Q 2 Seleccione la imagen que quiere ver 1 2 3 1 2 ...

Страница 134: ...Others 134 VQT0S19 MEMO ...

Страница 135: ...Others 135 VQT0S19 MEMO ...

Страница 136: ...erto Rico Inc Ave 65 de Infantería Km 9 5 San Gabriel Industrial Park Carolina Puerto Rico 00985 Panasonic Canada Inc 5770 Ambler Drive Mississauga Ontario L4W 2T3 2005 Matsushita Electric Industrial Co Ltd VQT0S19 H0705ZZ0 4000 A QuickTime and the QuickTime logo are trademarks or registered trademarks of Apple Computer Inc used under license ...

Отзывы: