– 108 –
Chapter 5 Playback — Thumbnail operations
2
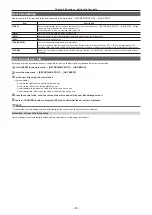
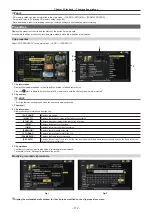
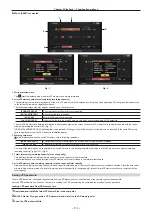
Move the cursor over the text memo to be copied and press the control stick.
You can select multiple text memos.
3
Select [COPY] in the main menu
→
[CLIP].
4
Select the copy target slot using the control stick and select [YES].
f
Copying starts.
f
The portion between the selected text memo and the next one is copied. If no text memo is found after the selected one, then the part after the
selected text memo to the end of the clip is copied.
f
If multiple text memos are selected, the selected sections are copied.
f
While the clip is being copied, the progress of the copy process and cancelation will be displayed. To discontinue the copy process, press the
control stick. When the [YES]/[NO] confirmation screen is displayed, use the control stick to select [YES].
@
@
NOTE
t
In clip division and copying using the text memo, the area copied may be automatically modified and copied depending on the recording method of the
clip.
Deleting clips
1
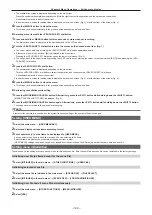
Use the control stick to move the cursor over the clip to be deleted, and press the control stick to select the clip.
2
Select [DELETE] in the main menu
→
[CLIP] and press the control stick.
3
Select [YES] using the control stick.
The clip is deleted. All selected clips (in blue-green frames) are deleted by this operation.
@
@
NOTE
t
To interrupt the deletion process, press the <SHIFT> button
+
<EXIT> button or press the control stick to cancel the operation. Once a clip is deleted
halfway, it cannot be restored even if the deletion process is aborted.
Restoring clips
Restores the clip with a fault which was caused by the power suddenly turning off during recording, ejecting the microP2 memory card while it was being
accessed, etc.
1
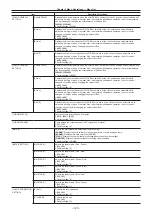
Use the control stick to move the cursor over the clip to be restored (defective clips are indicated by defective clip marks) and
press the control stick to select the clip.
2
Select [REPAIR] in the main menu
→
[CLIP] and press the control stick.
3
Select [YES] using the control stick.
This restores the clip.
@
@
NOTE
t
To find defective clips, set the main menu
→
[CLIP]
→
[REPOSITION] to [NG CLIPS]. Only defective clips are displayed. For details, refer to “Setting
thumbnails to be displayed” (page 105).
t
You can restore clips with yellow defective clip indicators. Delete clips with red defective clip indicators. Format the microP2 memory cards if the clips
cannot be deleted.
During restoration of the clips, however, the defective clip indicator may change from yellow to red, and result in the inability to restore the clips.
t
When defective clips containing proxy data are restored, proxy data will be deleted.
Reconnecting incomplete clips
The clips may become incomplete by the clips recorded across multiple microP2 memory cards (linked clip) are copied separately for each card, etc.
The reconnection function generates one clip (the original, connected clip) from incomplete clips.
1
Use the control stick to select incomplete clips to be linked.
Usually, thumbnails of incomplete clips (clips with indication) are displayed next to each other.
2
Select [RE-CONNECT] in the main menu
→
[CLIP] and press the control stick.
3
Select [YES] using the control stick.
This reconnects incomplete clips.
@
@
NOTE
t
Incomplete clip indicators will remain displayed when only some clips are reconnected, unless all the constituent clips of the original clip are
reconnected.
Copying clips
The clips can be selected and copied to the microP2 memory card in arbitrary card slot.
1
Use the control stick to move the cursor over the clip to be copied, and press the control stick to select the clip.
2
Move the cursor to the copy target from the [COPY] list in the main menu
→
[CLIP] and press the control stick.
Содержание AJ-PX230 Series
Страница 12: ...Before using the camera read this chapter Chapter 1 Overview ...
Страница 141: ...This chapter describes the screen displayed on the viewfinder or LCD monitor Chapter 7 Display ...
Страница 153: ...Maintenance of the camera or frequently asked questions are described Chapter 9 Maintenance ...
Страница 161: ...This chapter describes the specifications of this product Chapter 10 Specification ...
Страница 169: ...Web Site http www panasonic com Panasonic Corporation 2016 ...

