– 106 –
Chapter 5 Playback — Thumbnail operations
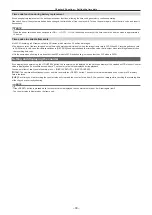
3
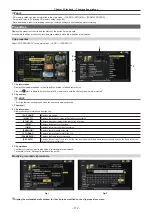
Press the control stick to enter the item menu. (Fig. 2)
The selected item has a check mark on it.
4
Press the control stick.
Pressing the control stick will check unchecked items, and uncheck the checked items.
@
@
NOTE
t
Property items can be displayed by selecting [SMALL] in the main menu
→
[CLIP]
→
[THUMBNAIL SETUP]
→
[THUMBNAIL SIZE].
t
A maximum of six items can be displayed at the same time.
t
When six items are already selected, all unchecked items cannot be selected. You can change your item selection by unchecking selected items.
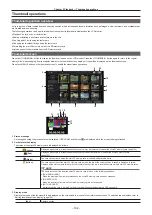
Changing thumbnails
Replace thumbnails with images that include previously attached text memos while images are recorded or played back.
Fig. 1
Fig. 2
1
Add text memos to images to be changed.
For details on adding text memos, refer to “Text memo recording function” (page 75).
2
Select [TEXT MEMO CLIPS] in the main menu
→
[CLIP]
→
[REPOSITION] and display the thumbnails of clips with text memos.
3
Move the cursor over the clip that you want to change the thumbnail and press the control stick, and then move the cursor to the
text memo display on the lower row.
4
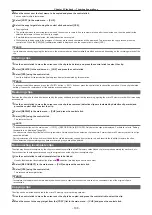
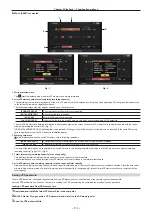
Select thumbnail to be replaced from the text memos, place the cursor on it, and select [EXCH. THUMBNAIL] in the main menu
→
[CLIP]. (Fig. 1)
5
Press the control stick, and on the confirmation screen displayed, select [YES] using the control stick. (Fig. 2)
The menu closes and the thumbnail for the clip is replaced.
@
@
NOTE
t
You can view the thumbnail position (number of frames from the top of the clip) from the [THUMBNAIL] item of the clip information display. Since
thumbnails usually come from the top of the clip, 0 is displayed.
t
Even if you change the thumbnail, playback from the thumbnail screen will still start from the beginning of the clip.
t
The thumbnail image with the [!] mark may be displayed for clips of a format with a different number of lines and frequencies when displaying a text
memo clip without displaying the thumbnail of the text memo position displayed at the bottom section.
Shot mark
Shot marks can be added to a clip thumbnail to distinguish the clip from others.
You must assign [SHOT MARK] to the USER button (USER1 to USER8) beforehand. For details, refer to “Assigning functions to the USER buttons”
(page 42).
1
Use the control stick to move the cursor over the clip to which you want to add a shot mark.
2
Press the USER button to which [SHOT MARK] is assigned.
f
A shot mark is added to the thumbnail of the clip at the cursor position.
f
To delete a shot mark, place the cursor on the clip again and press the USER button to which [SHOT MARK] is assigned.
@
@
NOTE
t
You can attach a shot mark during recording.
t
Add shot marks after recording stops to attach the shot mark to the most recently recorded clip.
For details, refer to “Shot mark recording function” (page 75).
t
To add/delete a shot mark in the clip across multiple microP2 memory cards, perform adding/deleting with all the microP2 memory cards that the clip
is recorded inserted.
Text memo
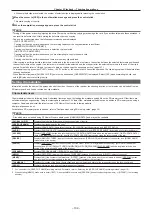
You can add text memos during recording or playback. Text memos can be used to play clips at some point or break clips into chunks and copy the
necessary portions.
Содержание AJ-PX230 Series
Страница 12: ...Before using the camera read this chapter Chapter 1 Overview ...
Страница 141: ...This chapter describes the screen displayed on the viewfinder or LCD monitor Chapter 7 Display ...
Страница 153: ...Maintenance of the camera or frequently asked questions are described Chapter 9 Maintenance ...
Страница 161: ...This chapter describes the specifications of this product Chapter 10 Specification ...
Страница 169: ...Web Site http www panasonic com Panasonic Corporation 2016 ...


